How to Build N8n Agent From Scratch
This is the tutorial on how to build an n8n agent from scratch.
In this tutorial, I will show how to build an simple n8n agent locally.
References
- self-host ollama
- allow different web origins to access ollama
- how to configure ollama server
- self-hosted AI Starter Kit | n8n Docs
- self-hosted AI video walkthrough
Steps
1. Install n8n on docker
start n8n
docker volume create n8n_data

docker run -it --rm --name n8n -p 5678:5678 -v n8n_data:/home/node/.n8n docker.n8n.io/n8nio/n8n
Once running, you can access n8n by opening: http://localhost:5678
You will first need to create an account and then you can start creating workflows.
2. Self-host ollama model
Ollama is a application to help you get up and runnin gwith large language models. It can also be used to host a language model locally.
You can download the ollama here
When finished, launch the ollama app.
You can customize ollama host by this command
# OLLAMA_HOST=ip address ollama serve
OLLAMA_HOST=127.0.0.1:11435 ollama serve
For example, 127.0.0.1:11435 will be the server address for ollama.
For different browser acess, Set OLLAMA_ORIGINS to include chrome-extension://*, moz-extension://*, and safari-web-extension://*
# Allow all Chrome, Firefox, and Safari extensions
OLLAMA_ORIGINS=chrome-extension://*,moz-extension://*,safari-web-extension://* ollama serve
Then you will see log like this, means your llm server is up and running
> OLLAMA_HOST=127.0.0.1:11435 OLLAMA_ORIGINS=chrome-extension://*,moz-extension://*,safari-web-extension://* ollama serve

2025/03/22 10:08:24 routes.go:1230: INFO server config env="map[HTTPS_PROXY: HTTP_PROXY: NO_PROXY: OLLAMA_CONTEXT_LENGTH:2048 OLLAMA_DEBUG:false OLLAMA_FLASH_ATTENTION:false OLLAMA_GPU_OVERHEAD:0 OLLAMA_HOST:http://127.0.0.1:11435 OLLAMA_KEEP_ALIVE:5m0s OLLAMA_KV_CACHE_TYPE: OLLAMA_LLM_LIBRARY: OLLAMA_LOAD_TIMEOUT:5m0s OLLAMA_MAX_LOADED_MODELS:0 OLLAMA_MAX_QUEUE:512 OLLAMA_MODELS:/Users/tengjungao/.ollama/models OLLAMA_MULTIUSER_CACHE:false OLLAMA_NEW_ENGINE:false OLLAMA_NOHISTORY:false OLLAMA_NOPRUNE:false OLLAMA_NUM_PARALLEL:0 OLLAMA_ORIGINS:[chrome-extension://* moz-extension://* safari-web-extension://* http://localhost https://localhost http://localhost:* https://localhost:* http://127.0.0.1 https://127.0.0.1 http://127.0.0.1:* https://127.0.0.1:* http://0.0.0.0 https://0.0.0.0 http://0.0.0.0:* https://0.0.0.0:* app://* file://* tauri://* vscode-webview://* vscode-file://*] OLLAMA_SCHED_SPREAD:false http_proxy: https_proxy: no_proxy:]"
time=2025-03-22T10:08:24.569-04:00 level=INFO source=images.go:432 msg="total blobs: 15"
time=2025-03-22T10:08:24.569-04:00 level=INFO source=images.go:439 msg="total unused blobs removed: 0"
time=2025-03-22T10:08:24.570-04:00 level=INFO source=routes.go:1297 msg="Listening on 127.0.0.1:11435 (version 0.6.2)"
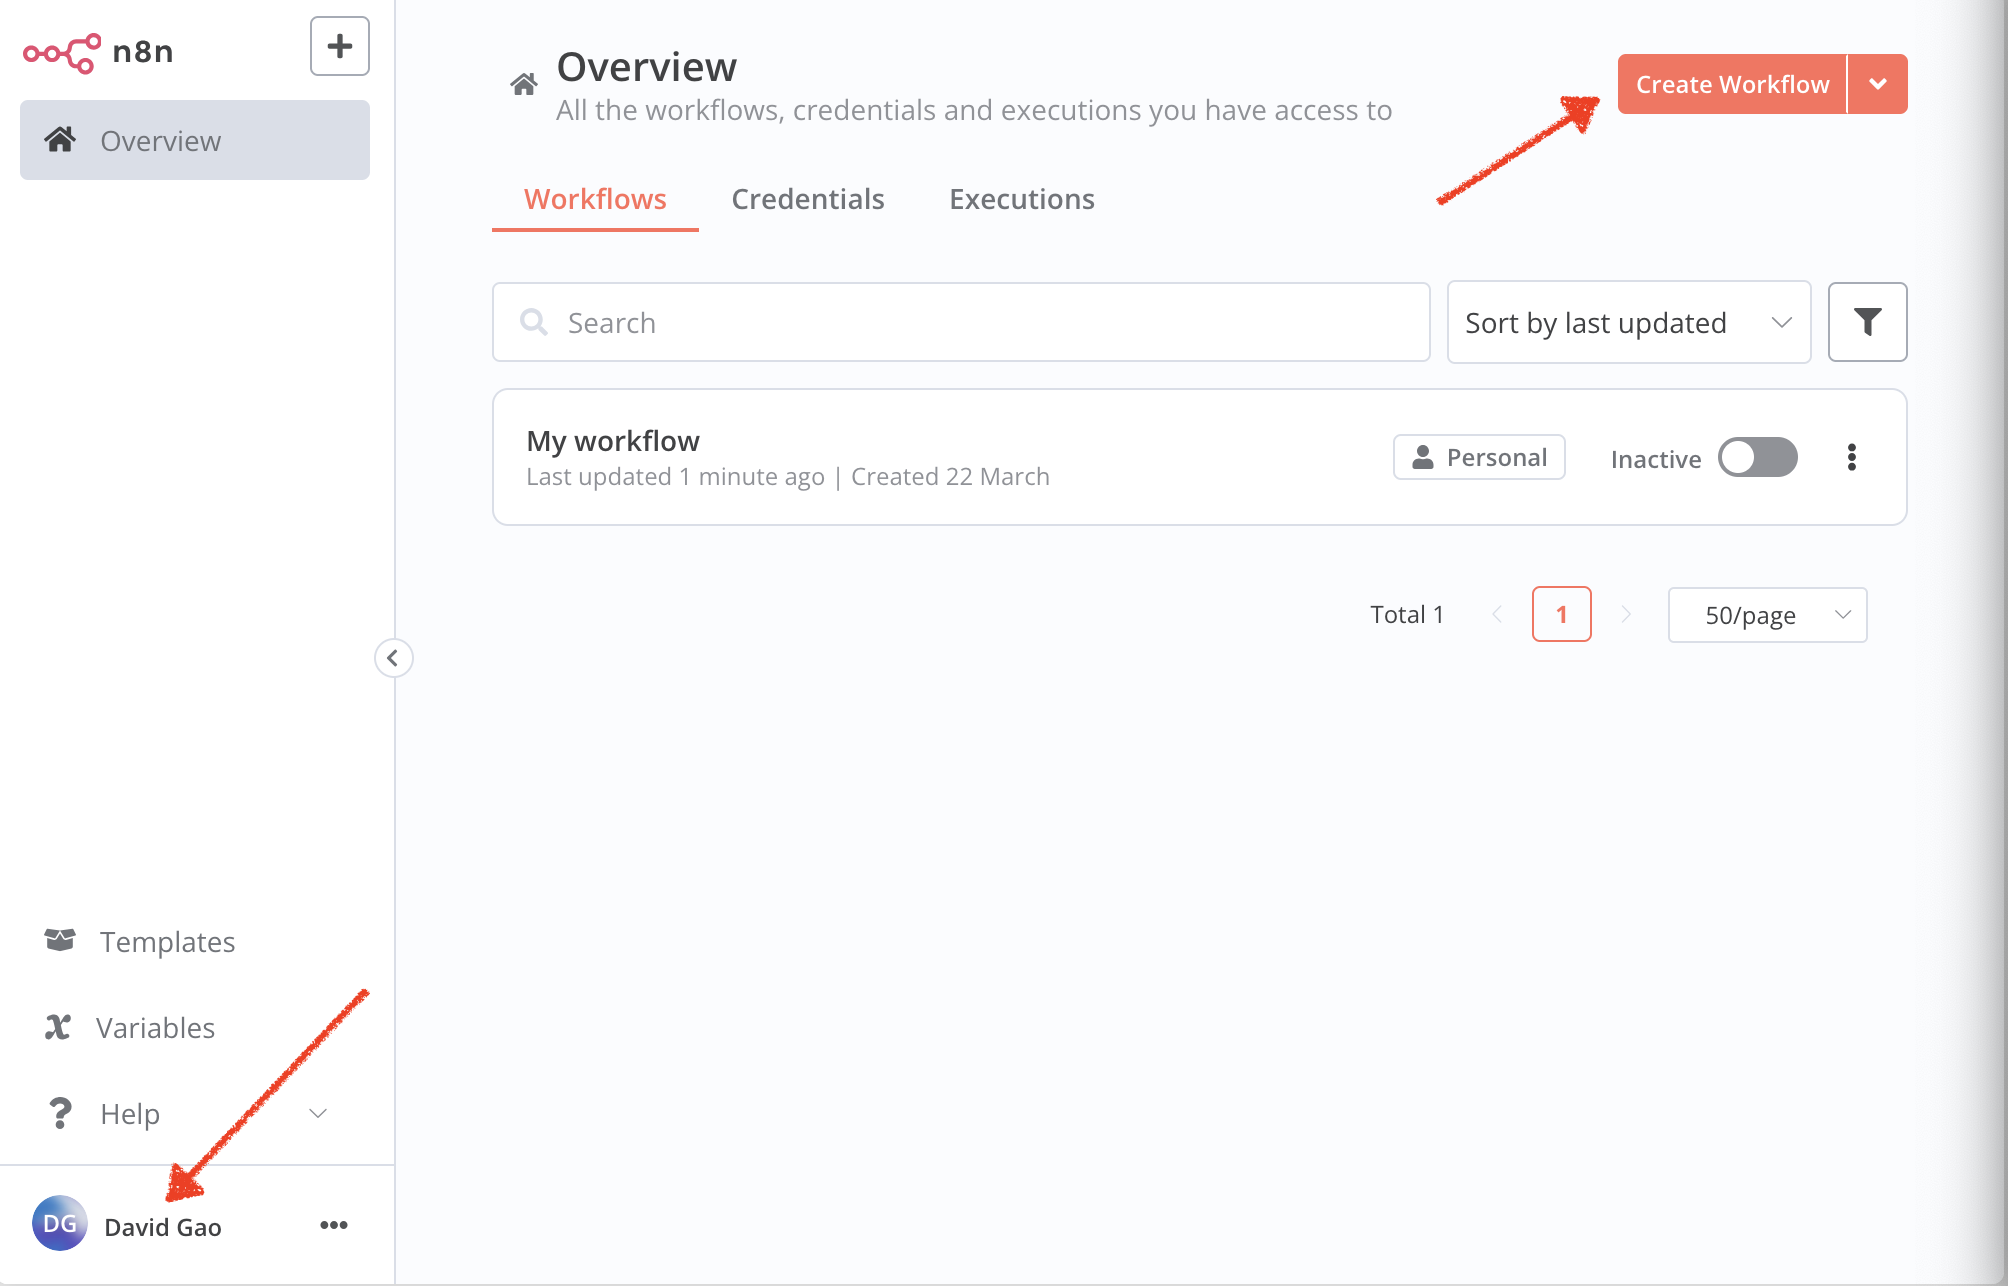
Now, go to n8n and create a new workflow. There’s a + on the top right.
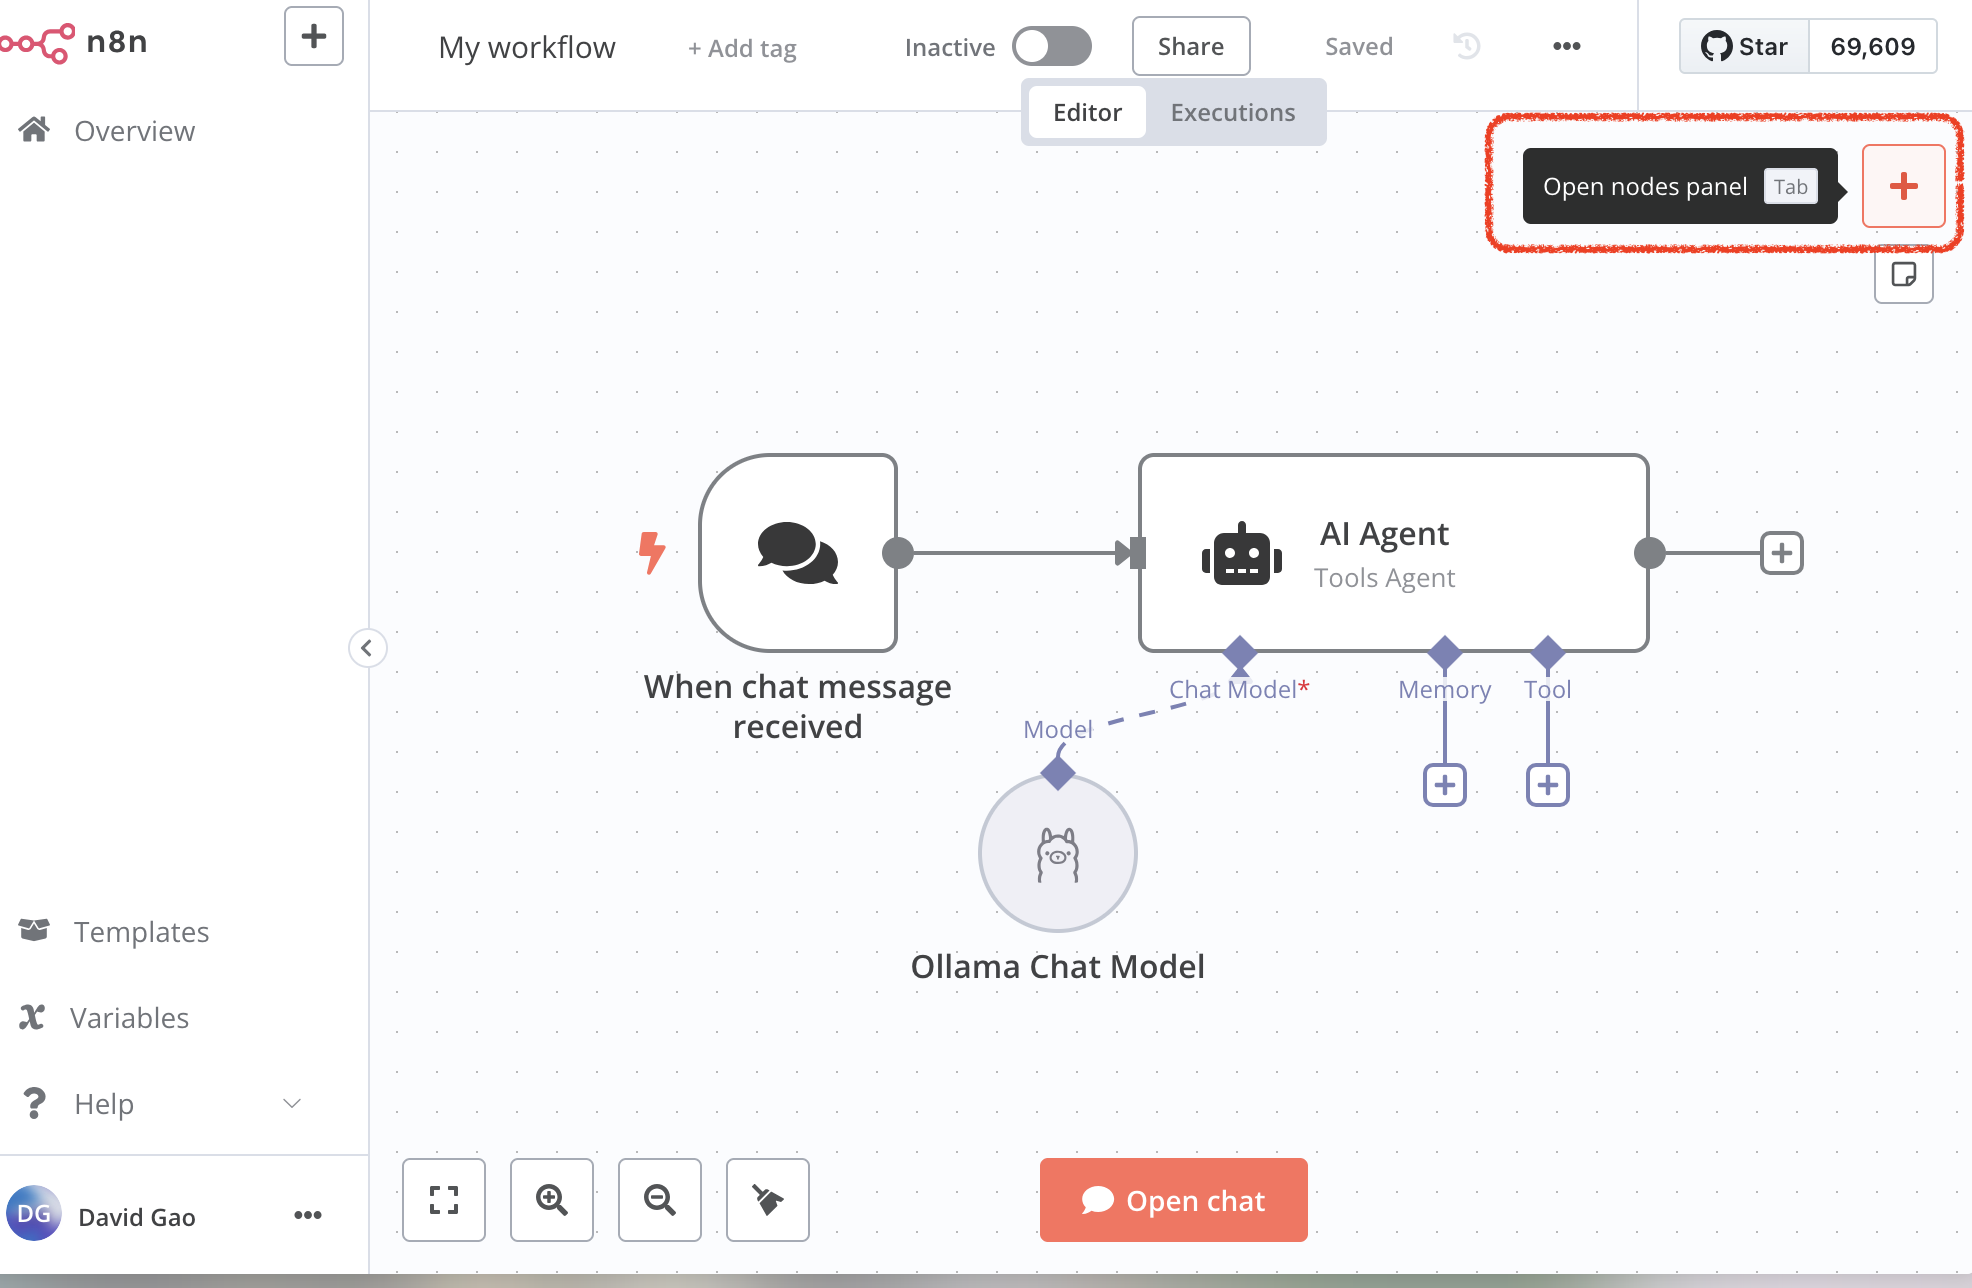
You can choose different nodes to create the pipeline.
For example, as shown I’m building a simple chatbot:
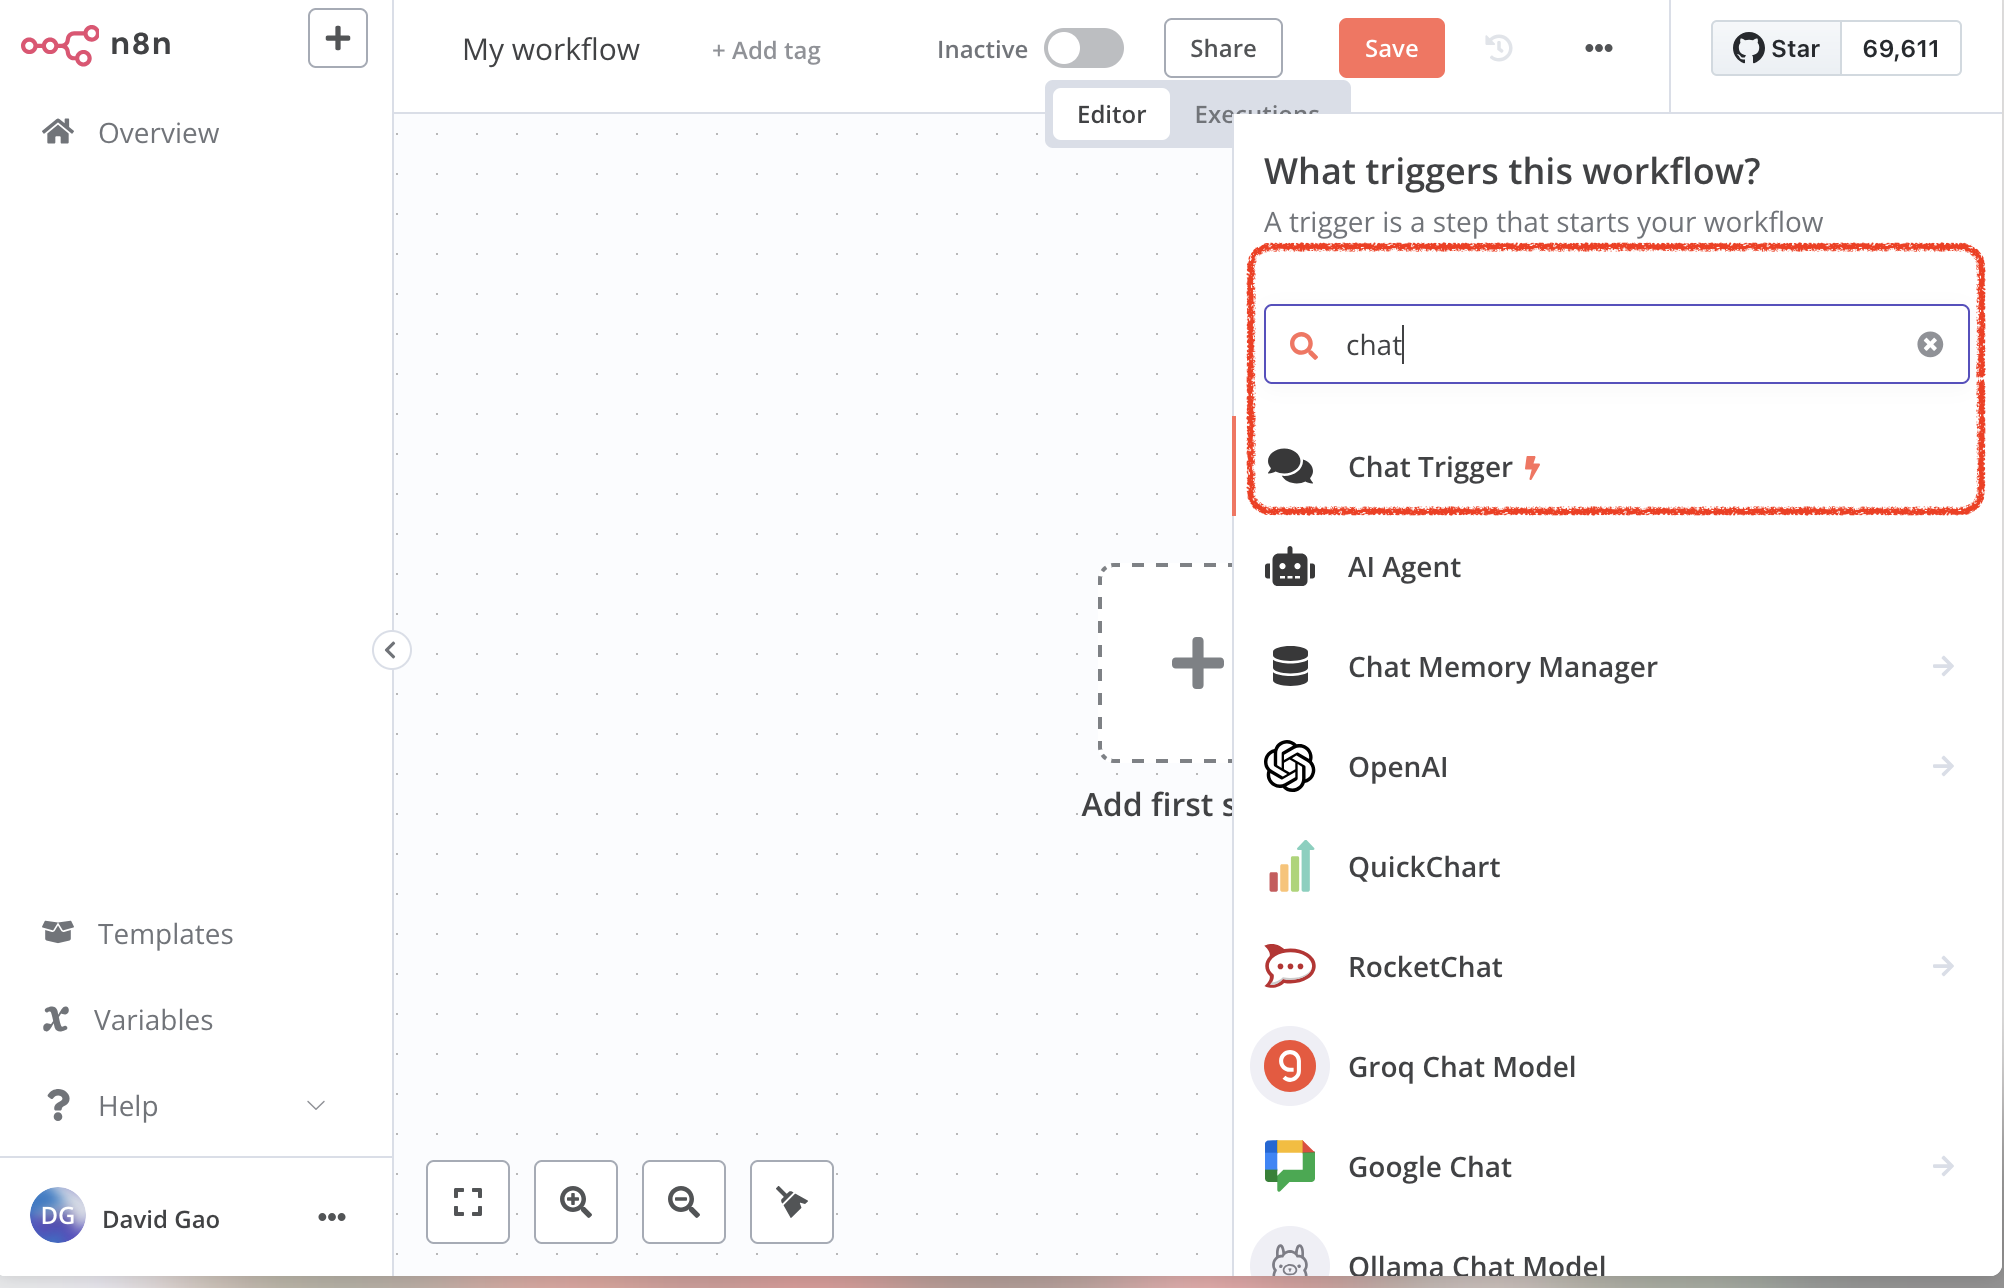
1. You first need a trigger to start the workflow.
- I should recieve a chat message from user, therefore the trigger will be chat message
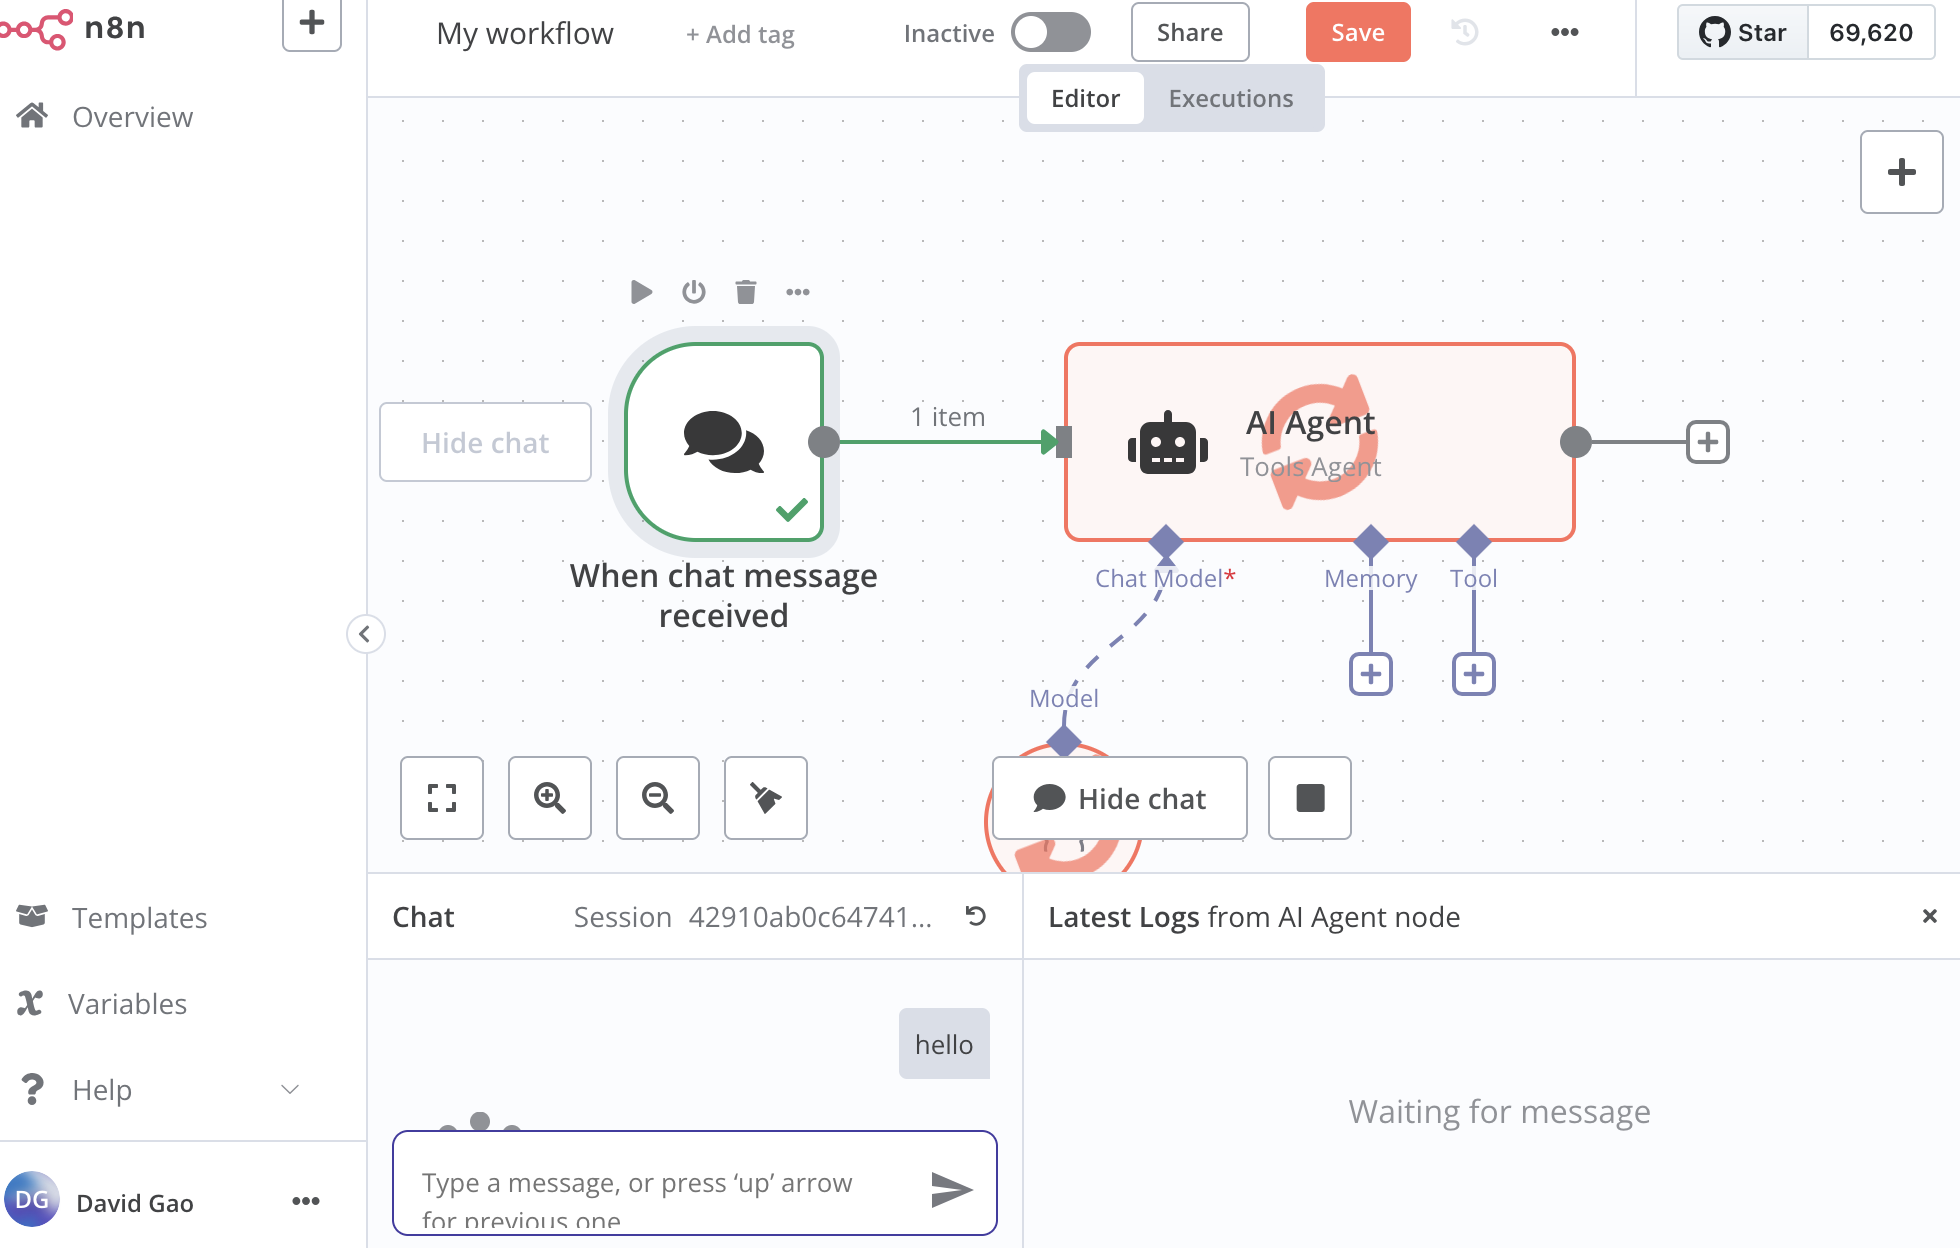
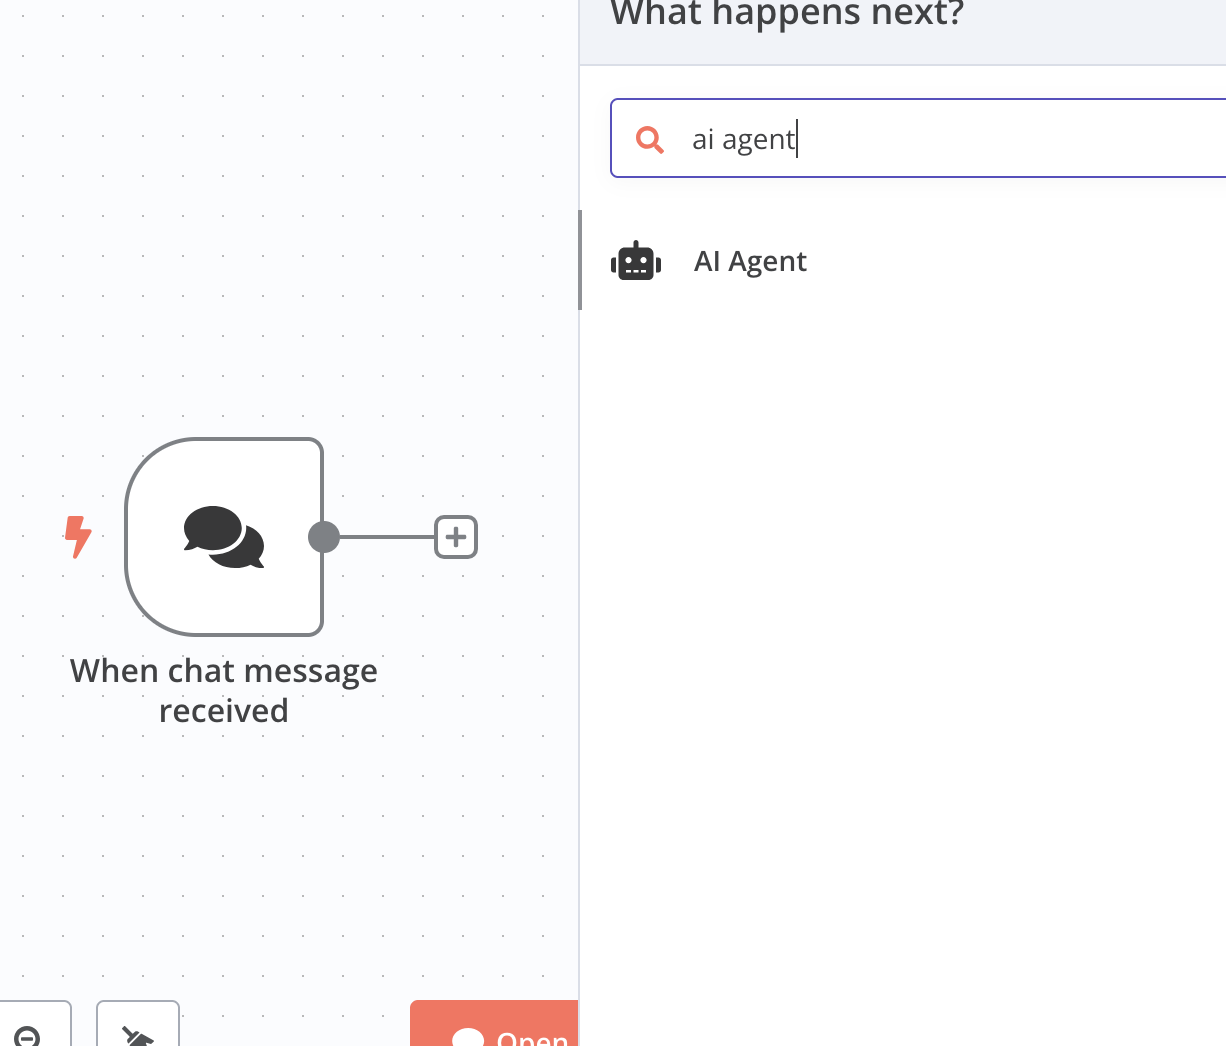
2. Add ai agent
Then you can add another component following this action, say an AI Agent.
You will be shown this pane to set up:
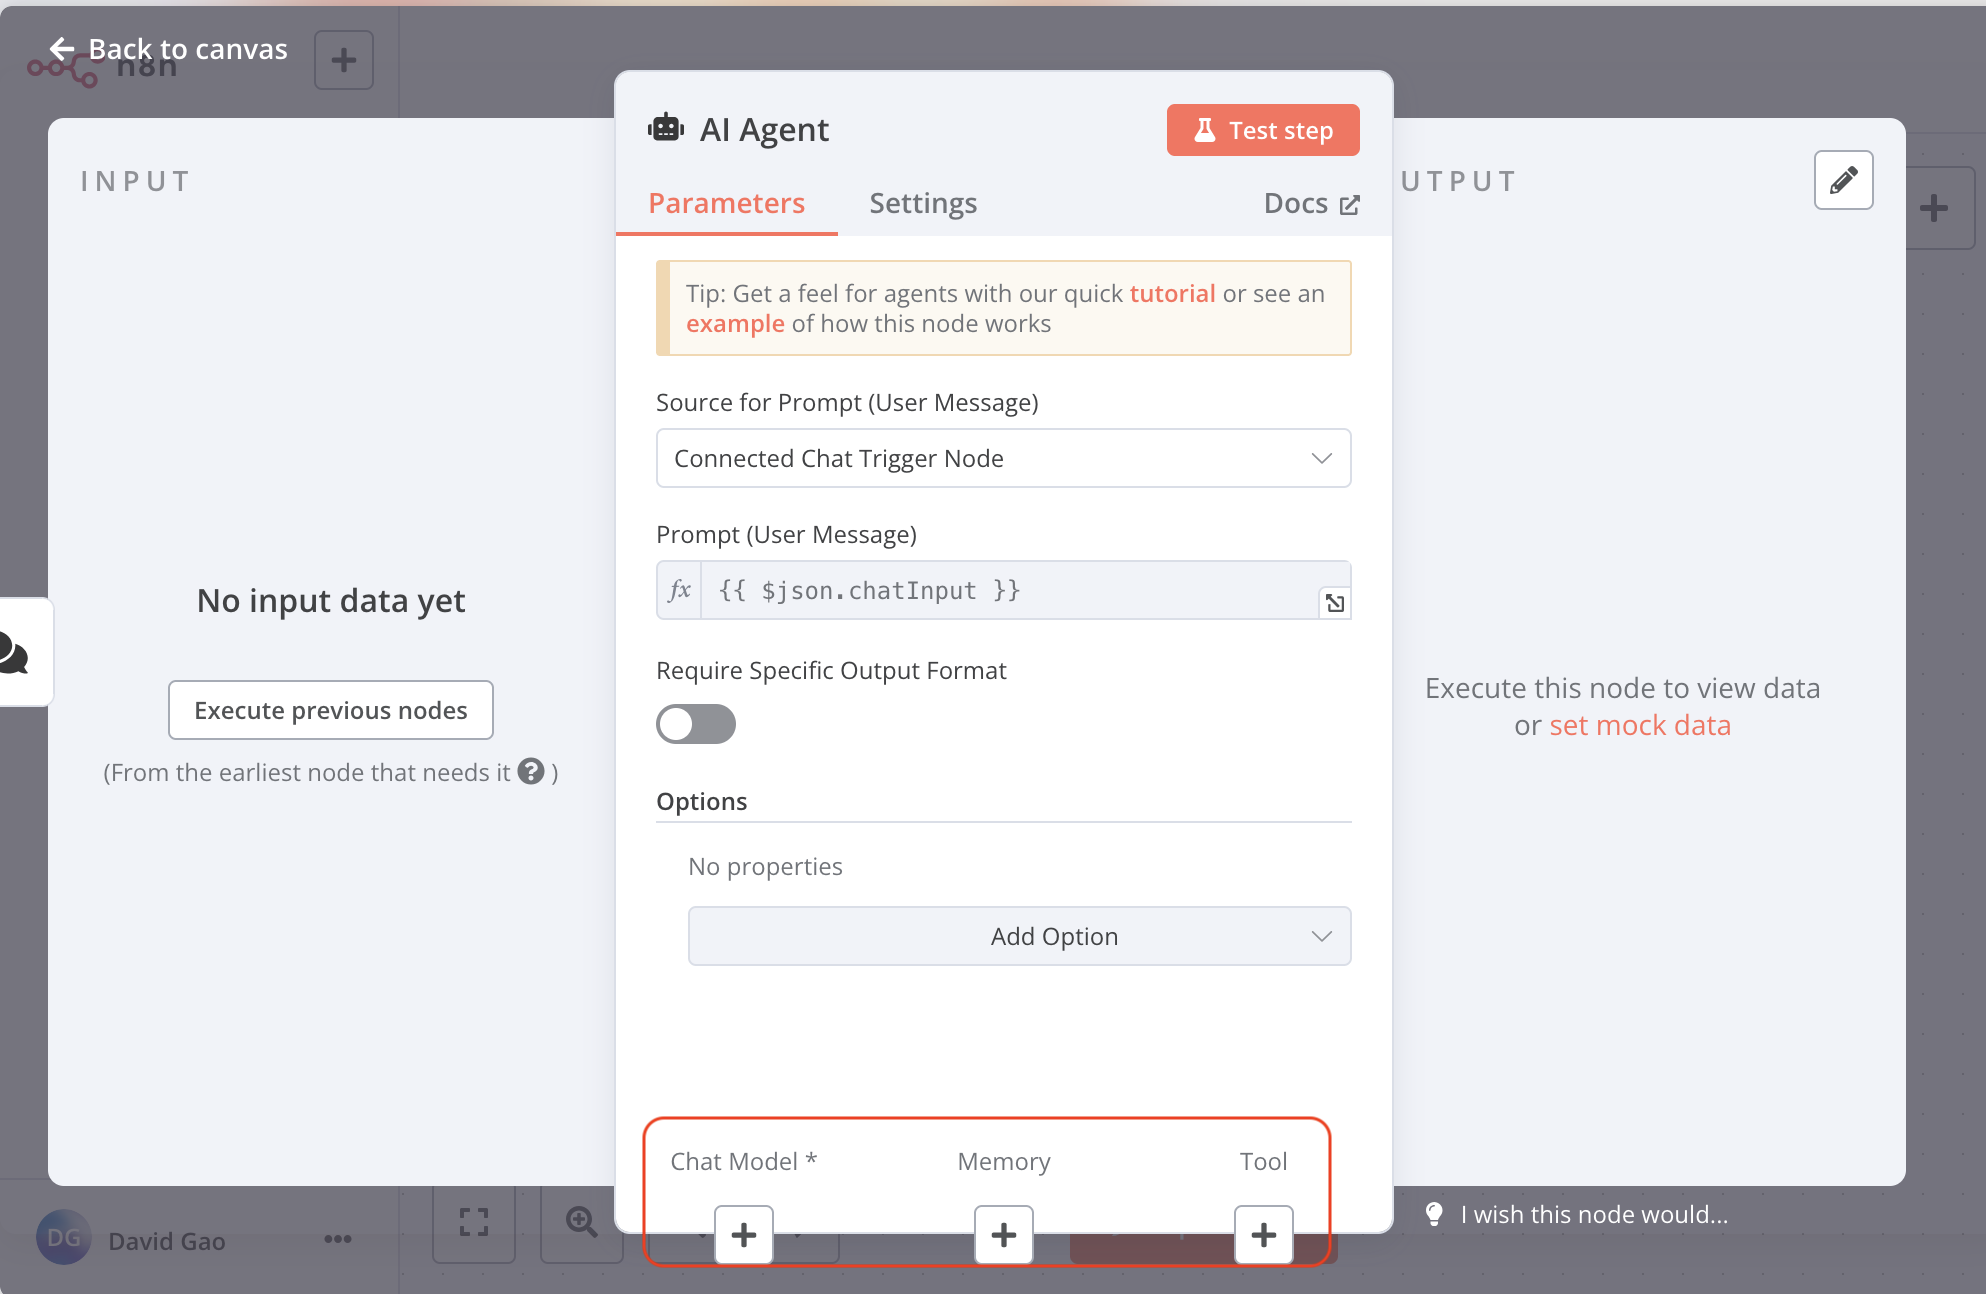
You can setup the chat model, memory and tool
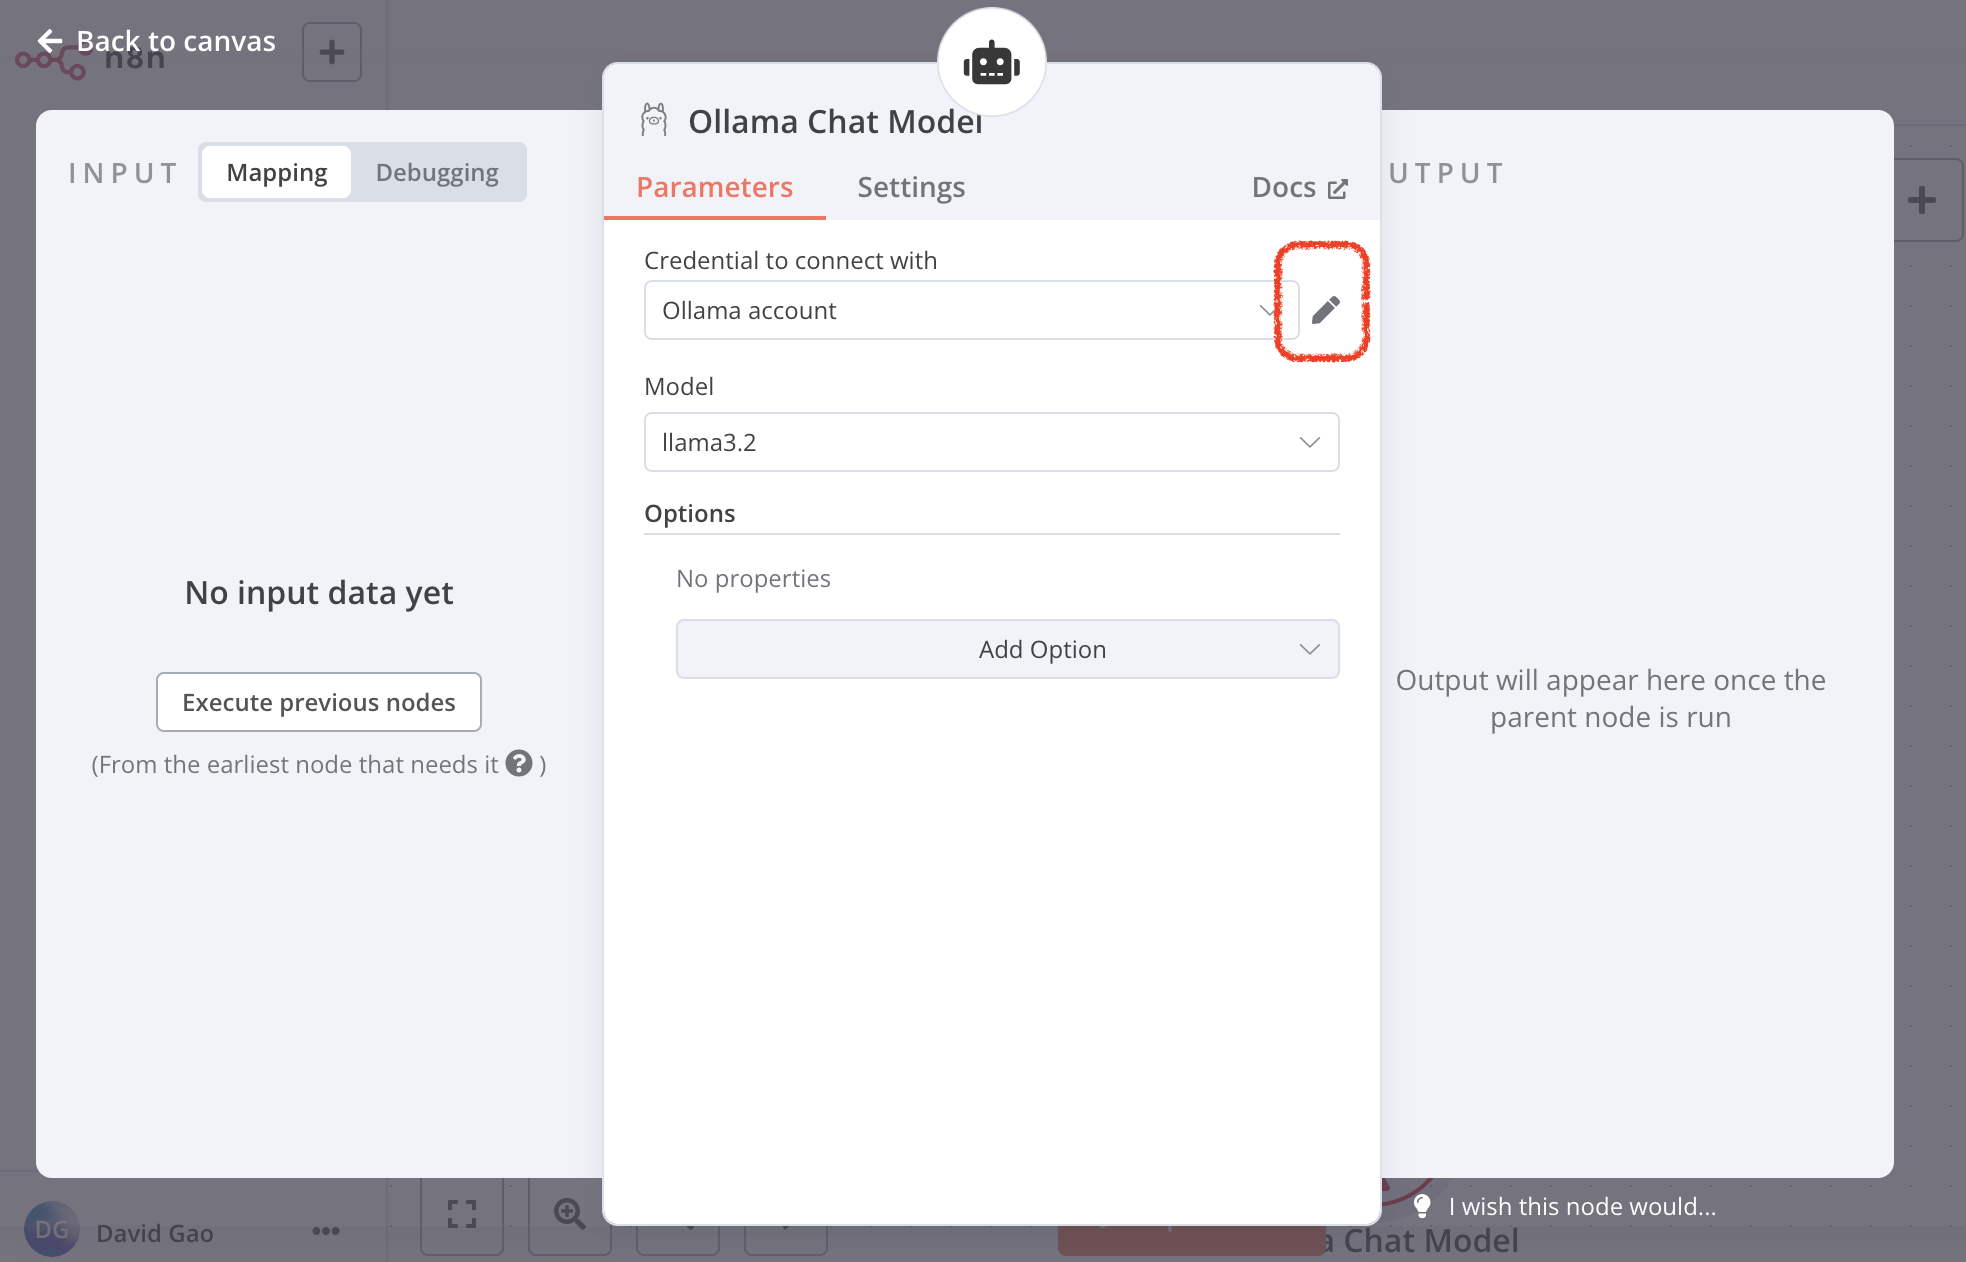
click chat model, choose the Ollama Chat Model
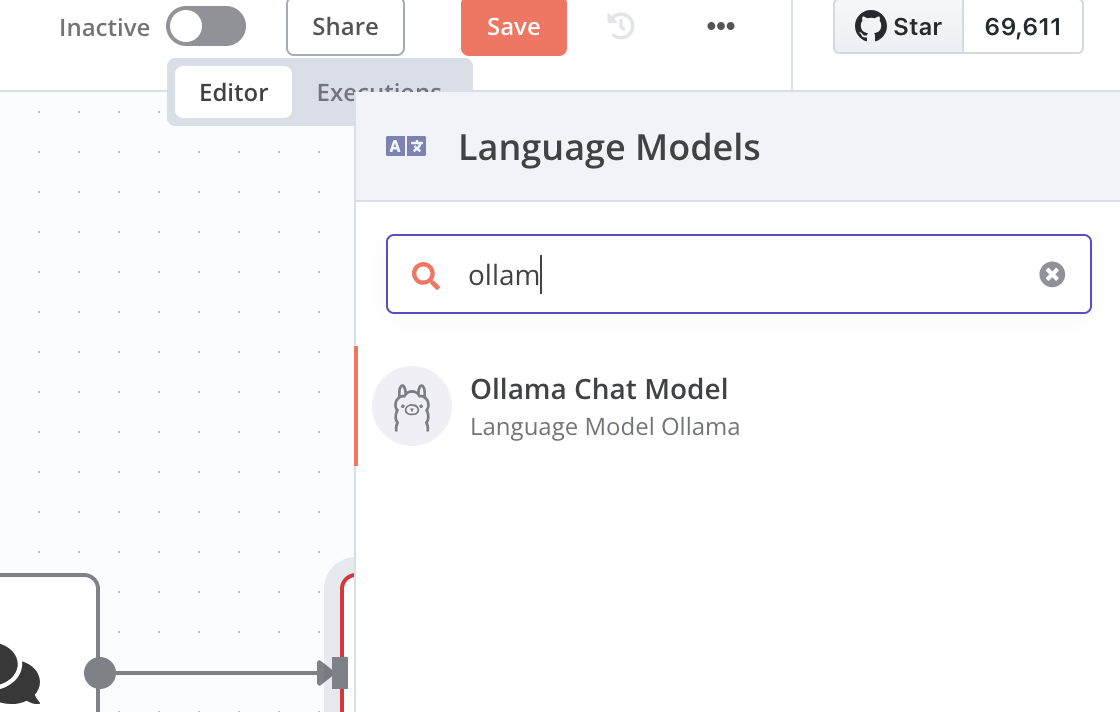
Since we are setting the local host llm through Ollama, we can connect it
Create the Ollama Credential in n8n
open the sidebar, click credential
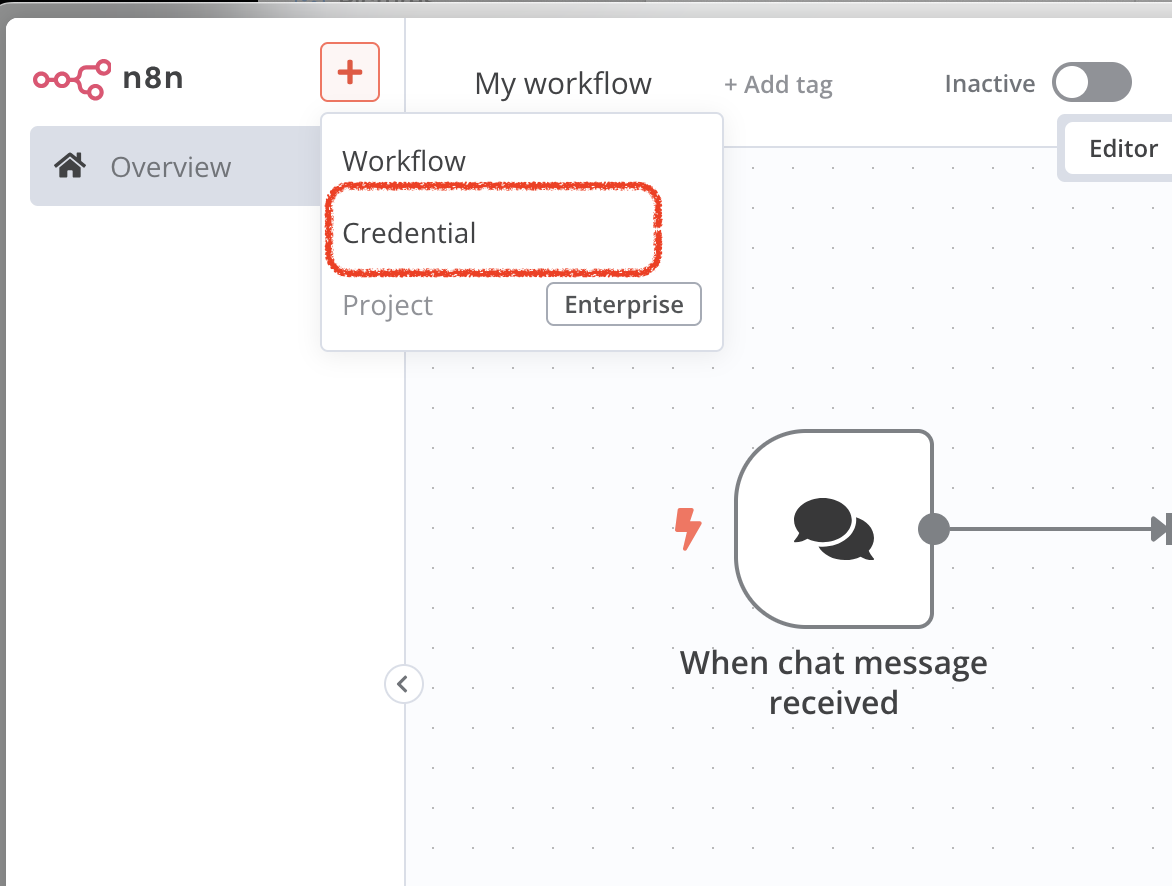
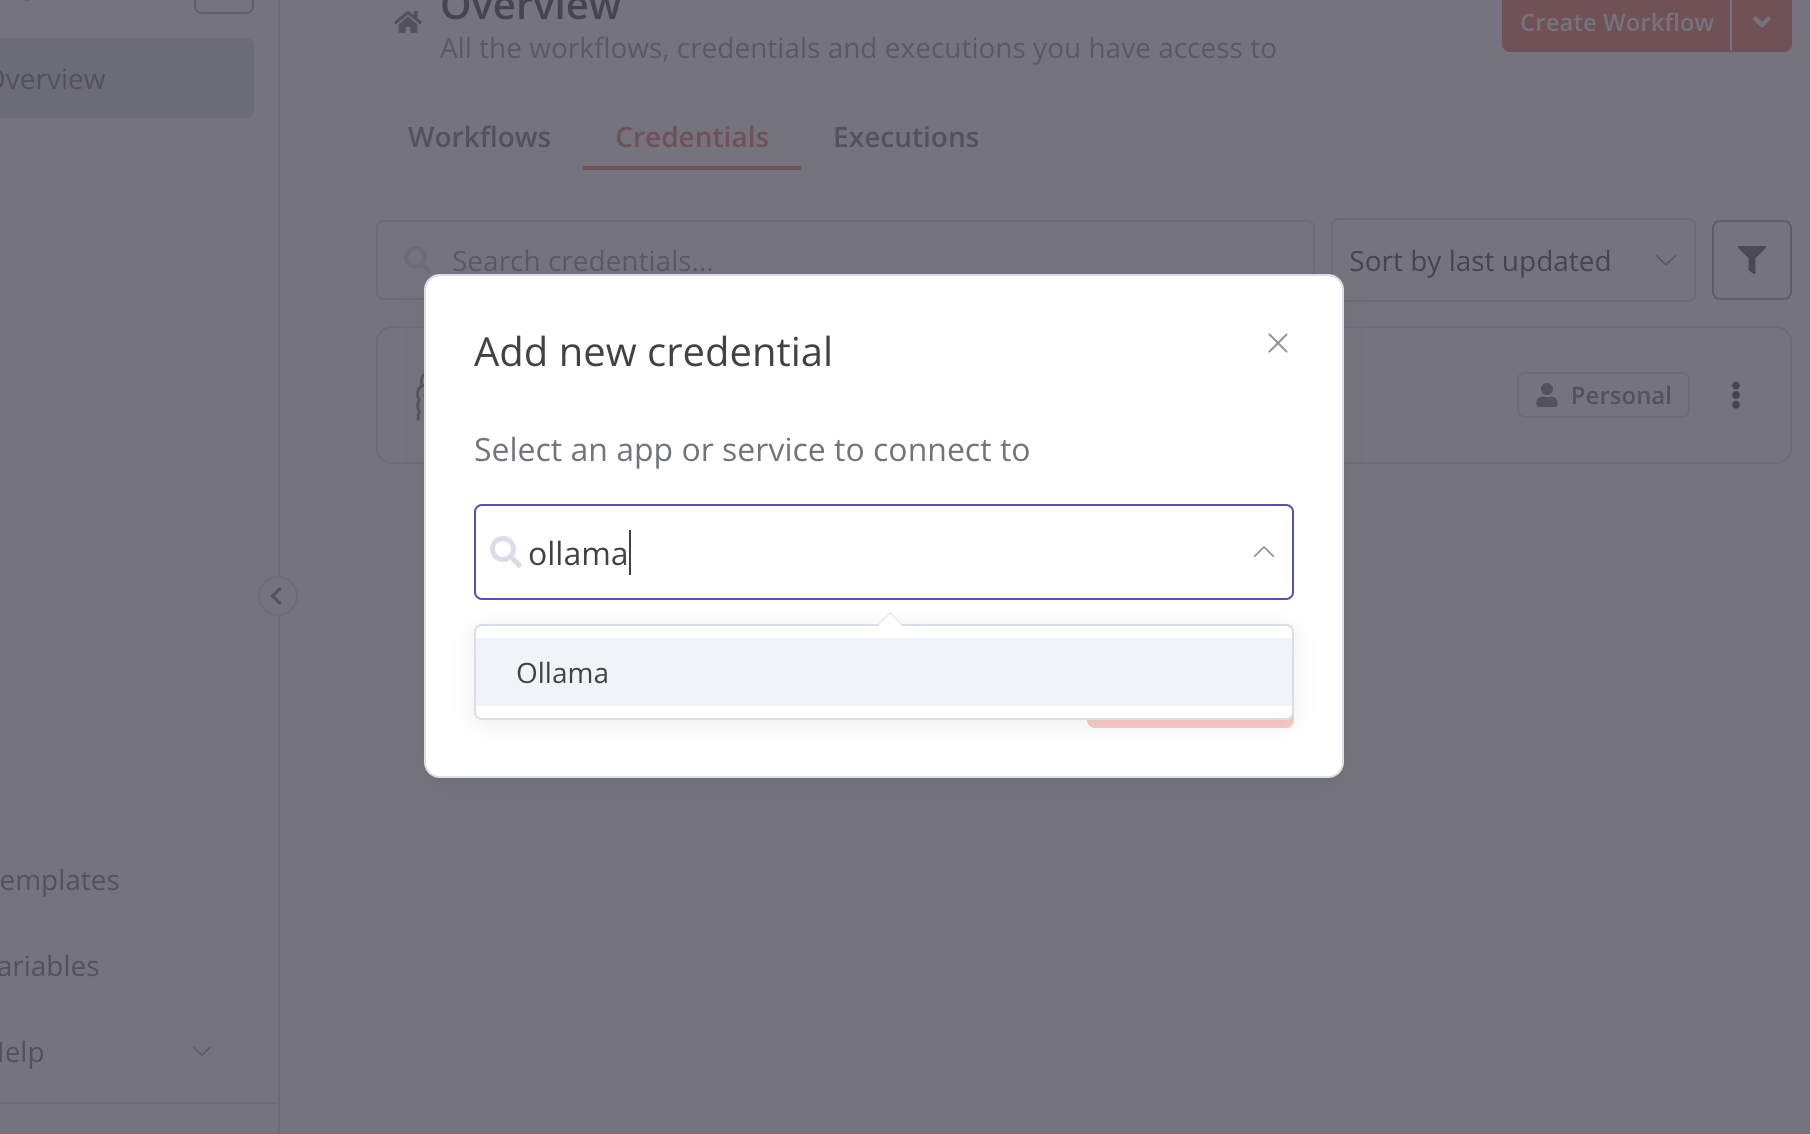
choose ollama
Recall the ollama server local:
127.0.0.1:11435
[!NOTE] However, this may not work because you’re using http:127.0.0.1:11435 from inside the n8n Docker container, which cannot access your host’s localhost
You should change the base url to http://host.docker.internal:11435
Then click Retry, it will connect host successfully.

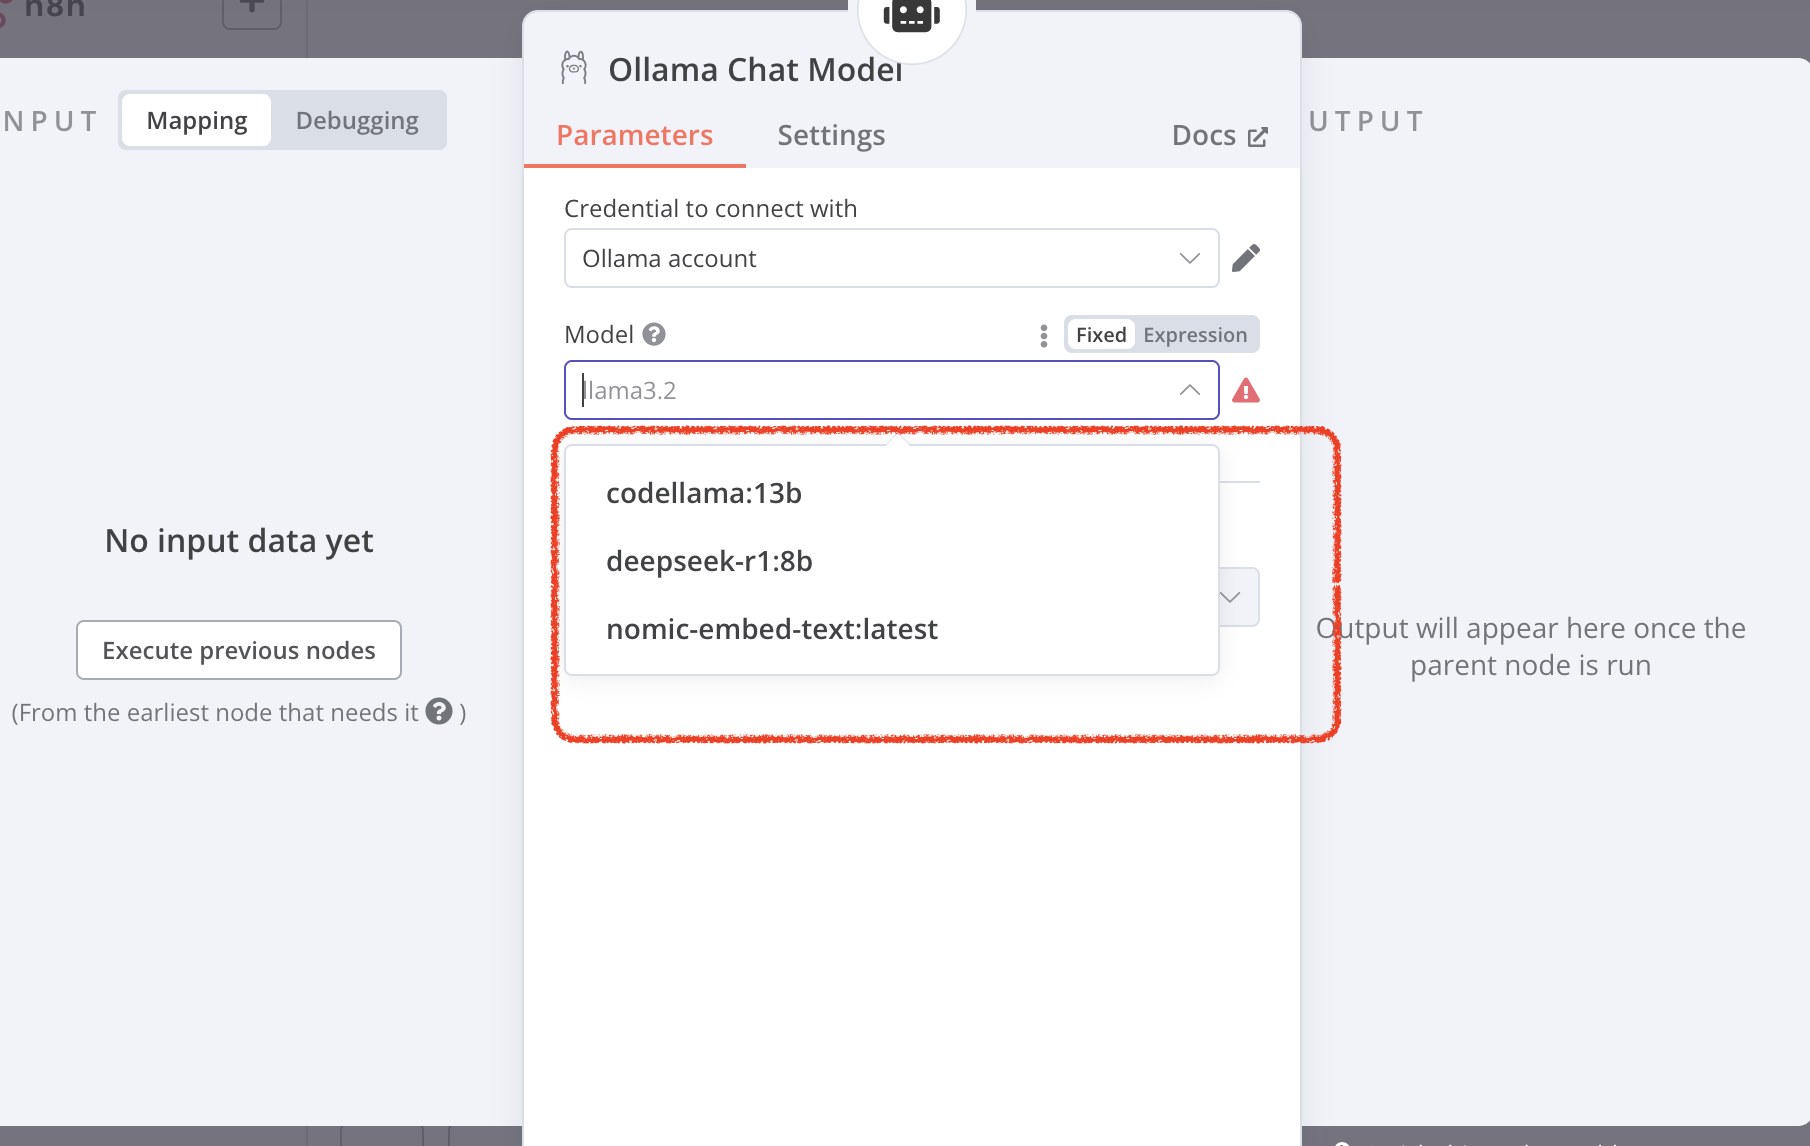
Save the Ollama account setting. Go back to workflow. Double click Ollama Chat Model node, you can choose your own local models.
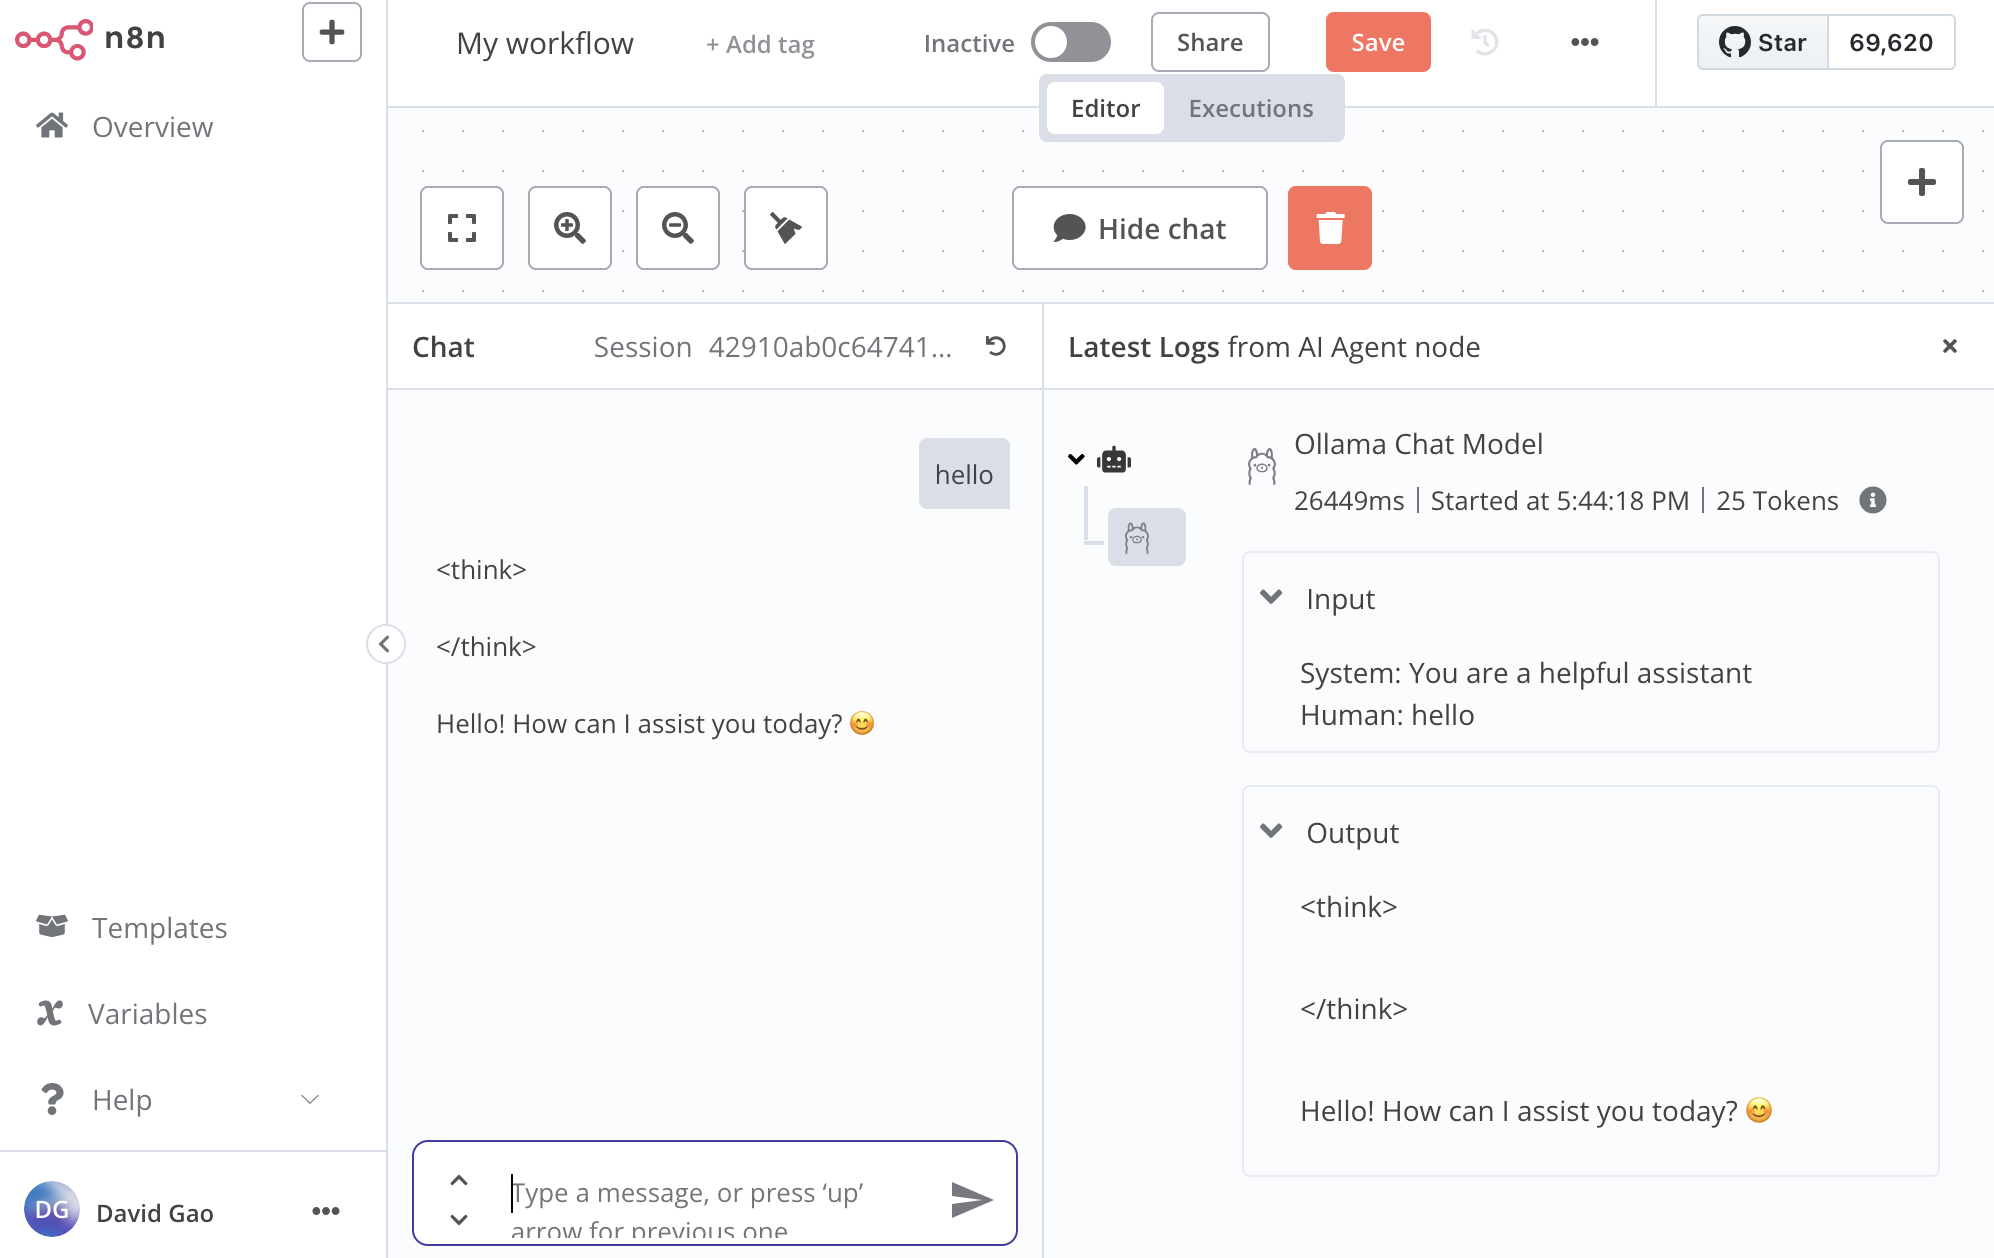
3. Chat with local LLM
- click open chat, try type something
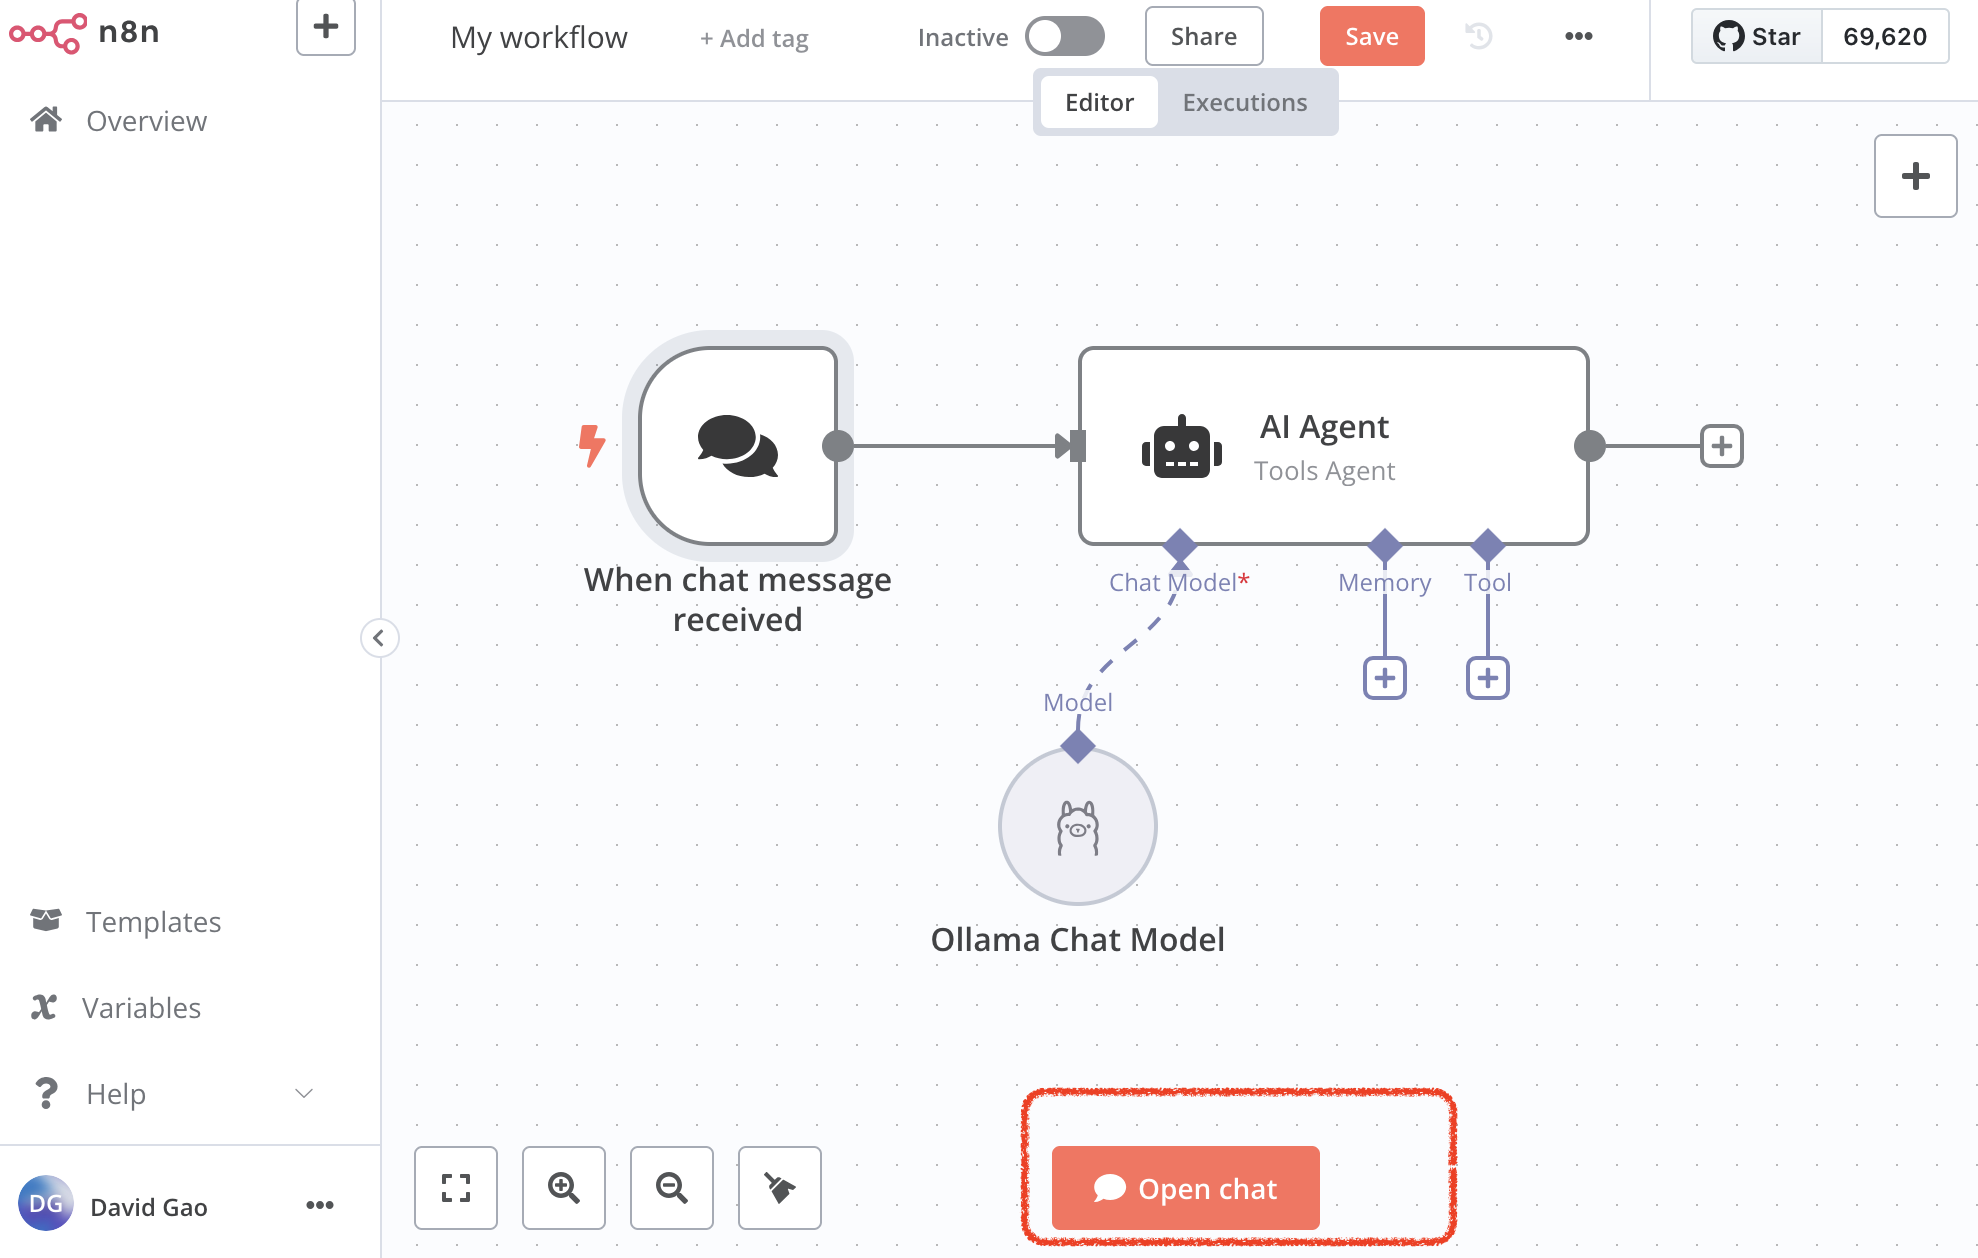
You will see your input, model output in logs(right pane) and chat window on the left!