Install Arch Linux Btw
I happend to get a ThinkPad x240 the day before yesterday, so I want to try it.
- Arch install documentations can be found here
- Quick preview guide
Prepareation
- download ISO file in USB flash drive
- you can find mirror site to download faster
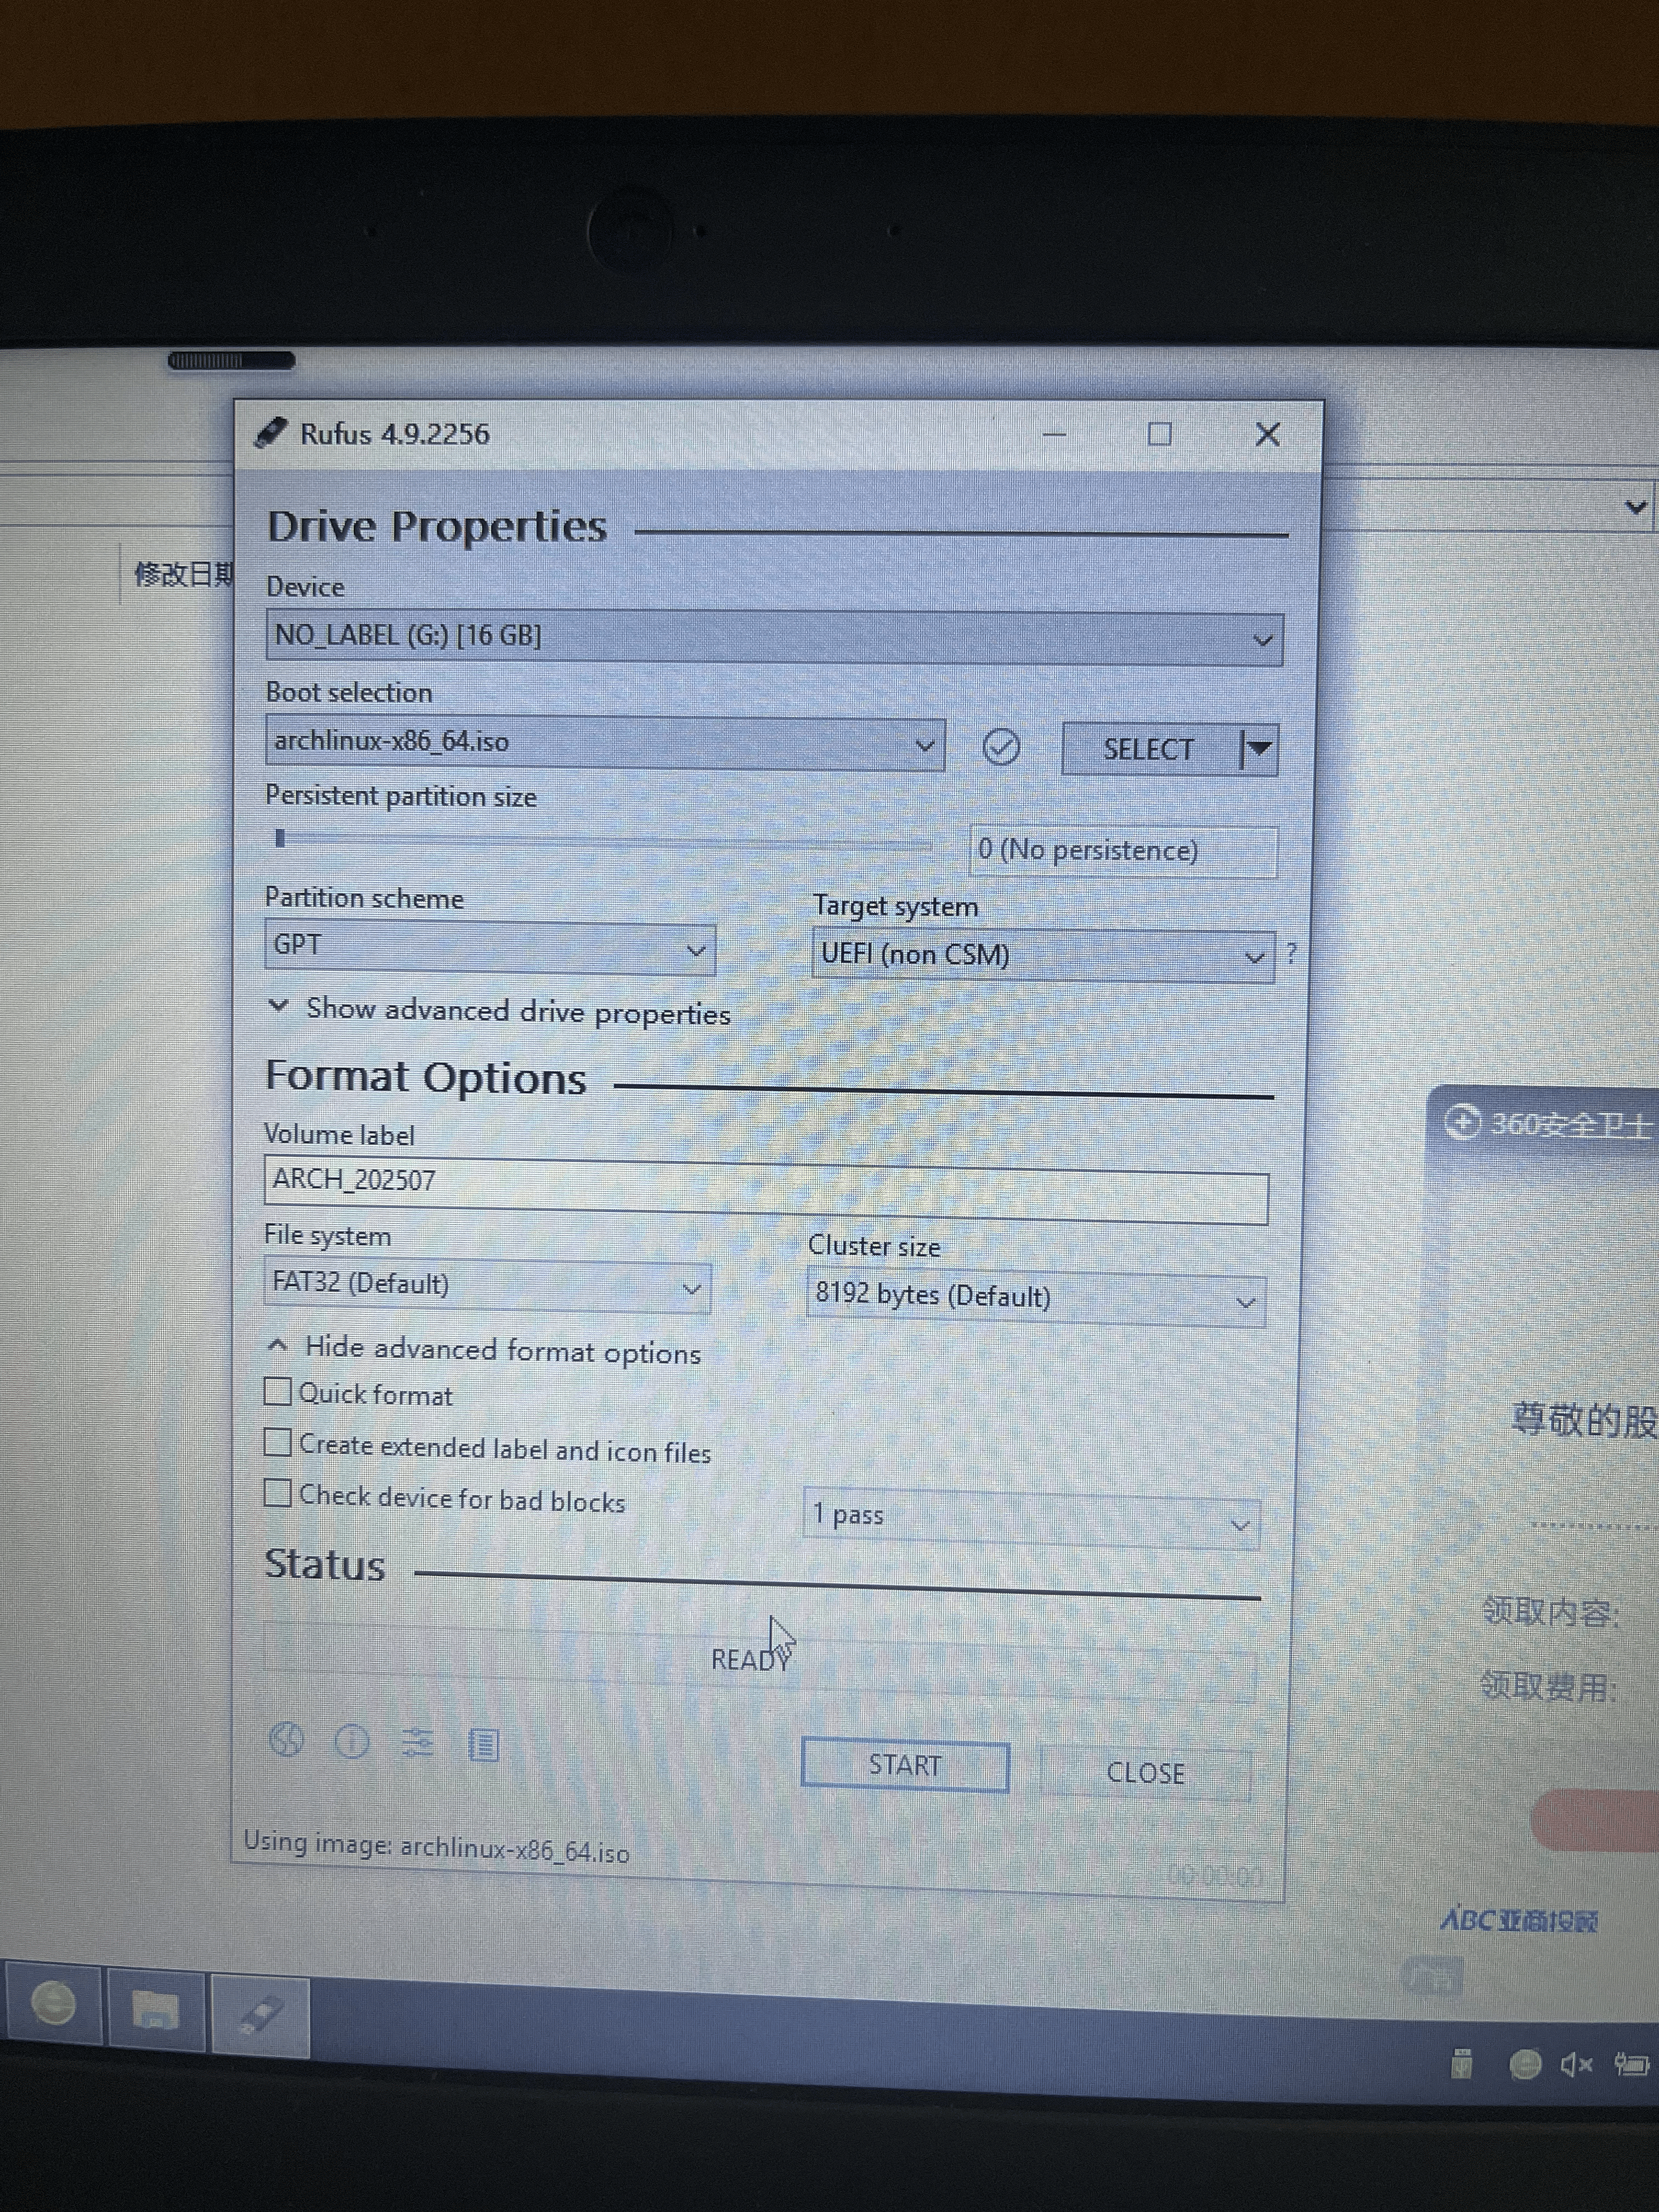
- make the usb dirve bootable
-
download rufus
-
Lenovo ThinkPad x240 uses a GUID Partition Table (GPT) scheme, especially when installed with Windows 8 or later(windows 11 in my case).
- boot option
- I don’t want windows anymore, so for partition I will leave it for this iso.
[!NOTE] when do partition, you need to move iso file to another disk.
- Find the BIOS settings
- how to enter BIOS for Lenovo: (F2)
- if pc boot too quickly, you can also go to BIOS through
settings -> update and recovery -> recovery -> advanced startup
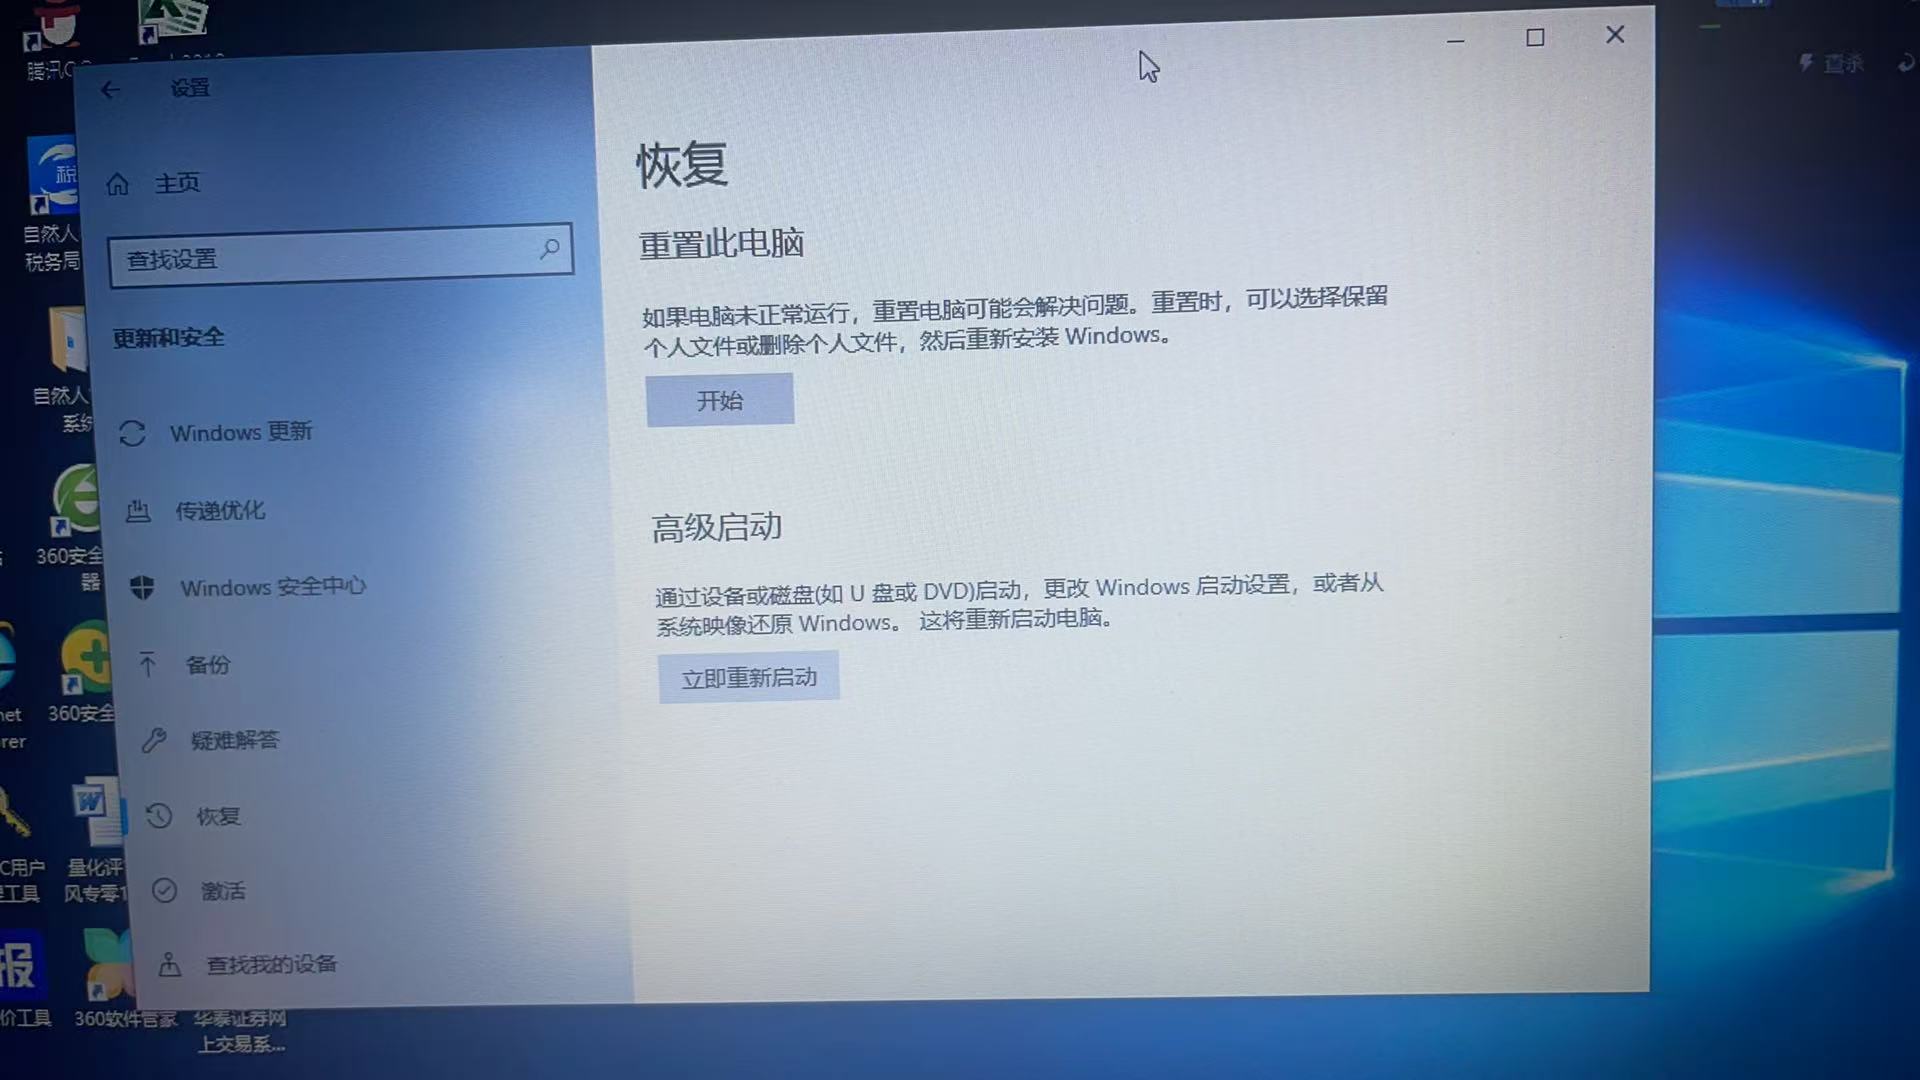
-
disable secure boot (not need, but at least I konw hot to spin up this menu now … )
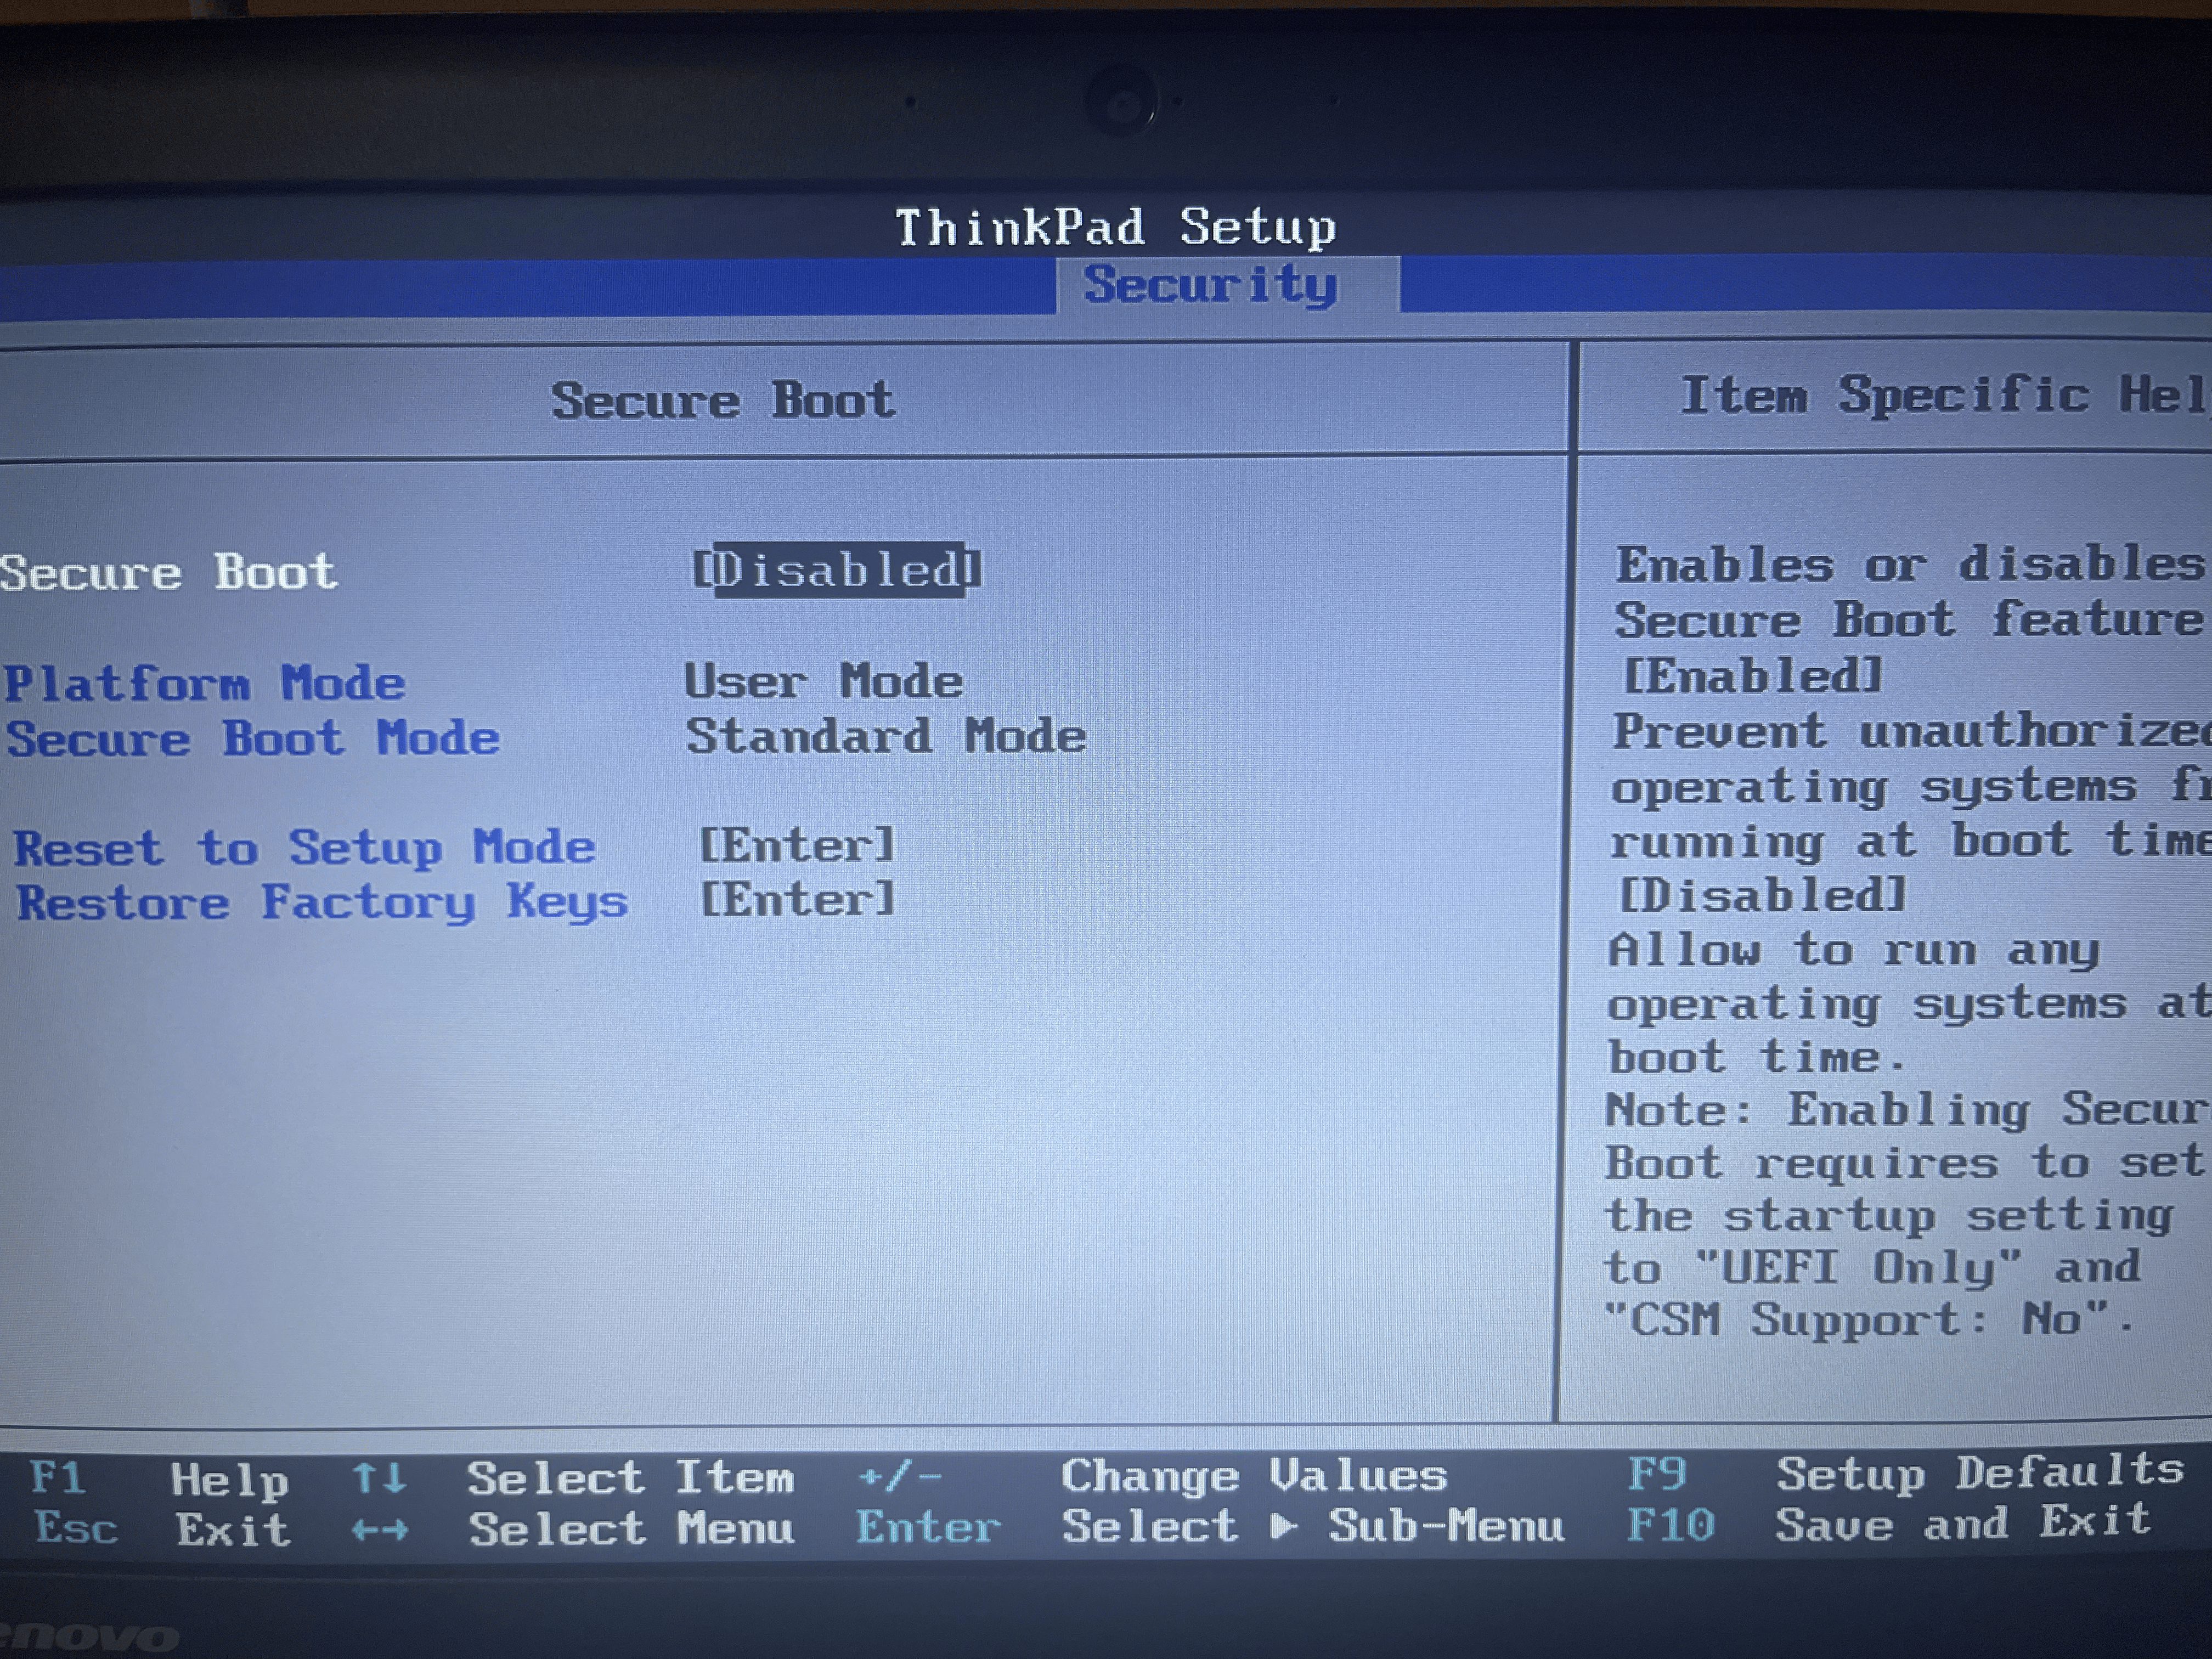
-
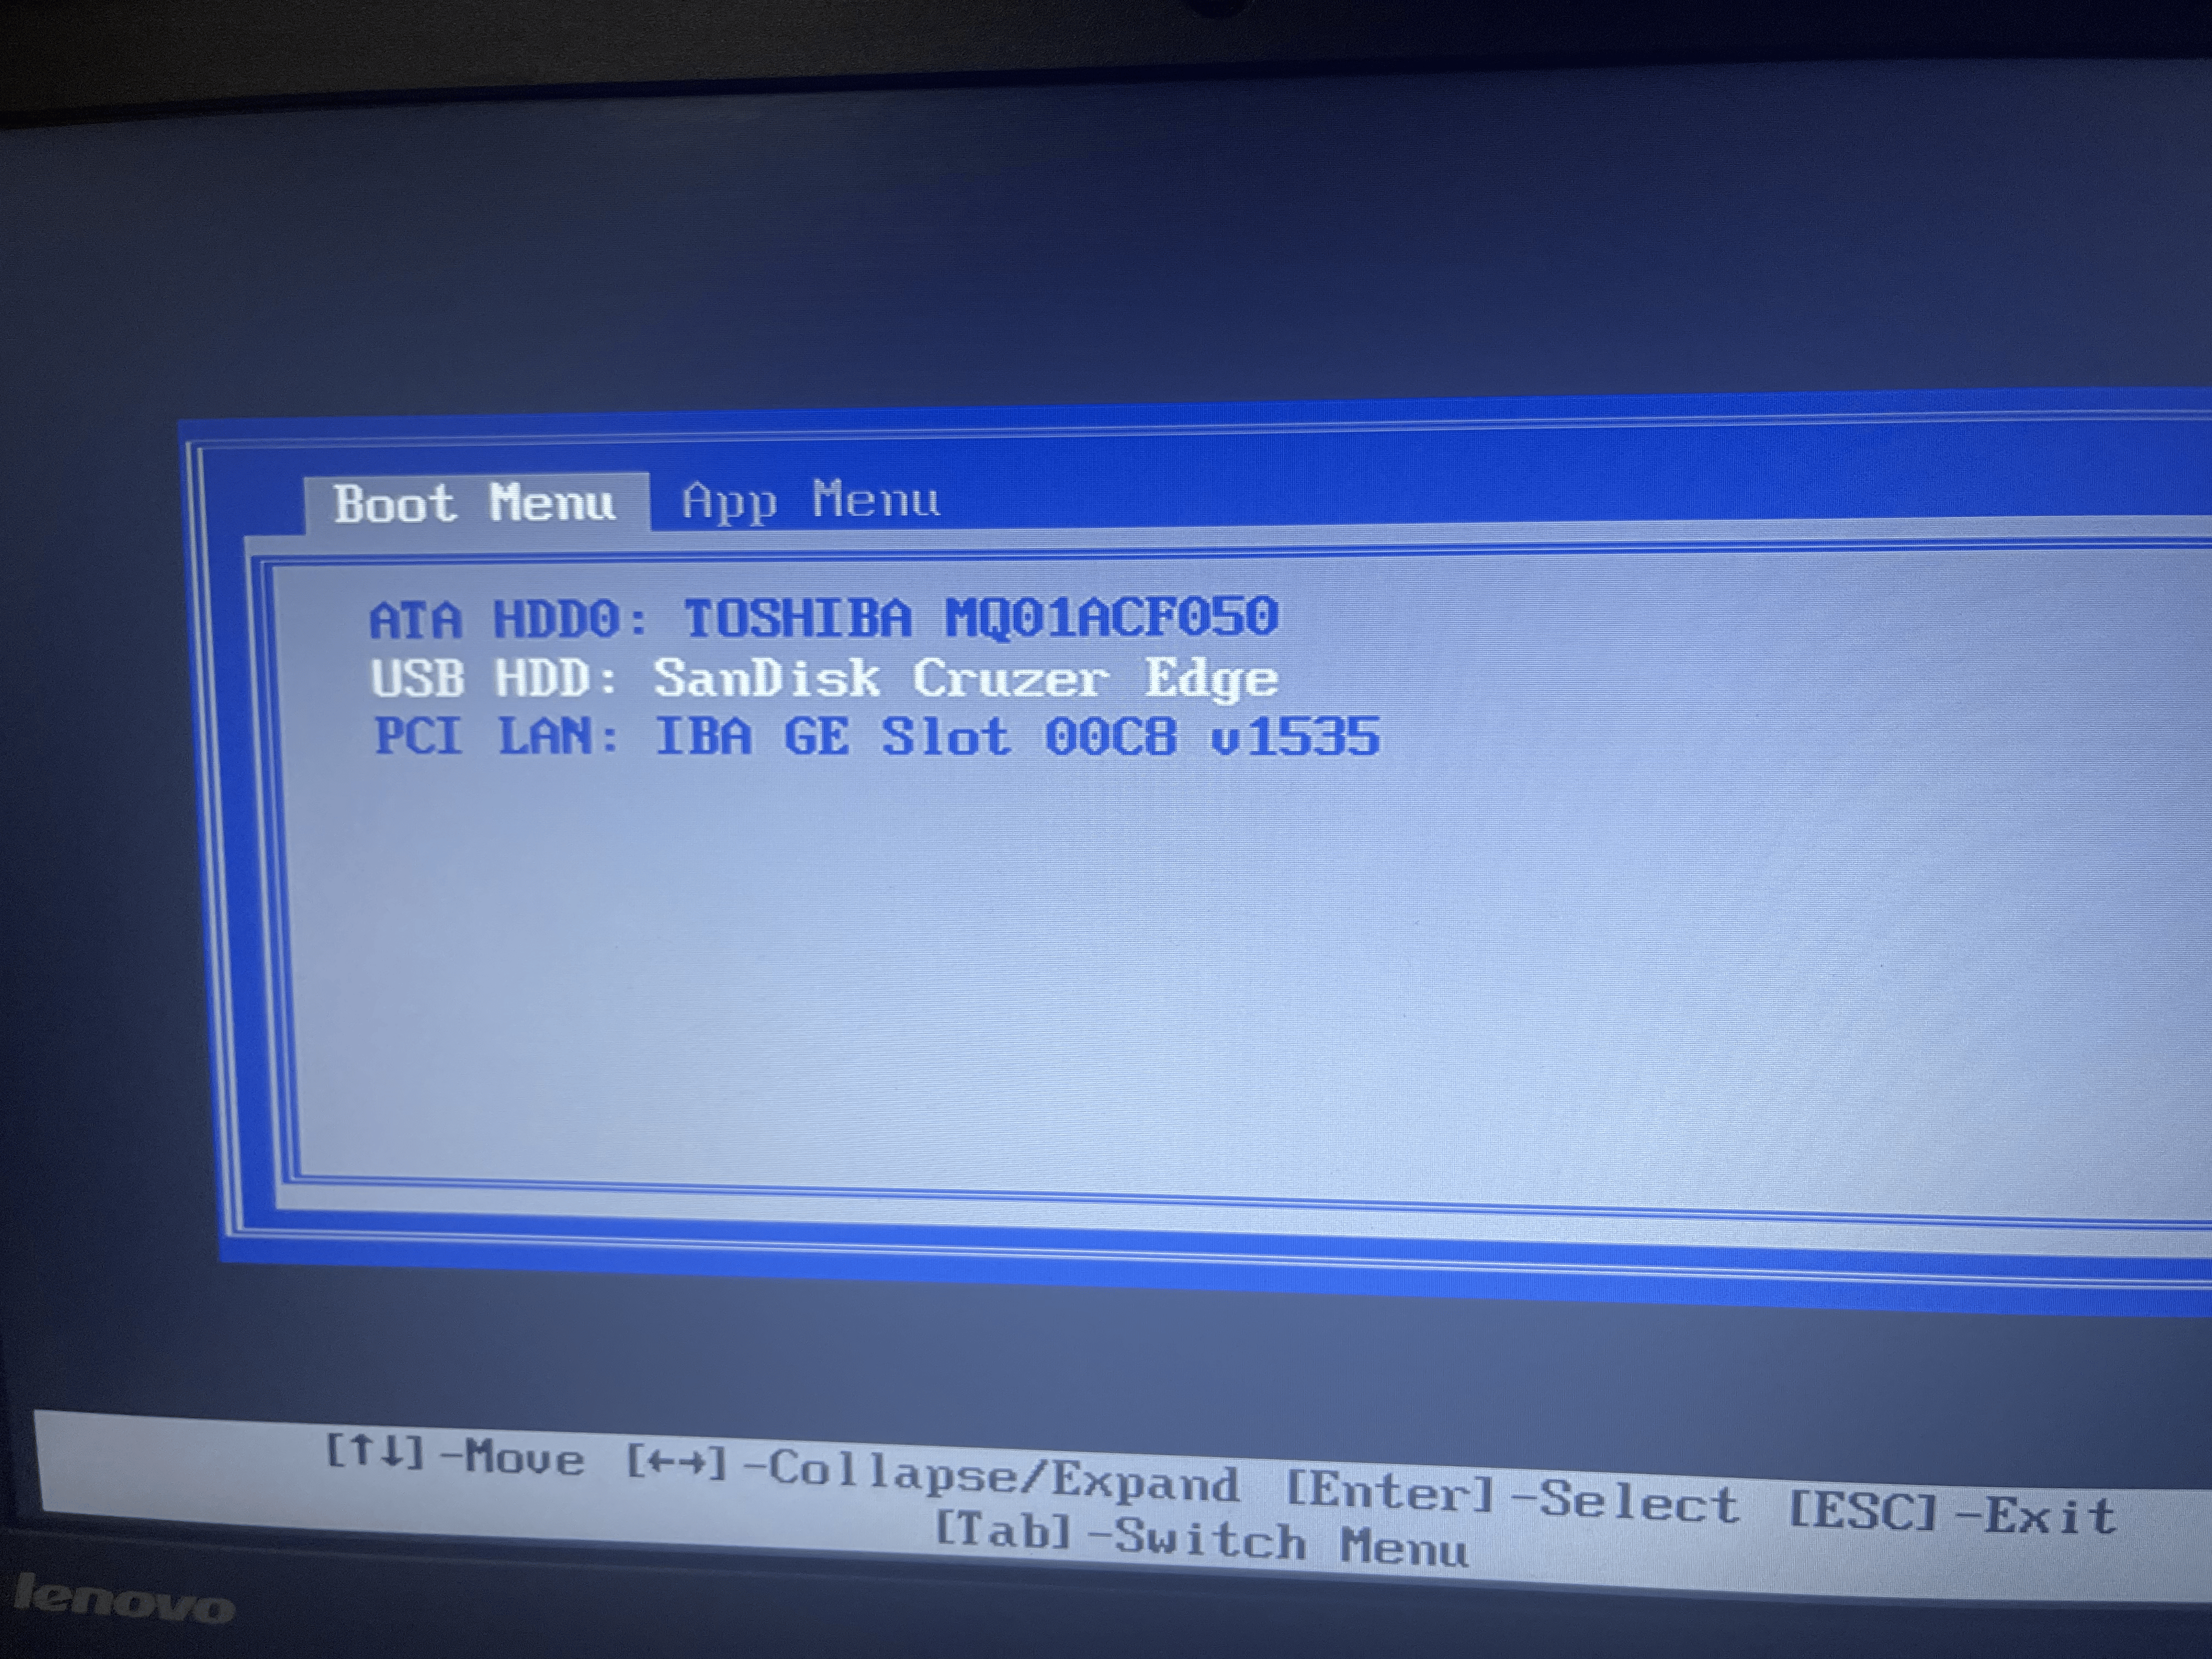
F12 Boot Menu, source
- Point the current boot device to the one which has the Arch Linux installation medium.
If you are lucky, you will see this
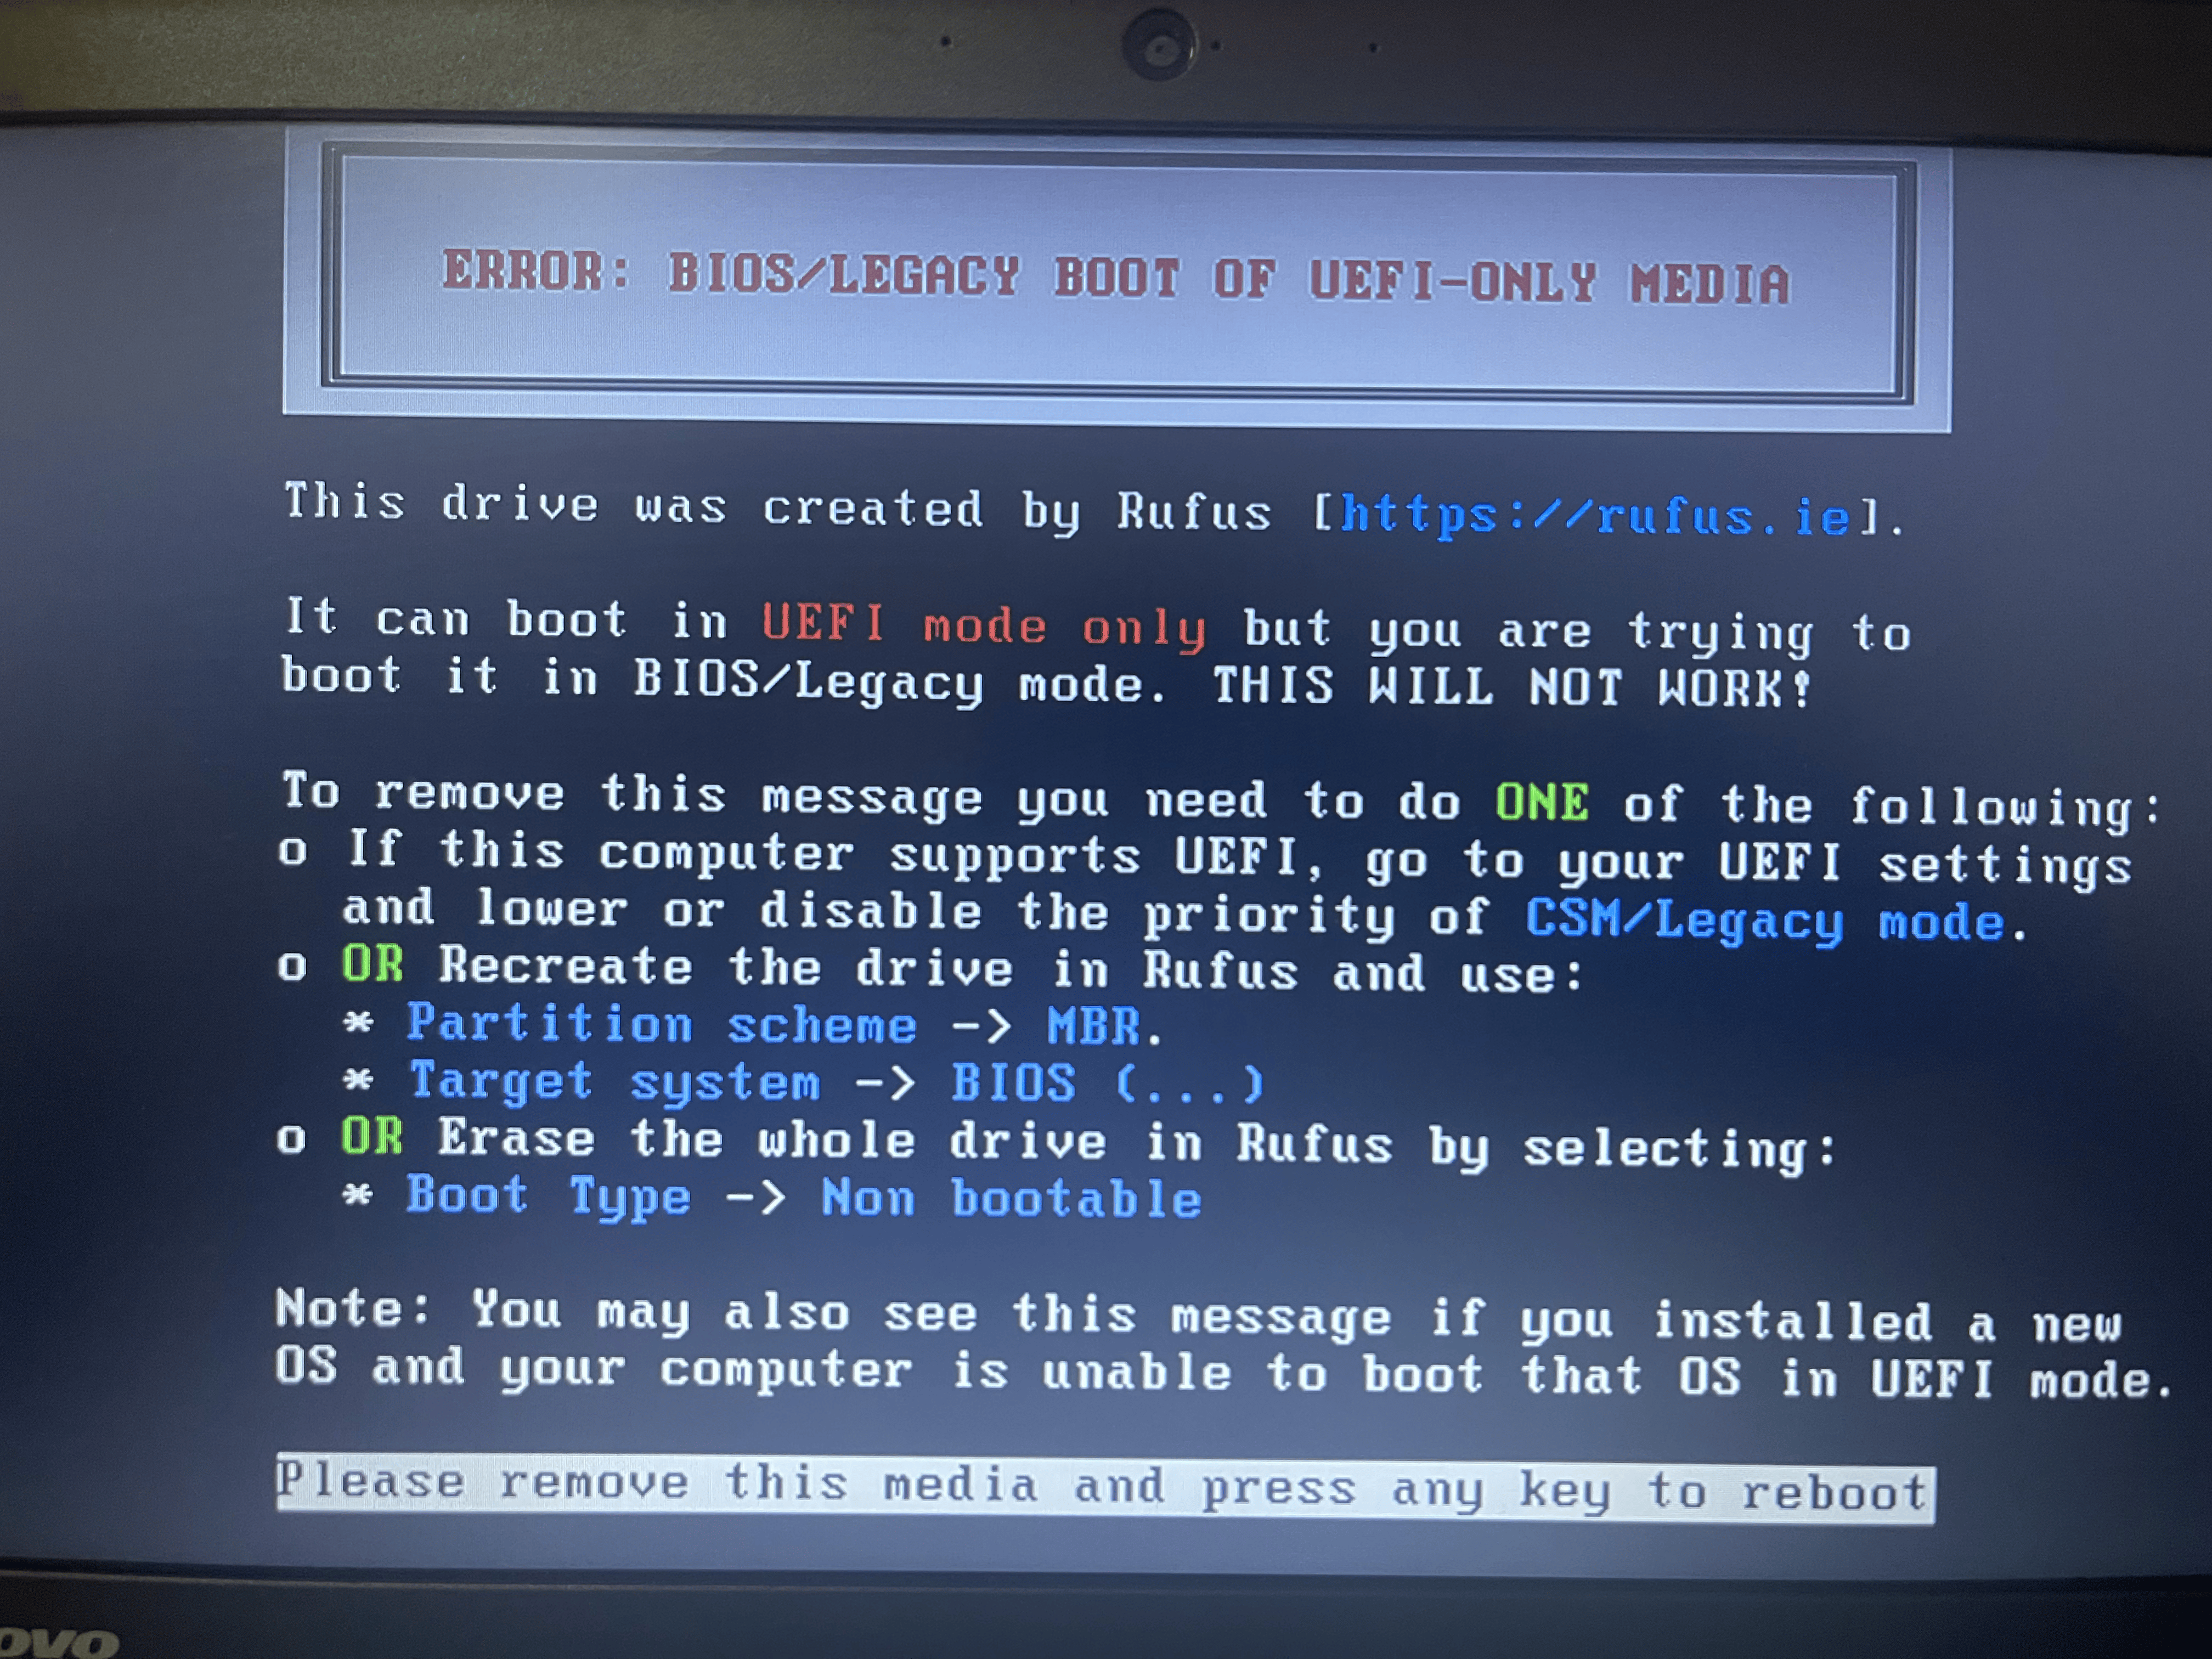
it tells me to enable UEFI boot, and after searching I realized I should enable secure boot…
After changing to secure boot, I got image failed to verify, access denied error.
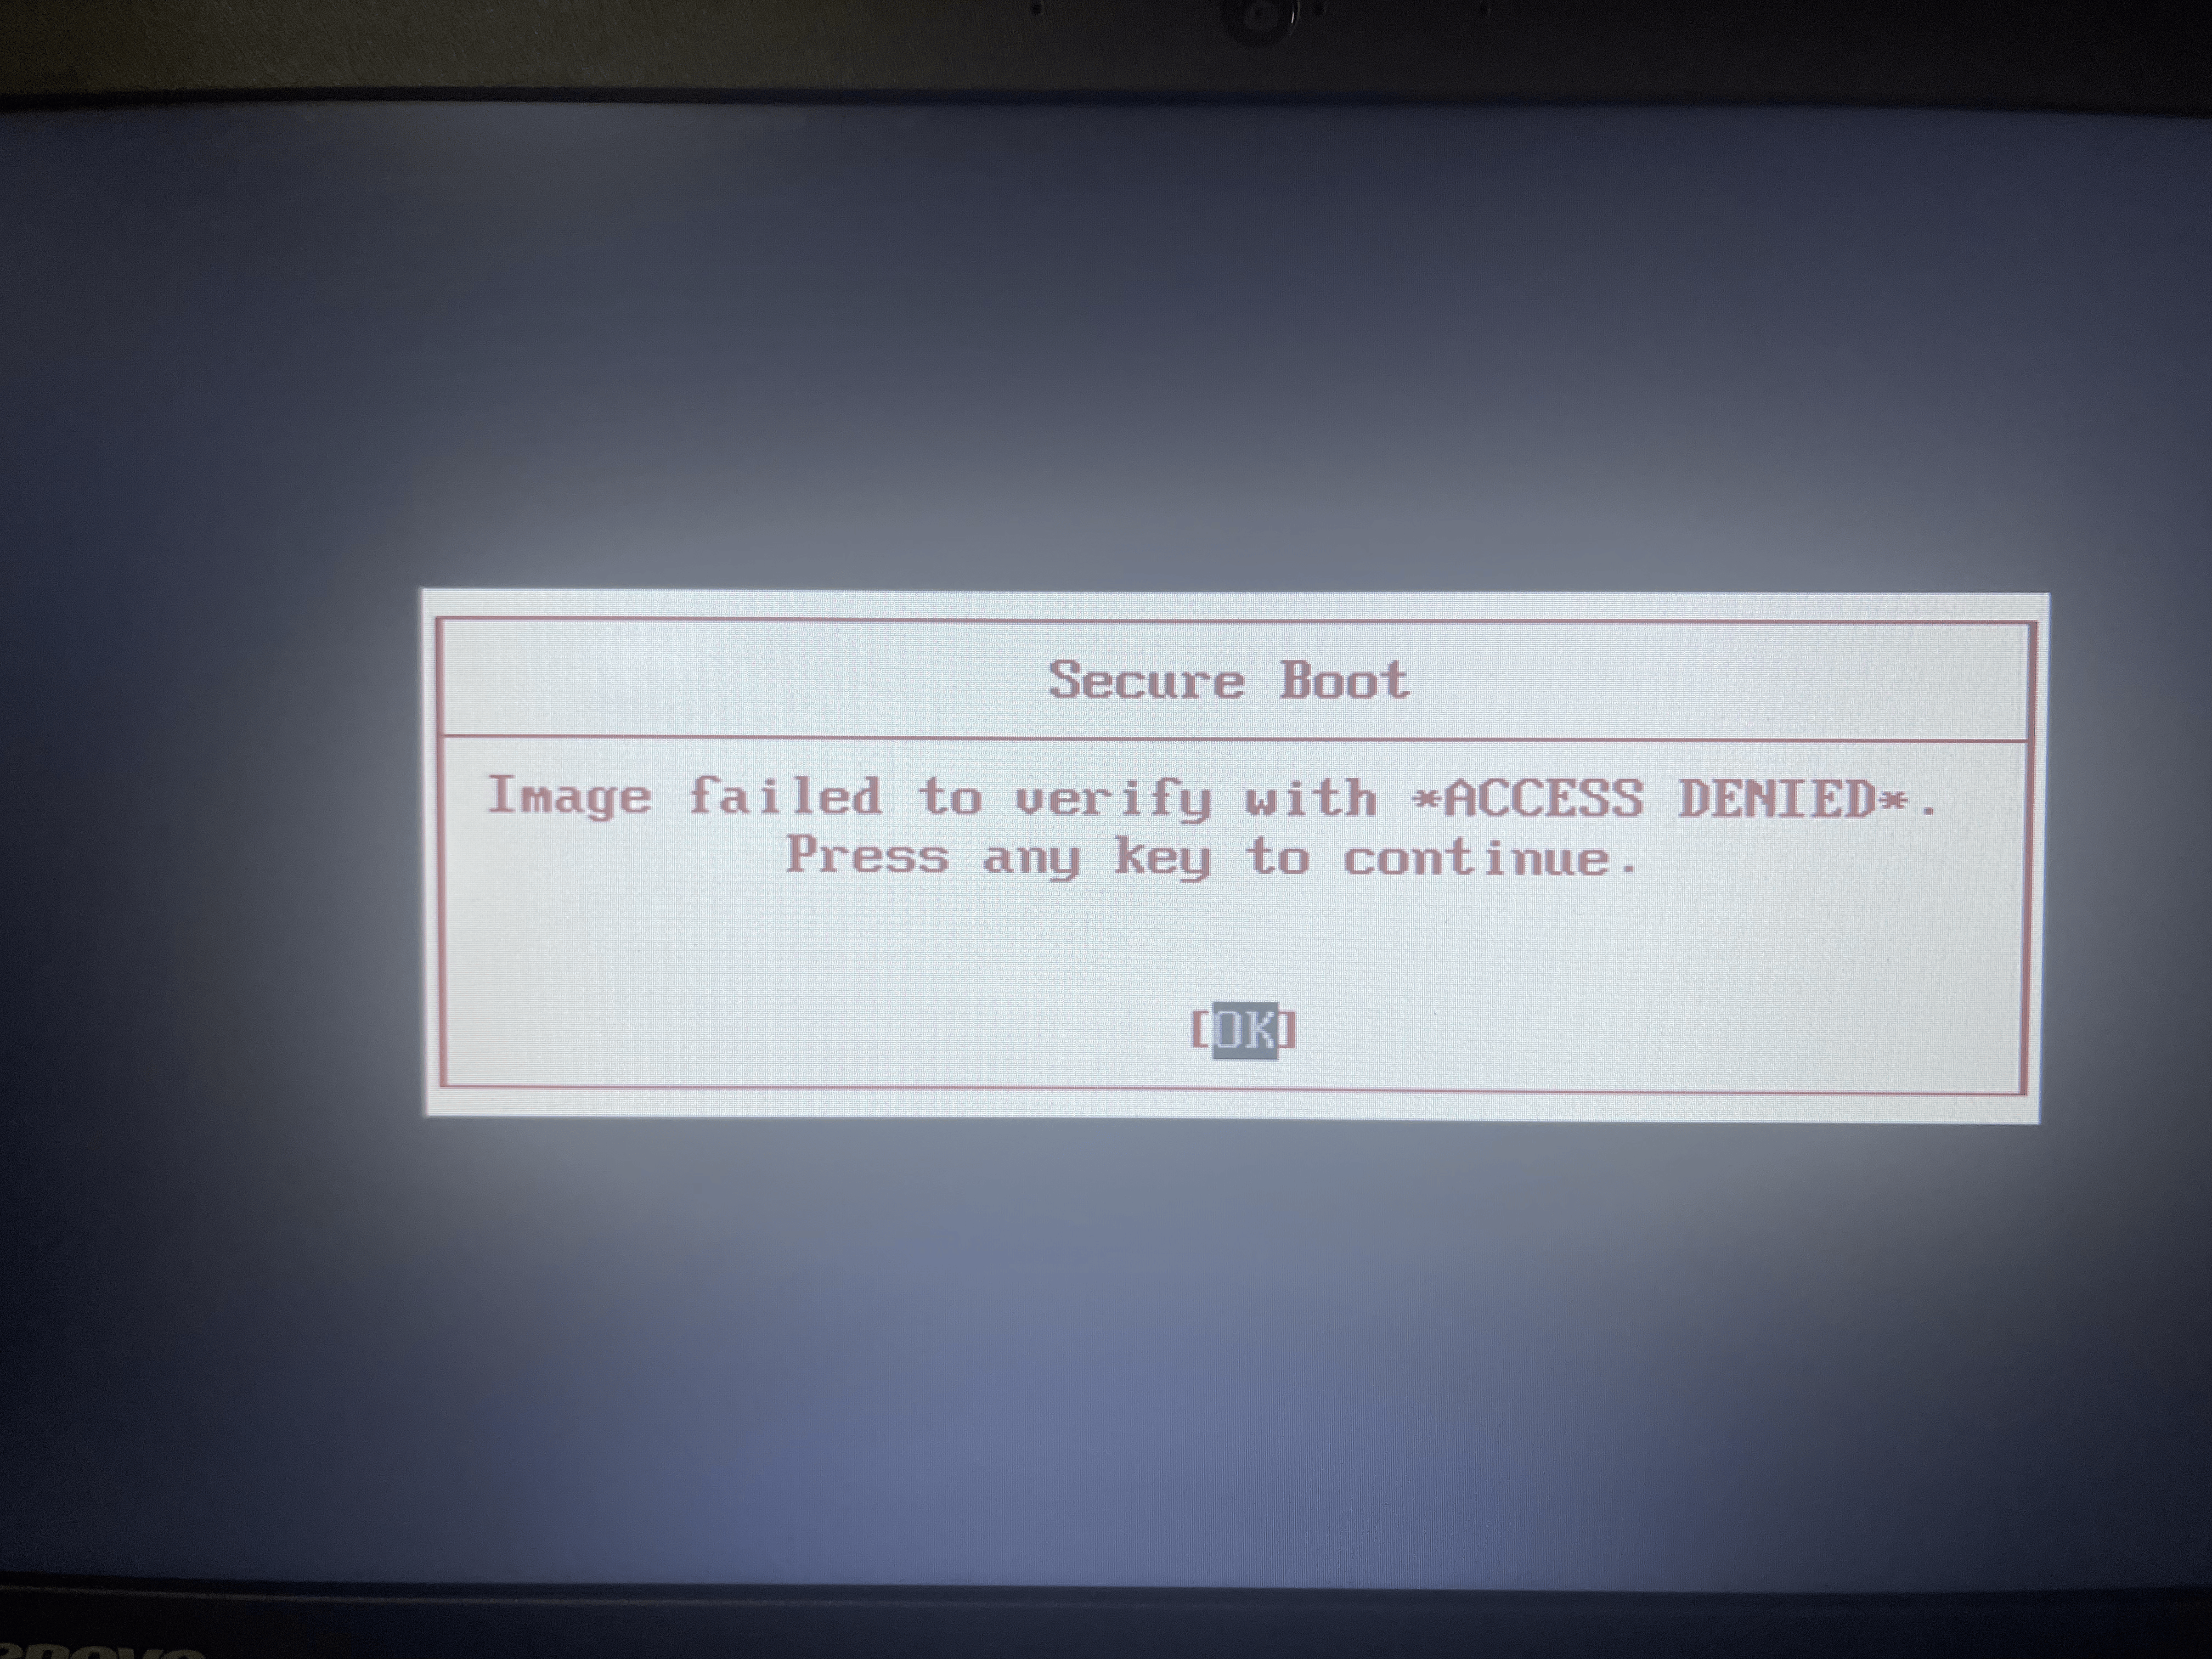
Solution:
- disable secure boot
- ensure system is set to UEFI boot mode (not legacy/CSM)
- check rufus settings (I did correct)
LFG!
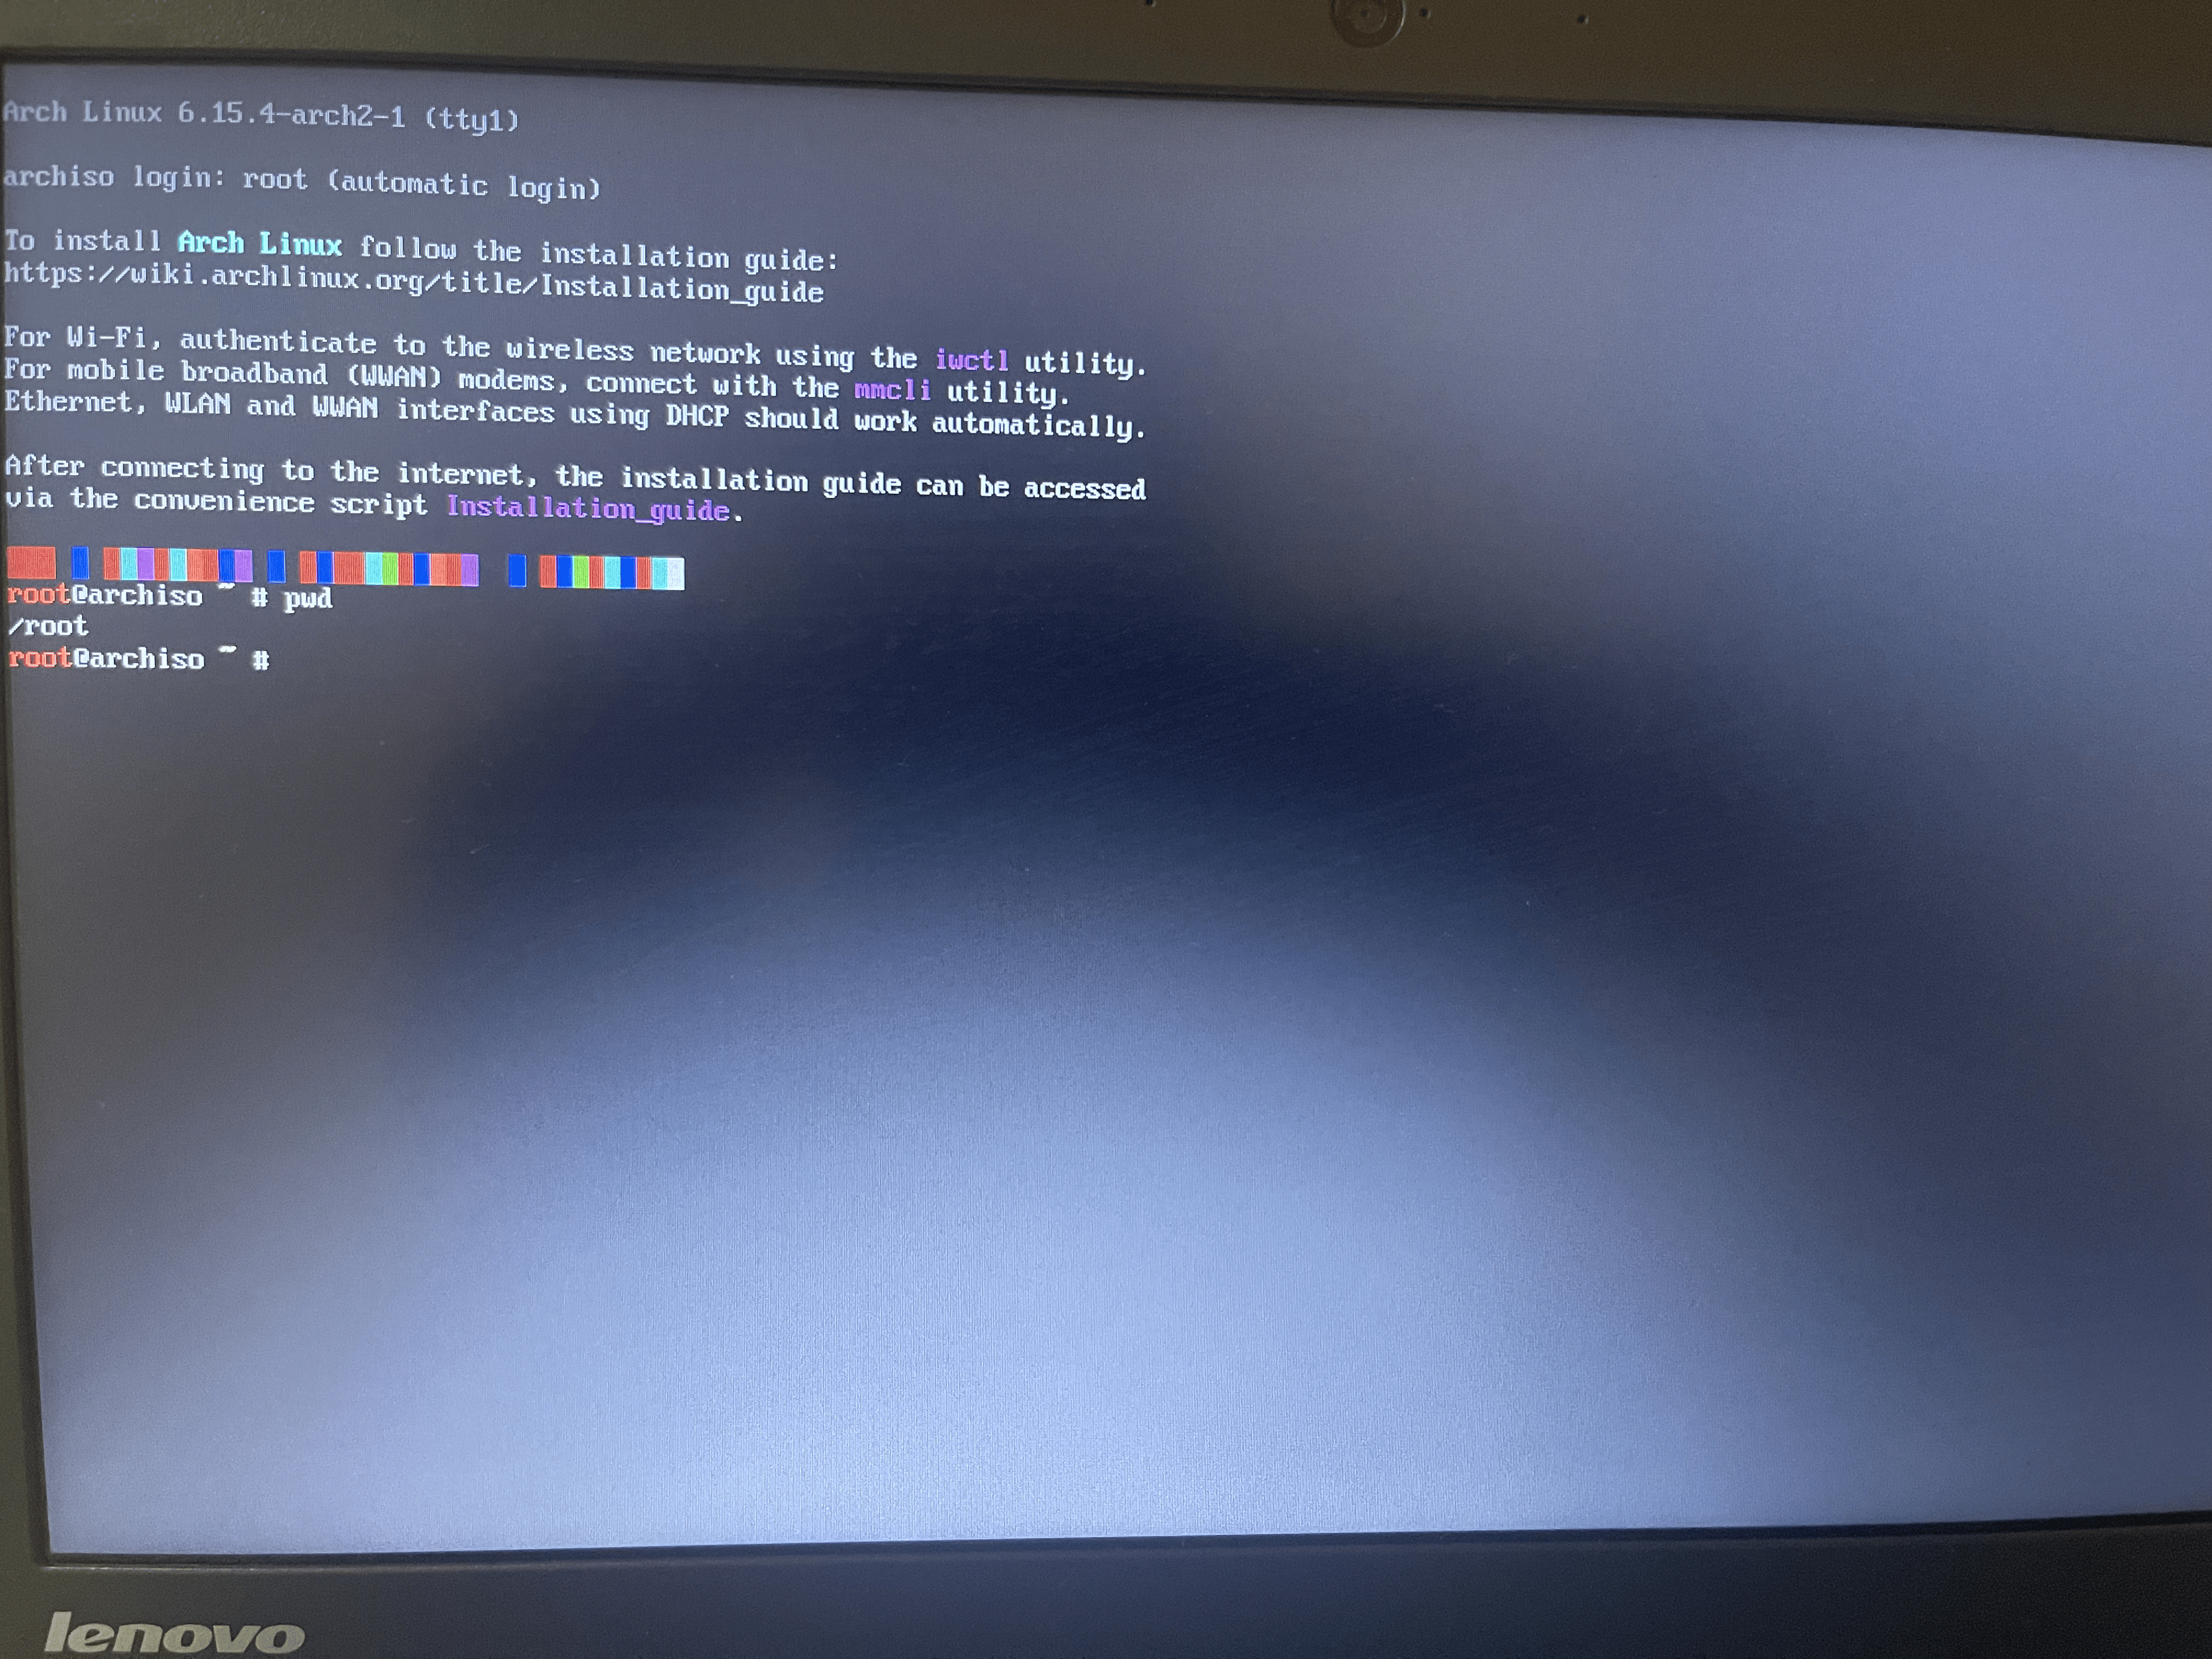
[!NOTE] right now arch linux is still in the flash drive. Need to install on hard disk.
console keymap default keyboard layout is US, we good.
Verify the boot mode:
cat /sys/firmware/efi/fw_platform_size
# 64
- If the command returns 64, the system is booted in UEFI mode and has a 64-bit x64 UEFI.
- If the command returns 32, the system is booted in UEFI mode and has a 32-bit IA32 UEFI. While this is supported, it will limit the boot loader choice to those that support mixed mode booting.
- If it returns No such file or directory, the system may be booted in BIOS (or CSM) mode.
- If the system did not boot in the mode you desired (UEFI vs BIOS), refer to your motherboard’s manual.
update the system clock, set timezone and time.
ln -sf /usr/share/zoneinfo/PRC /etc/localtime  # or current timezone you're in

# ls /usr/share/zoneinfo to see what zone they have
set hardware clock from the system clock so that it persists across reboots
hwclock --systohc
Partition the disks
When recognized by the live system, disks are assigned to a block device such as /dev/sda, /dev/nvme0n1 or /dev/mmcblk0. To identify these devices, use lsblk or fdisk.
fdisk -l
use lsblk to find the device name of your PC’s internal drive
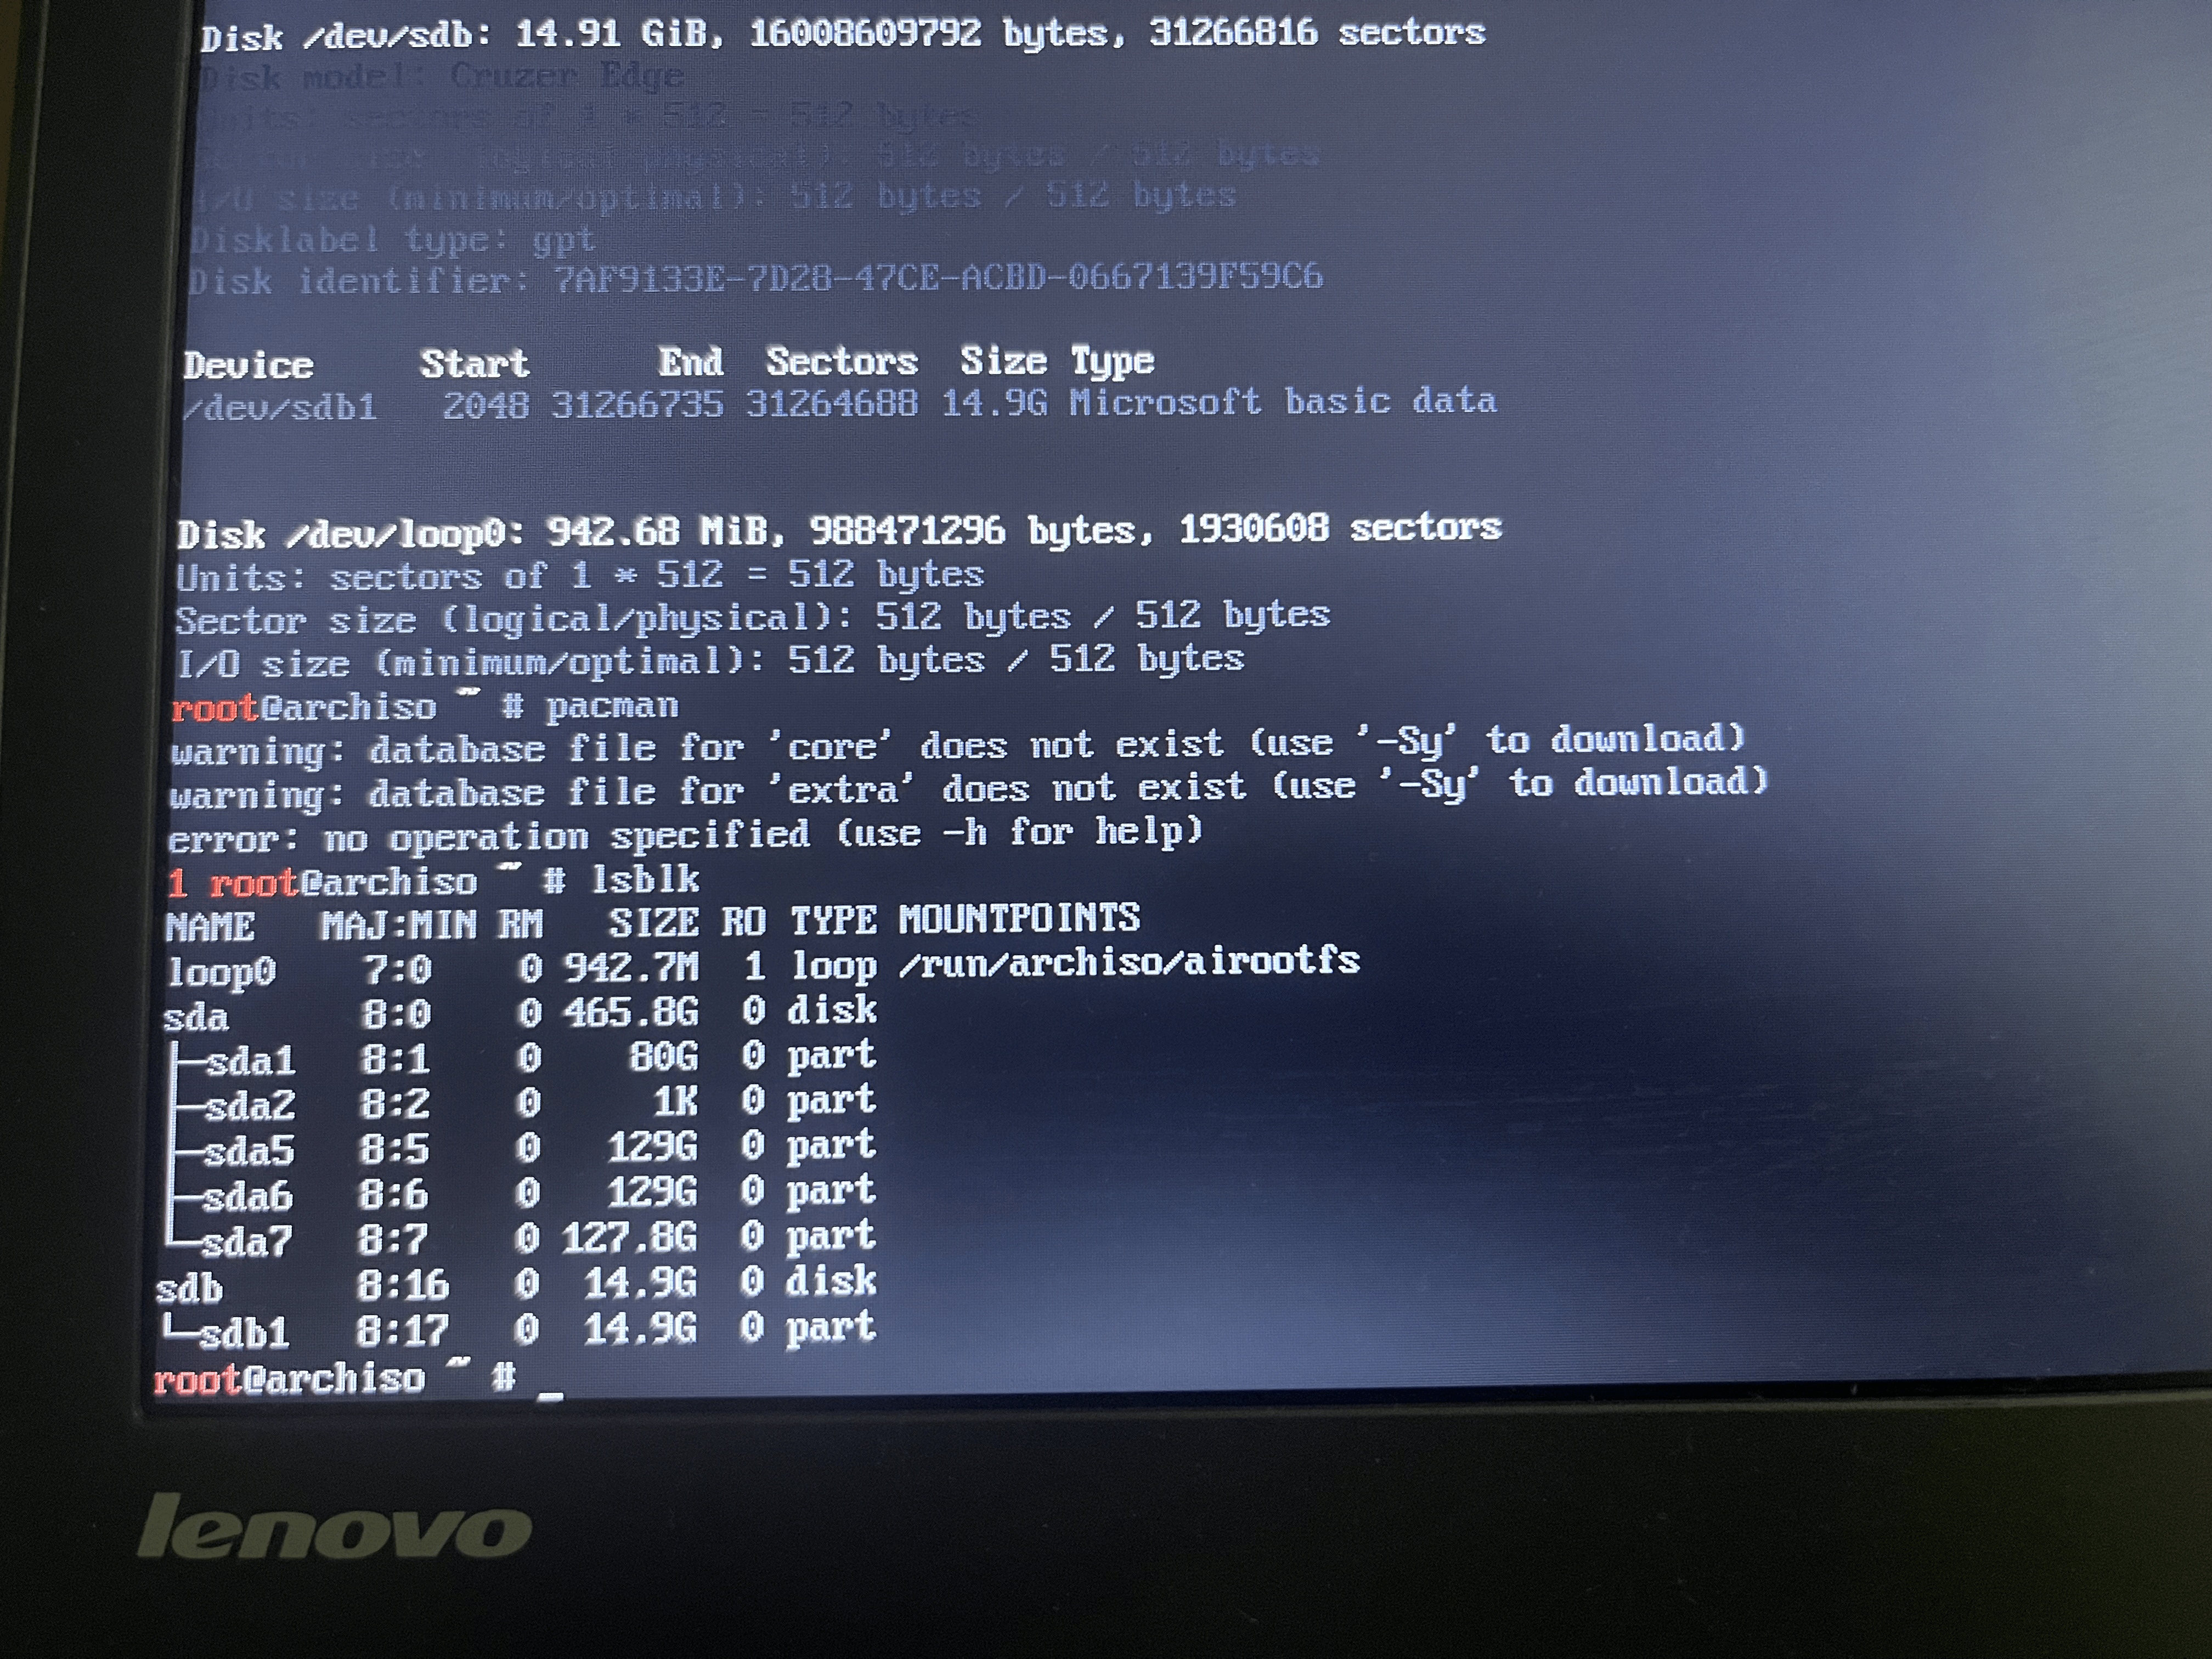
- These partitions (e.g., sda1, sda2, sda5, sda6, sda7) are remnants of the previous operating system installation (likely Windows, or a previous Linux setup) that was on your PC’s internal drive. Each of them served a specific purpose for that OS (e.g., system reserved, primary OS partition, recovery partition, data partitions, etc.).
- In short: These are just the existing divisions of your hard drive from its prior use. You will be wiping these away to create your new Arch Linux partitions.
sdbis representing my flash drive, don’t mess this one.
I’m thinking about keep two partiion:
/homefor a separate partiion to keep the files safe/for root partition
so it will be like this:
/                             <-- Lives on /dev/sda2
├── bin
├── etc
├── usr
└── home                      <-- This directory is a mount point for /dev/sda4
    └── yourusername          <-- Contents of /dev/sda4
-
/dev/sda1(EFI System Partition - ESP): This is mandatory for UEFI booting. -
/dev/sda2(Root Partition - /): This will contain all your Arch Linux system files. -
/dev/sda3(Swap Partition): For virtual memory. -
/dev/sda4(Home Partition - /home): This will hold all your personal user data, separate from the OS.
use a partitioning tool like fdisk to modify partition tables. e.g.:
fdisk /dev/the_disk_to_be_partitioned
example fdisk partition tutorial
I’m using UEFI/GPT layout, menu suggest:
| Mount point on the installed system | Partition | Partition type GUID | Suggested size |
|---|---|---|---|
| /boot or /efi1 | /dev/sda1 | C12A7328-F81F-11D2-BA4B-00A0C93EC93B: EFI system partition | 1 GiB |
| [SWAP] | /dev/sda2 | 0657FD6D-A4AB-43C4-84E5-0933C84B4F4F: Linux swap | At least 4 GiB or the size of RAM to use hibernation |
| / | /dev/sda3 | 4F68BCE3-E8CD-4DB1-96E7-FBCAF984B709: Linux x86-64 root (/) | Remainder of the device. At least 23–32 GiB. |
Here is the step by step guide I used when do partitioning this pc:
sudo fdisk /dev/sda
- wipe the other partitions
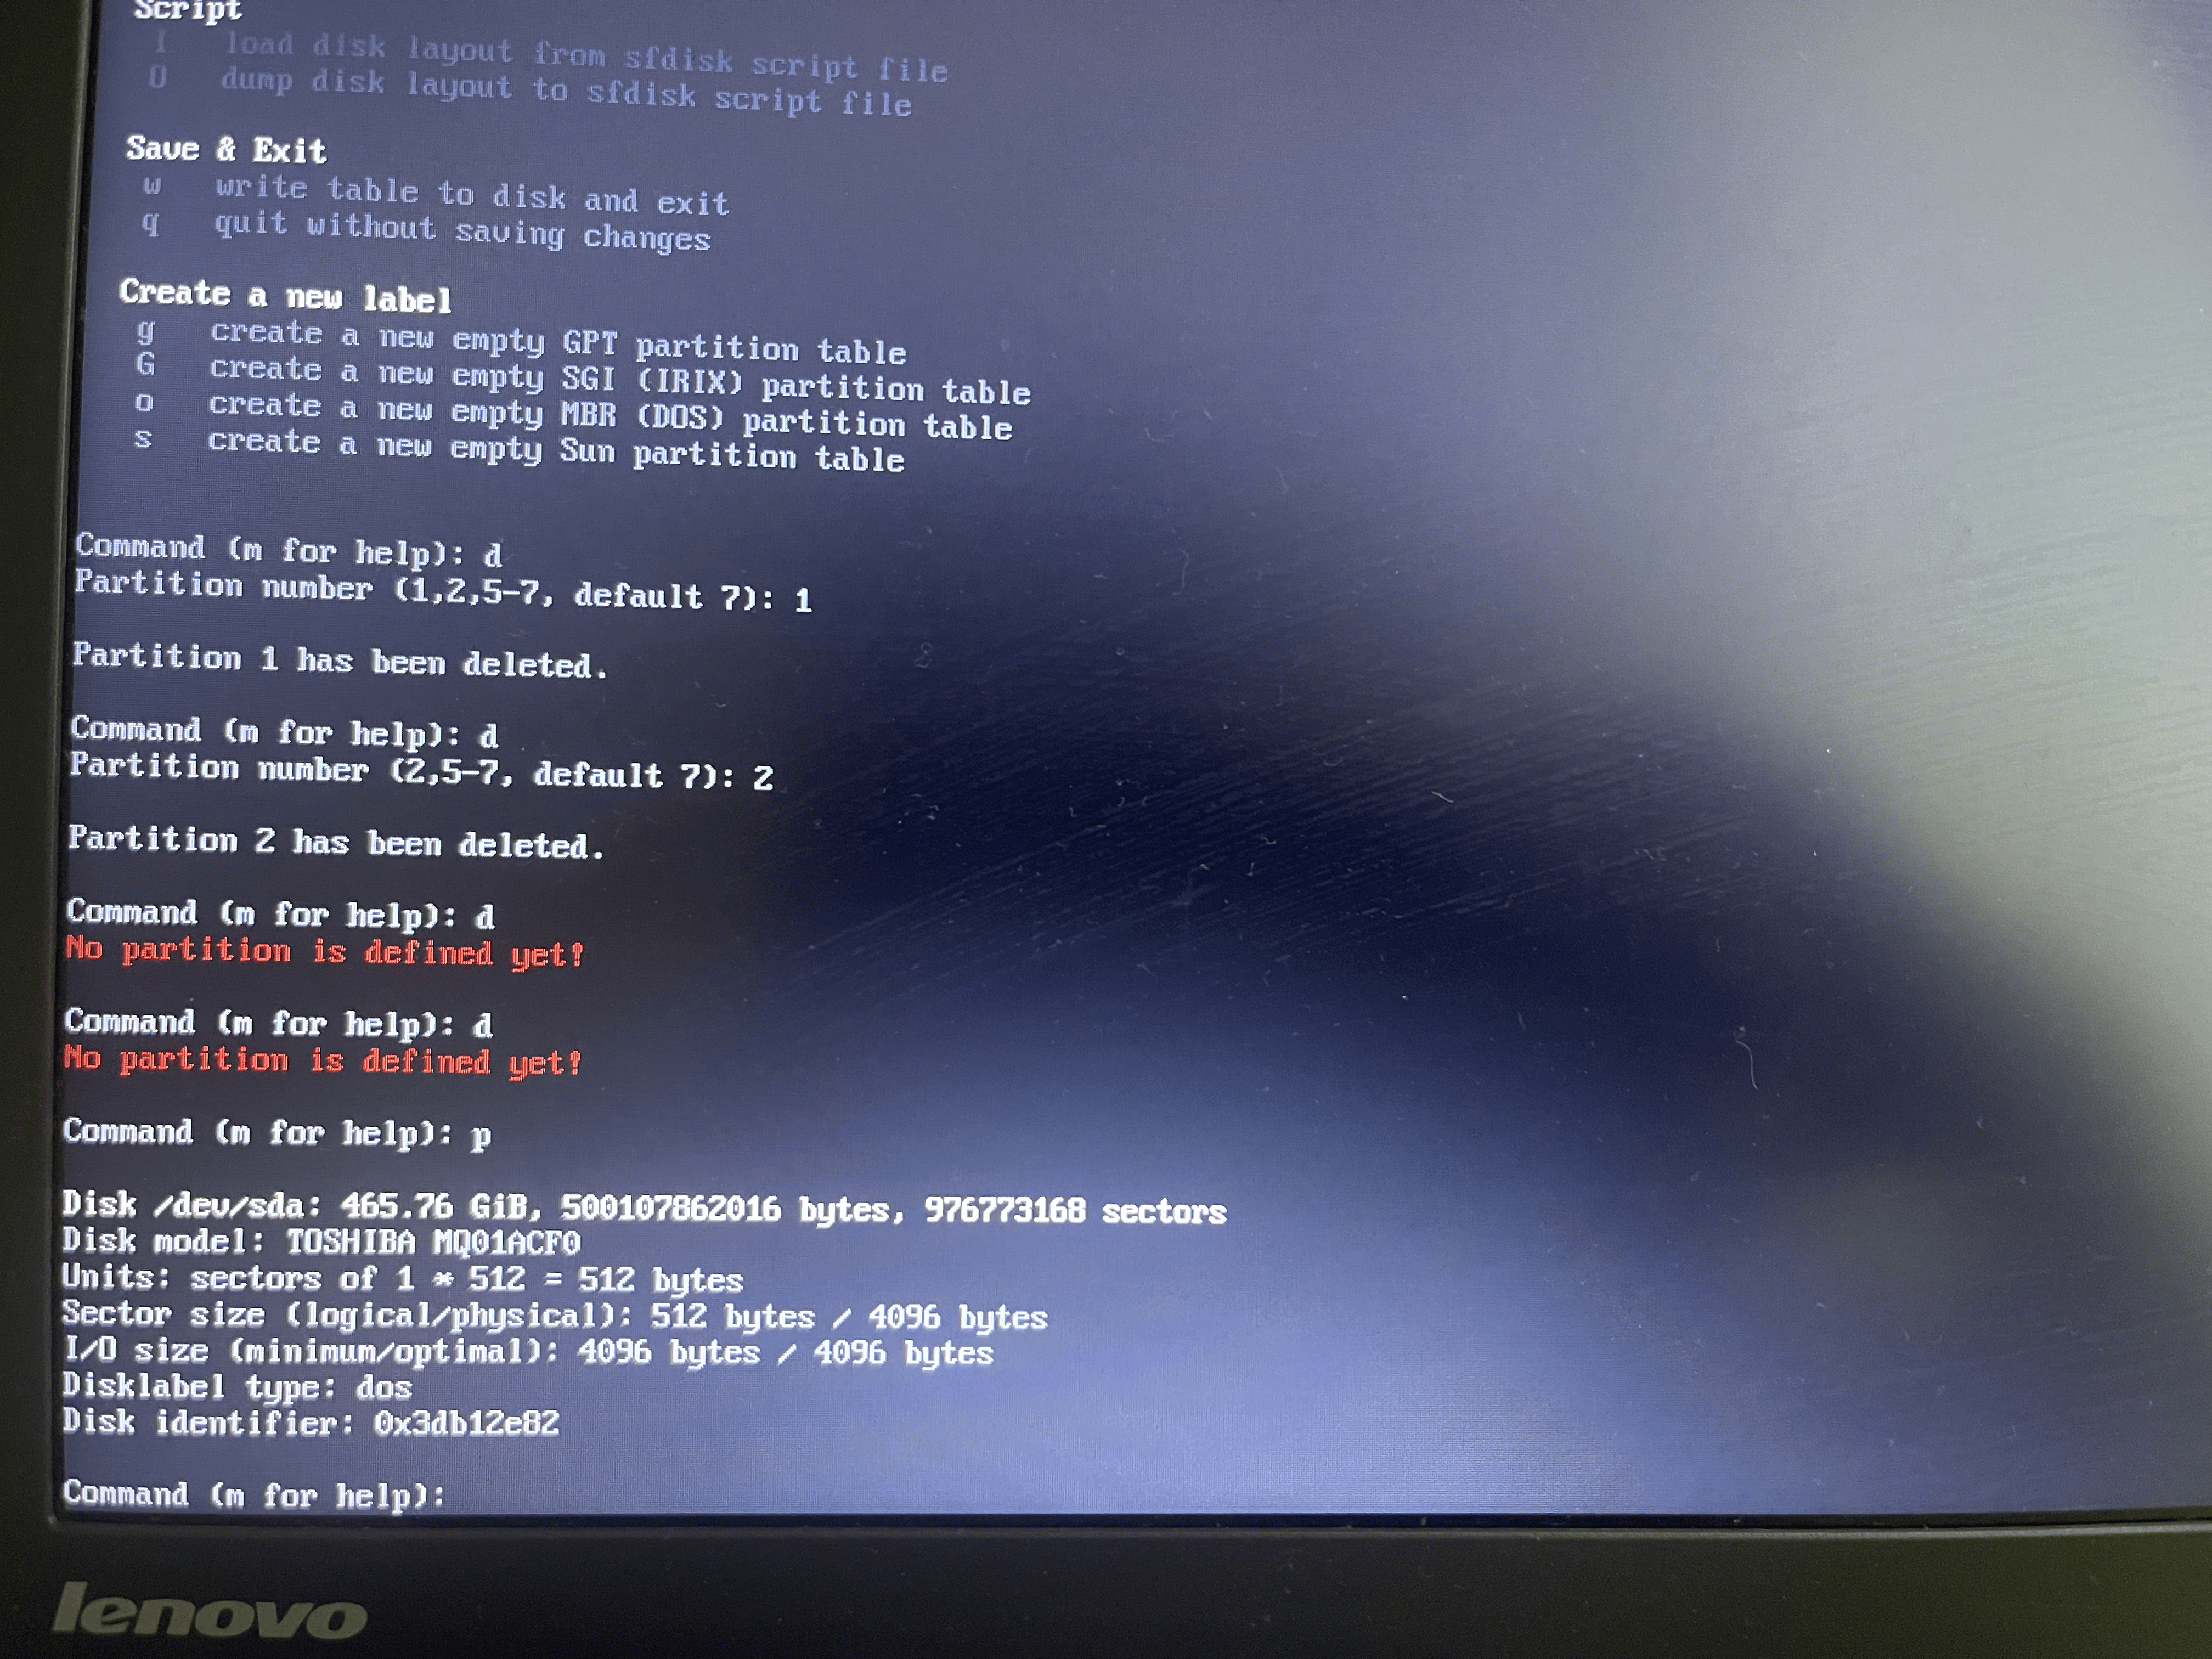
- create a new partition
- create a 50G partition for OS
Create Partition 2: Root Partition (/ - /dev/sda2)
Press n and then Enter (to create a new partition).

Partition number: Press Enter for the default (2).

First sector: Press Enter for the default.

Last sector / Size: Type +50G (for 50 Gigabytes) and then Enter. (Adjust this size if you know you need more or less, but 50G is a solid recommendation).

Change partition type: Press t and then Enter.

    Partition number to change: Press Enter for the default (2).

    For Linux filesystem, the alias is usually 23 or 83.

    Type 23 (or 83) and then Enter.
Create Partition 3: Home Partition (/home - /dev/sda3)
Press n and then Enter.

Partition number: Press Enter for the default (3).

First sector: Press Enter for the default.

Last sector / Size: Press Enter to use the remainder of the disk for this partition.

Change partition type: Press t and then Enter.

    Partition number to change: Press Enter for the default (3).

    Type 23 (or 83) and then Enter (for Linux filesystem).
The final partitons stucutures look like this:
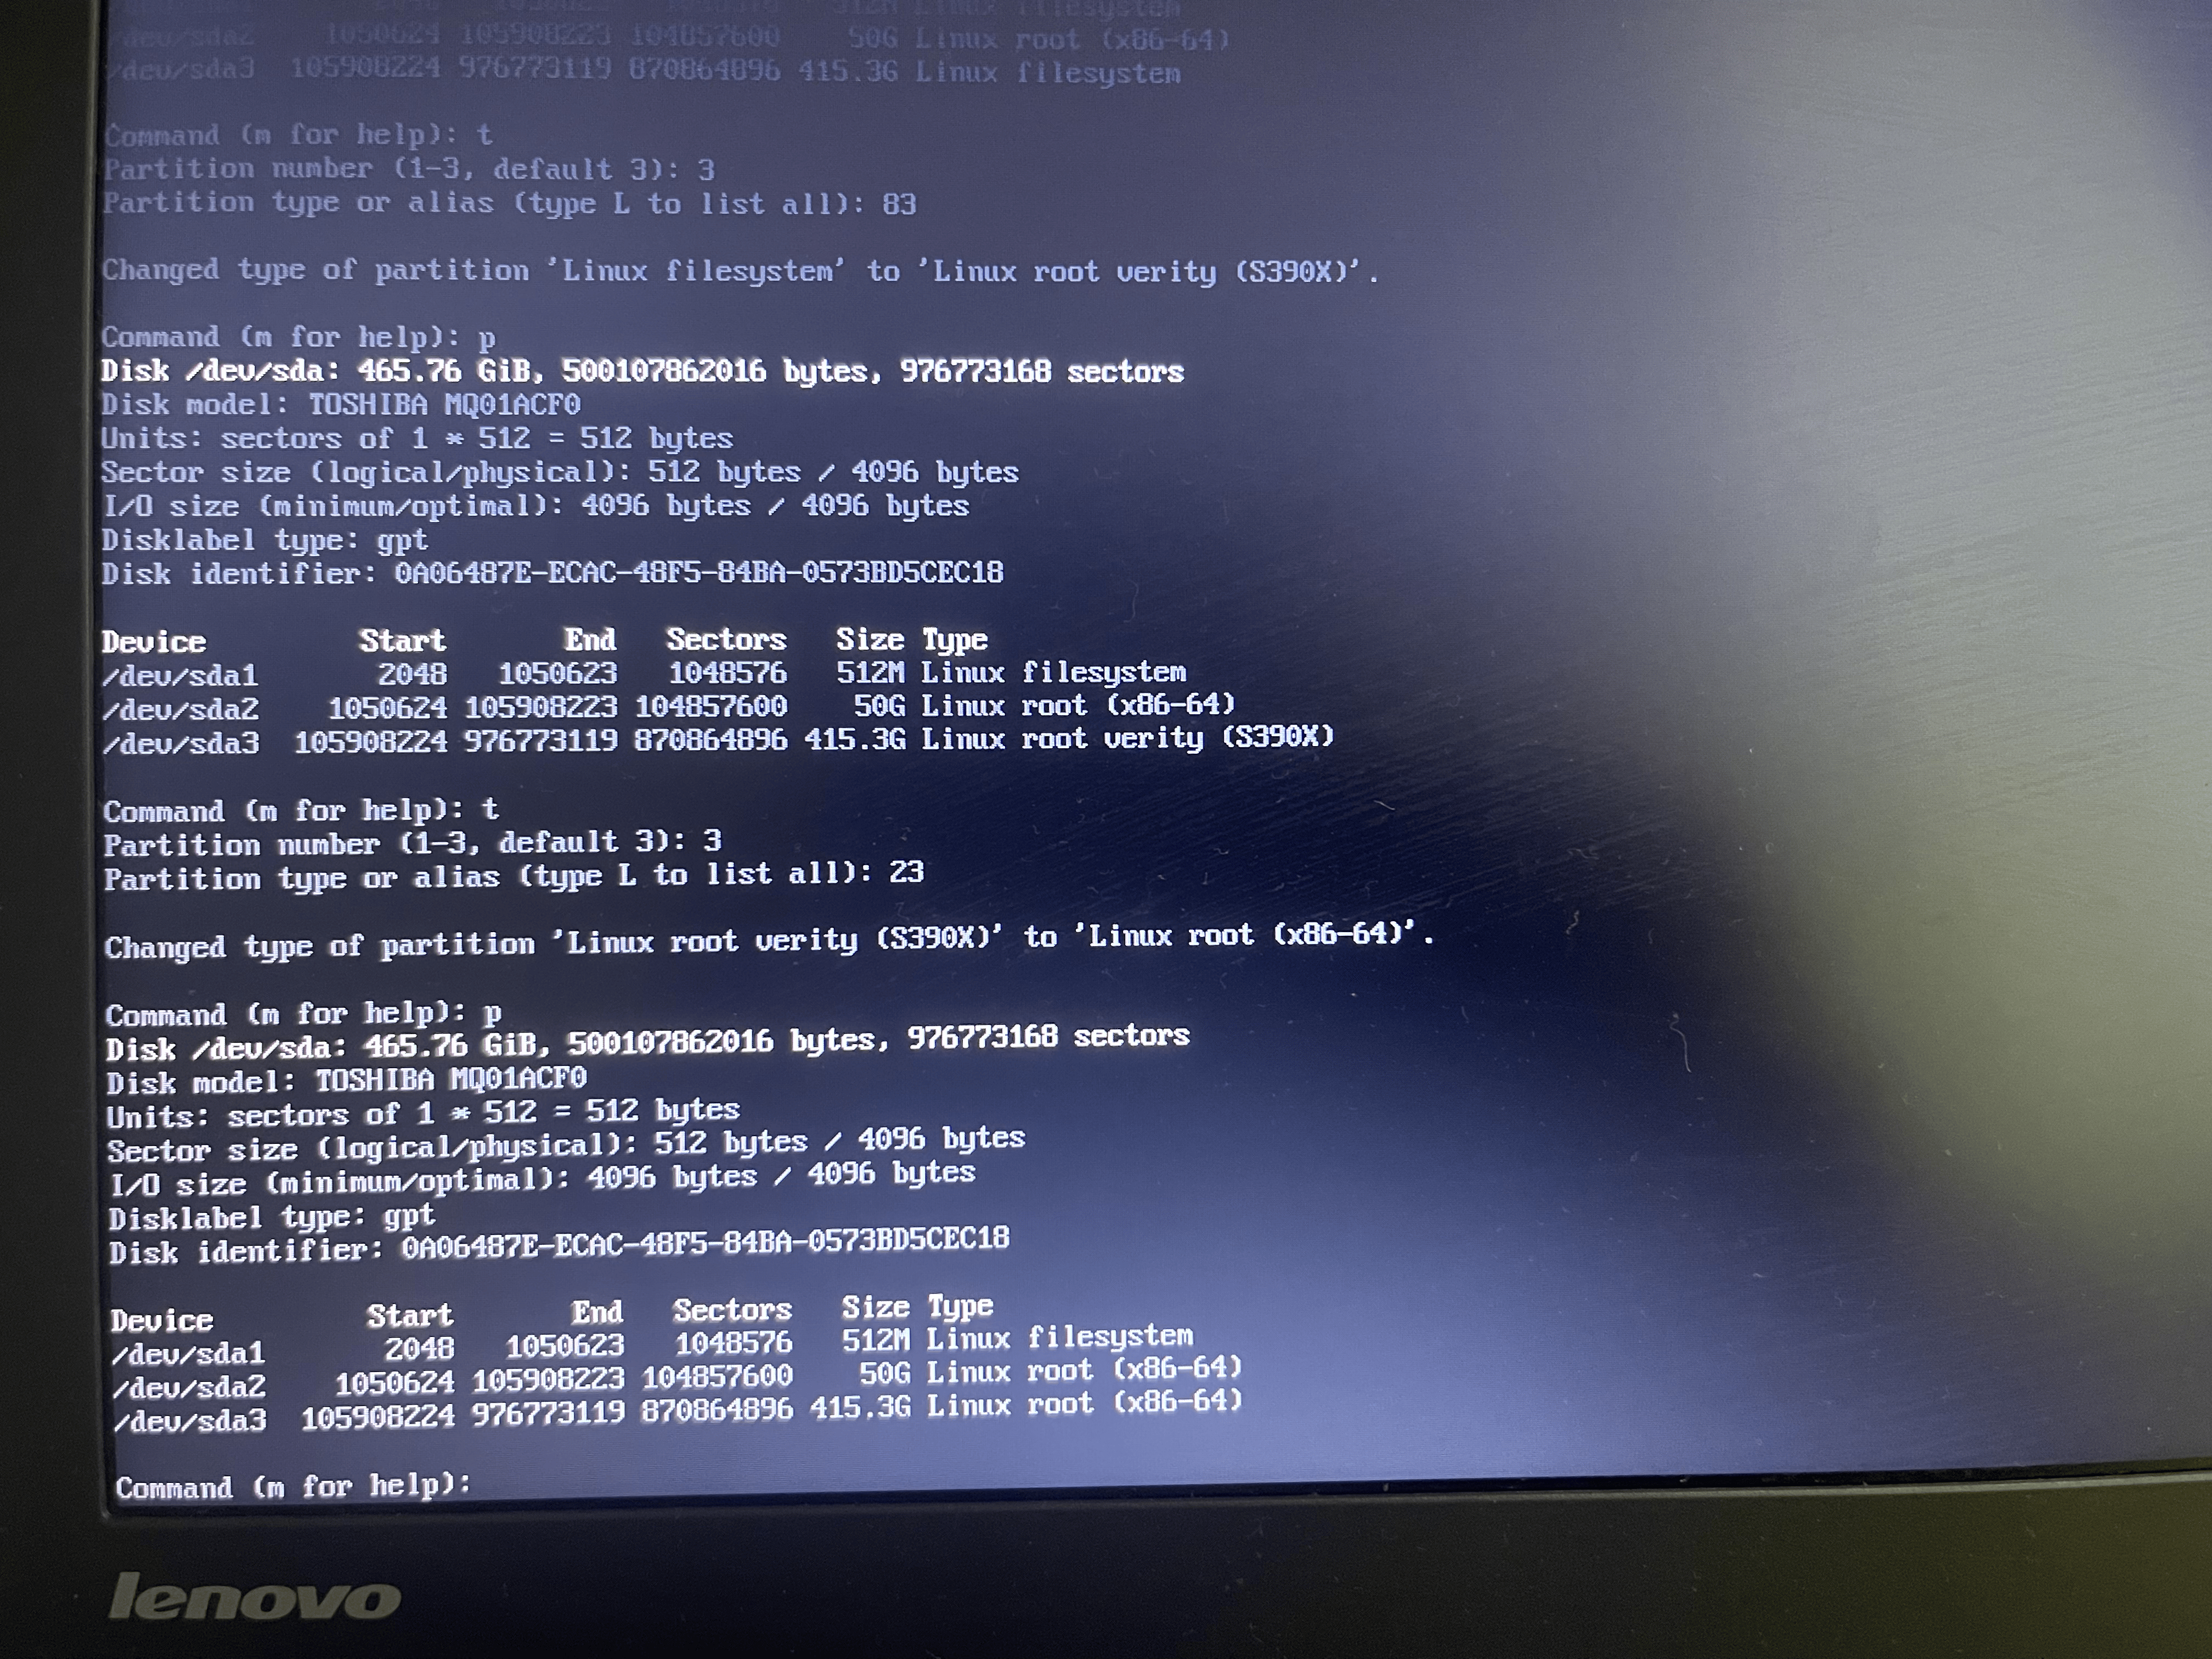
-
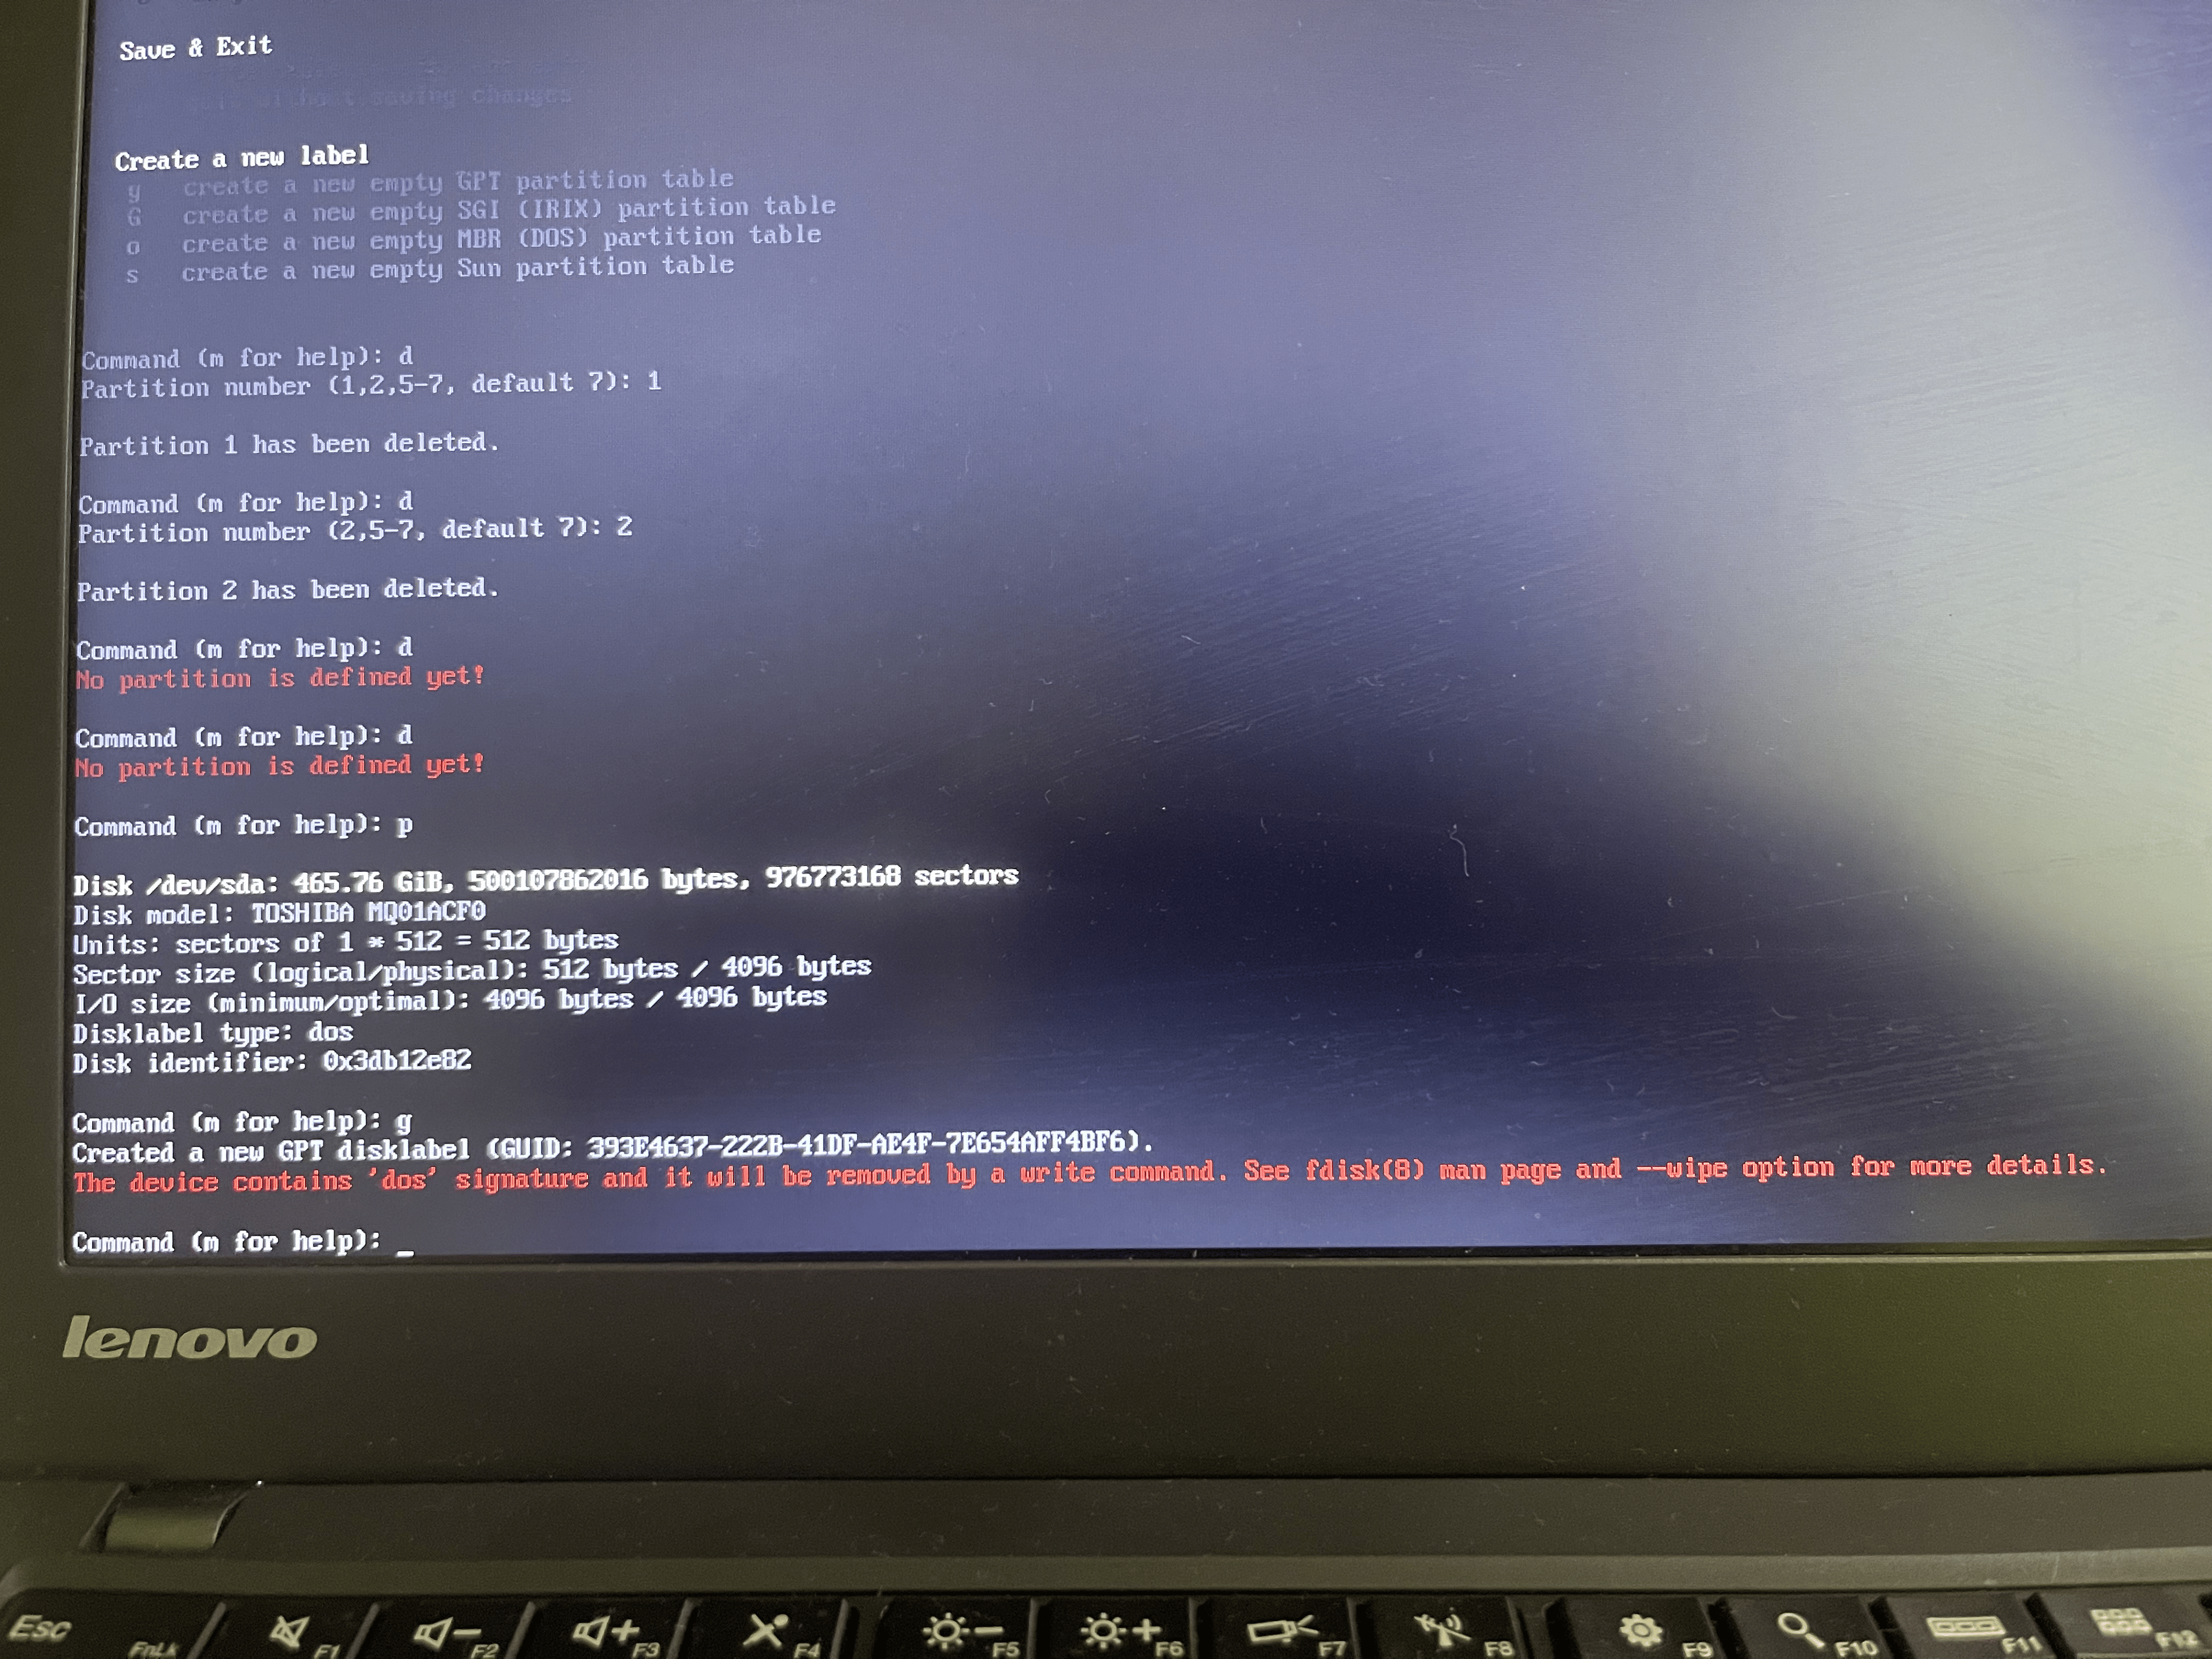
type
wto write table to disk and exit, apply the changes -
once the partitions has been created, each newly created partition must be formatted with an appropriate file system
Format the partition: part 1 -> Create a file system
warning:
- After creating a new file system, data previously stored on this partition can unlikely be recovered. Create a backup of any data you want to keep.
- The purpose of a given partition may restrict the choice of file system. For example, an EFI system partition must contain a FAT32 file system, and the file system containing the /boot directory must be supported by the boot loader.
Before continuing, identify the device where the file sytem will be created and whether or not it is mounted.
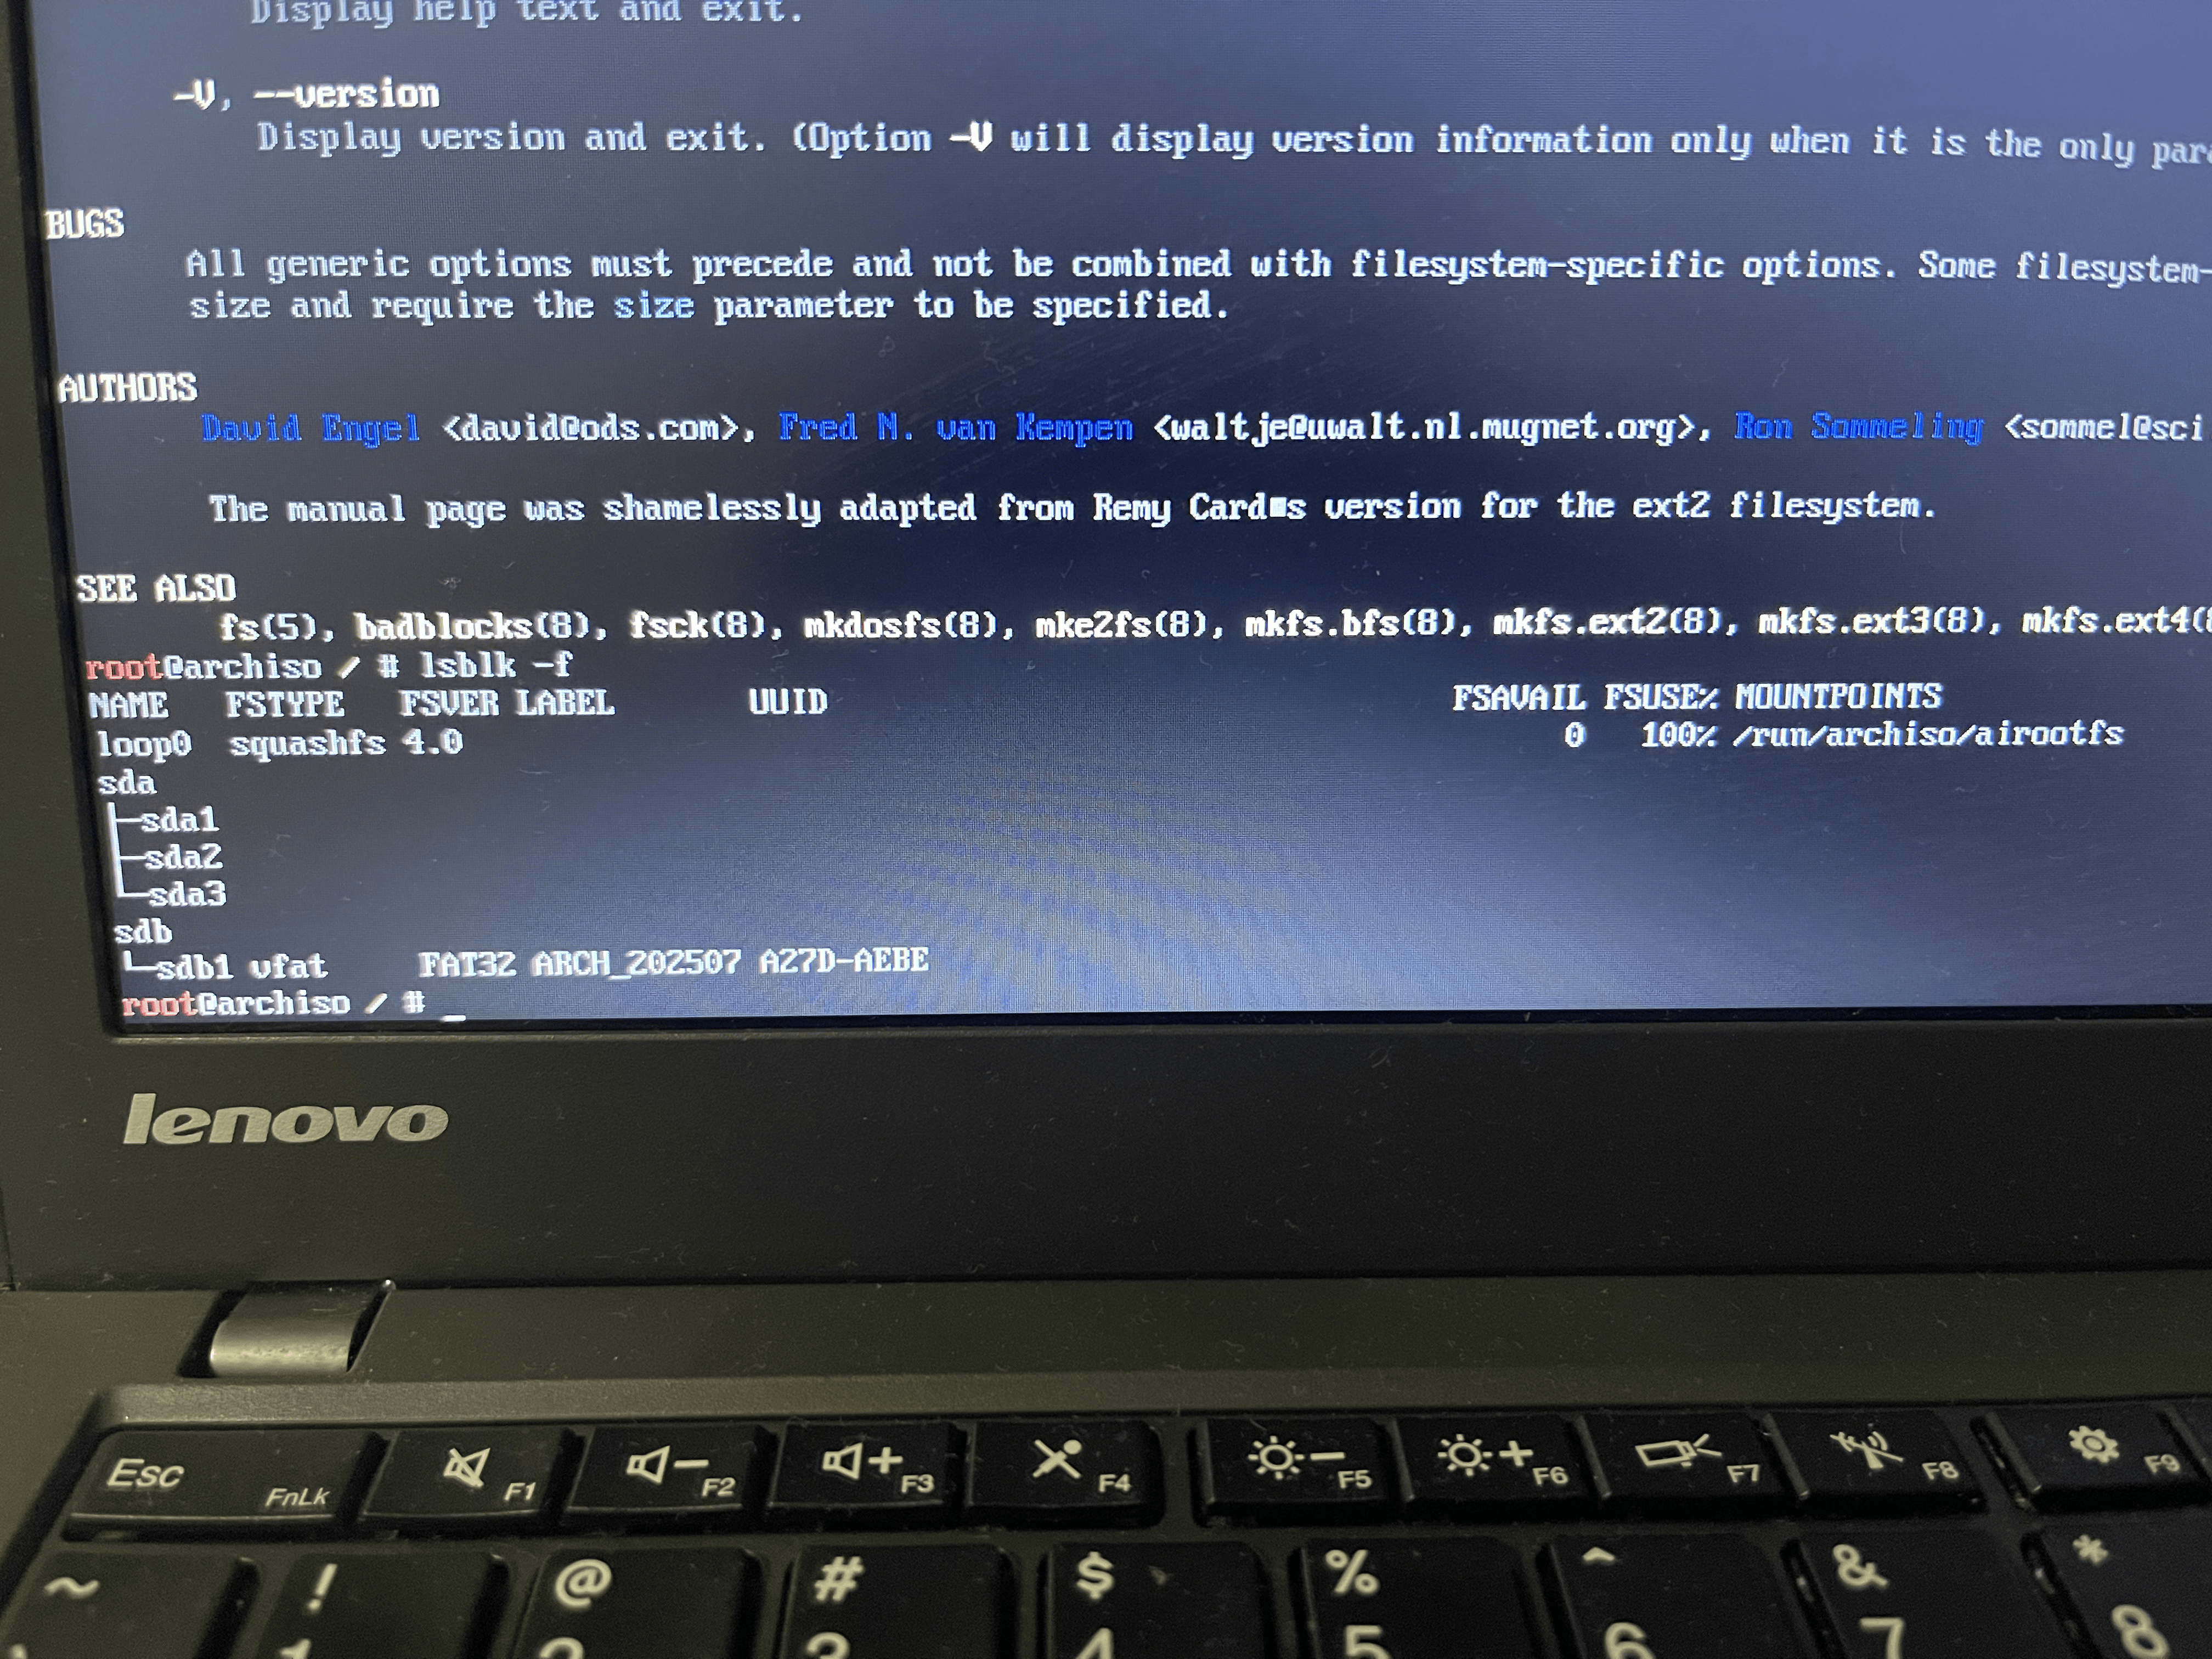
currently,
loop0is my live ISO filesystem (squashfs)sdb1is my USB drive’s filesystem(vfat)- crucially, for
/dev/sda1,/dev/sda2, anddev/sda3, theFSTYPEcolumn is completely empty, because I haven’t format them yet.
Create the FAT32 file system on /dev/sda1 (EFI System Partition):
mkfs.fat -F 32 /dev/sda1  # FAT size 32
# (This command aligns with the documentation's requirement for EFI system partitions to be FAT32.)
# mkfs.fat 4.2 (2021-01-31)
Create the Ext4 file system on /dev/sda2
mkfs.ext4 /dev/sda2
# (This is a common and robust filesystem for your main Linux system.)
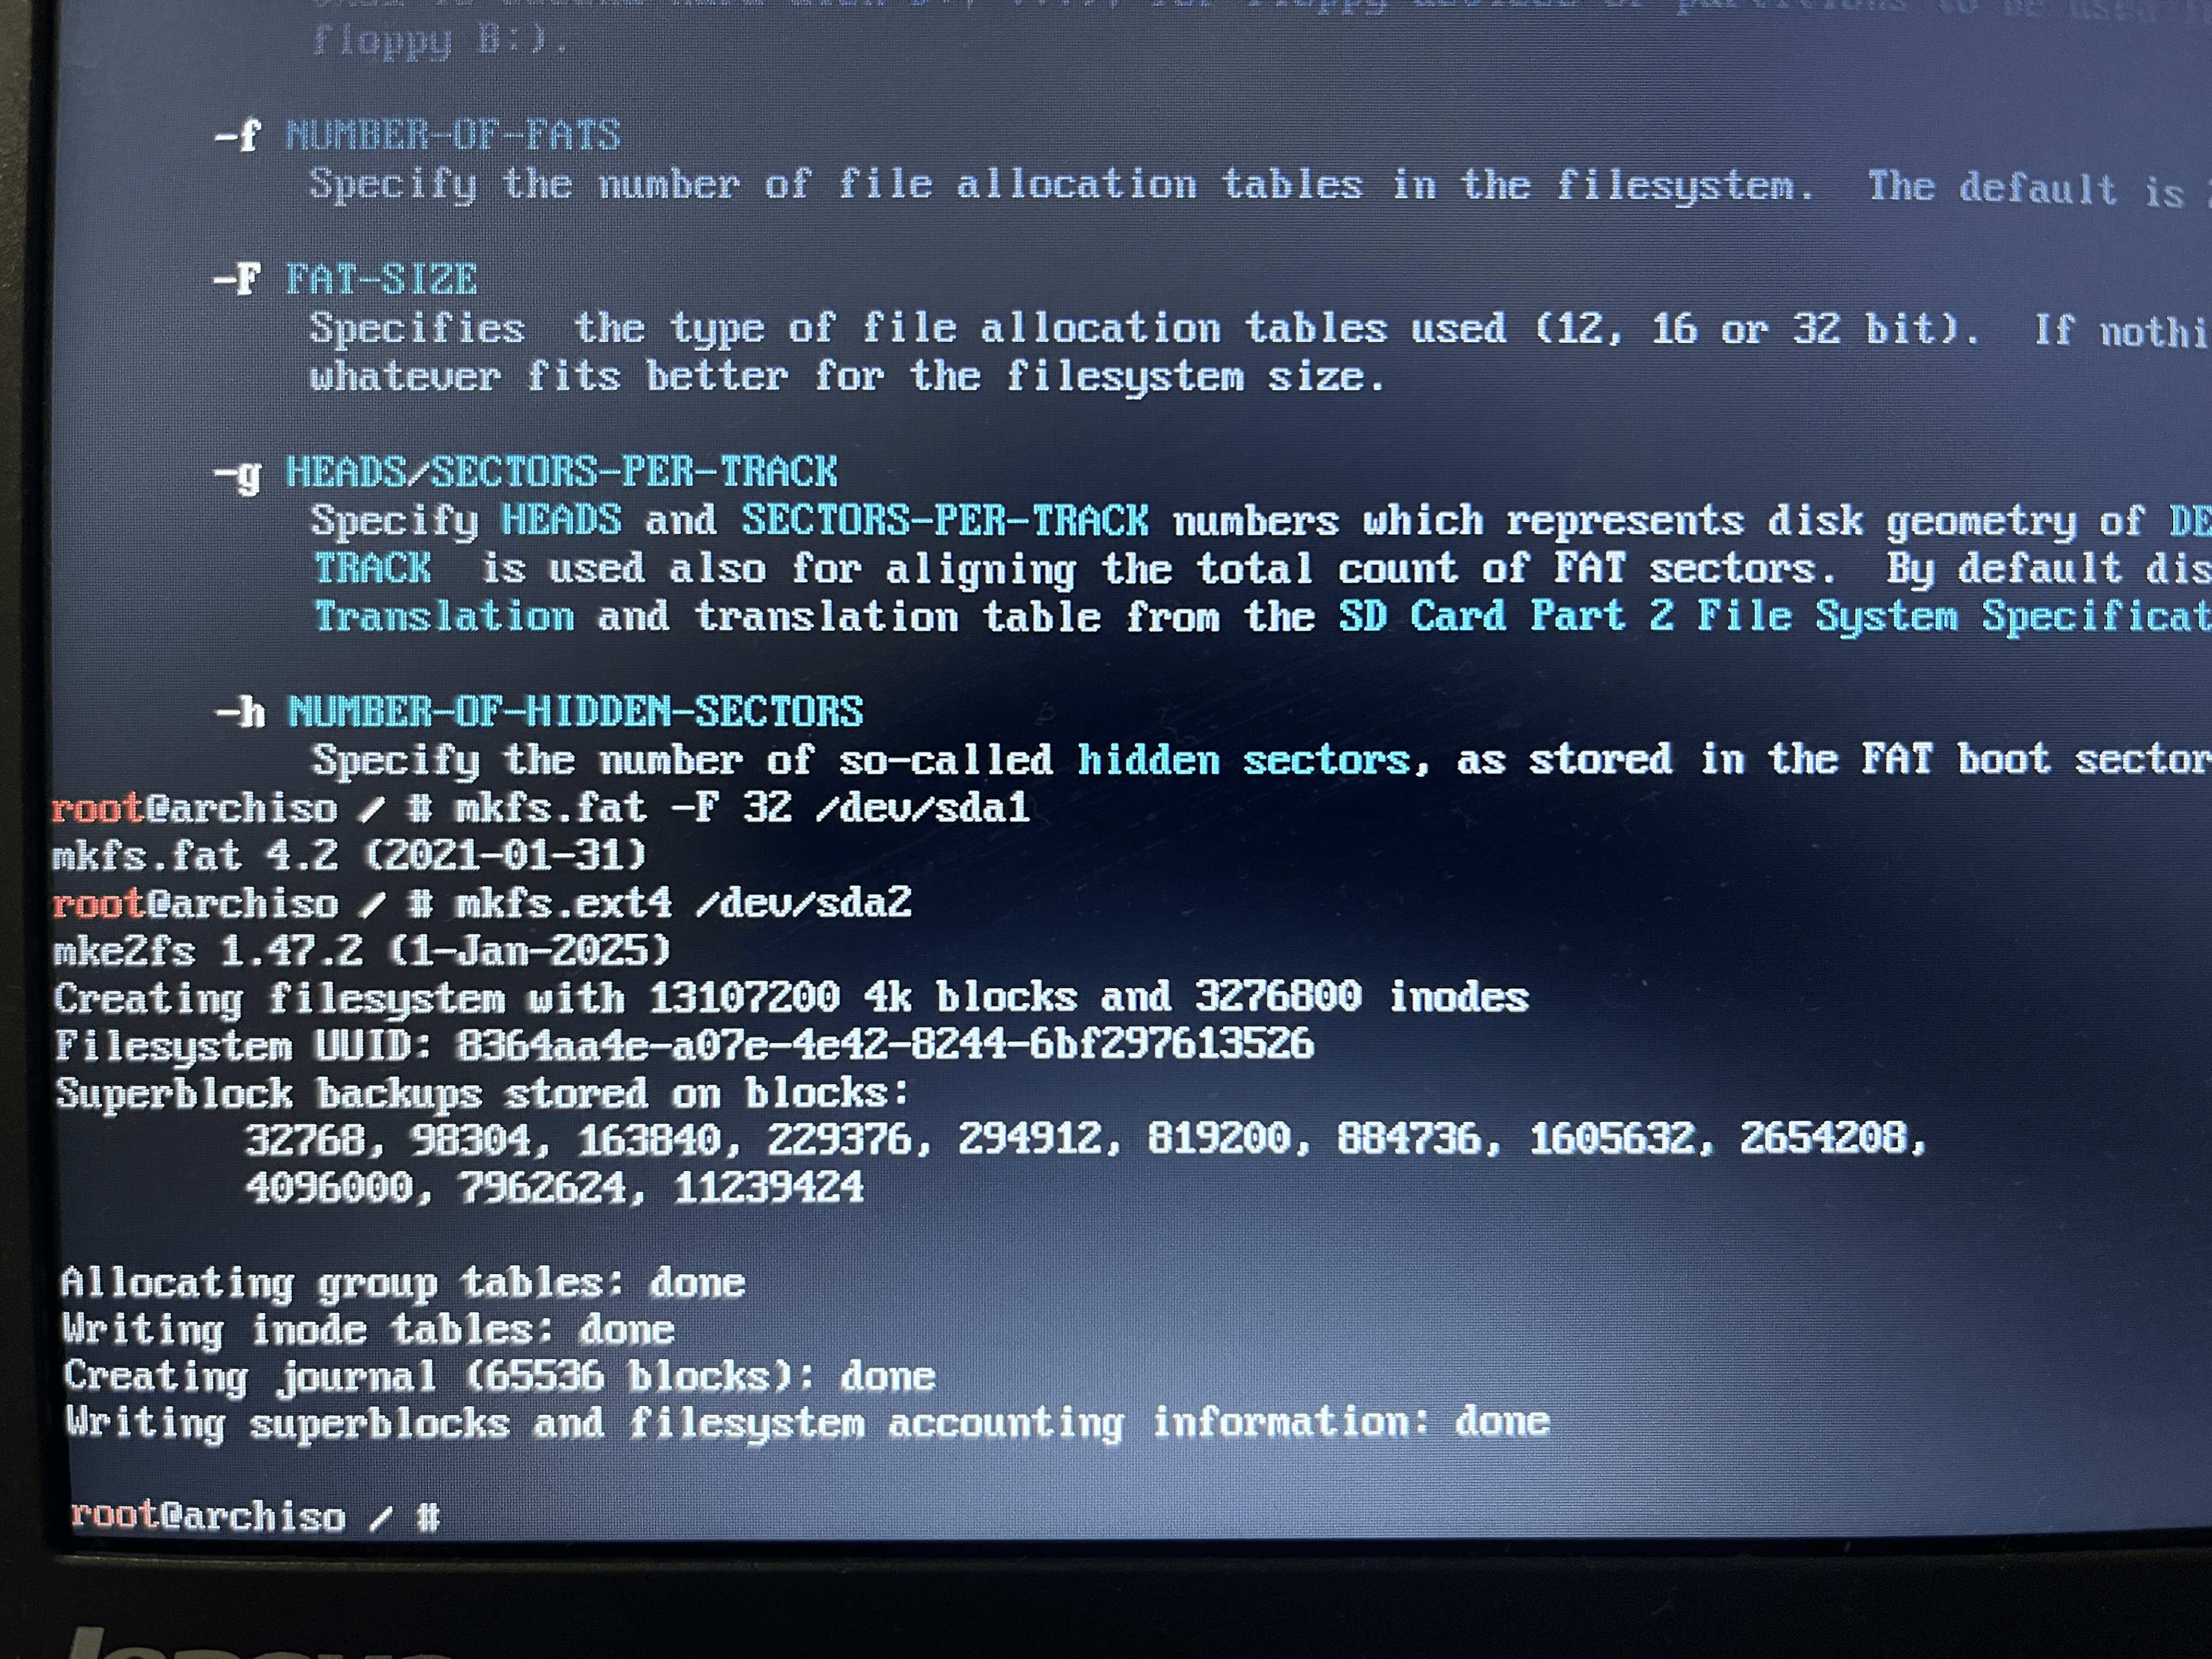
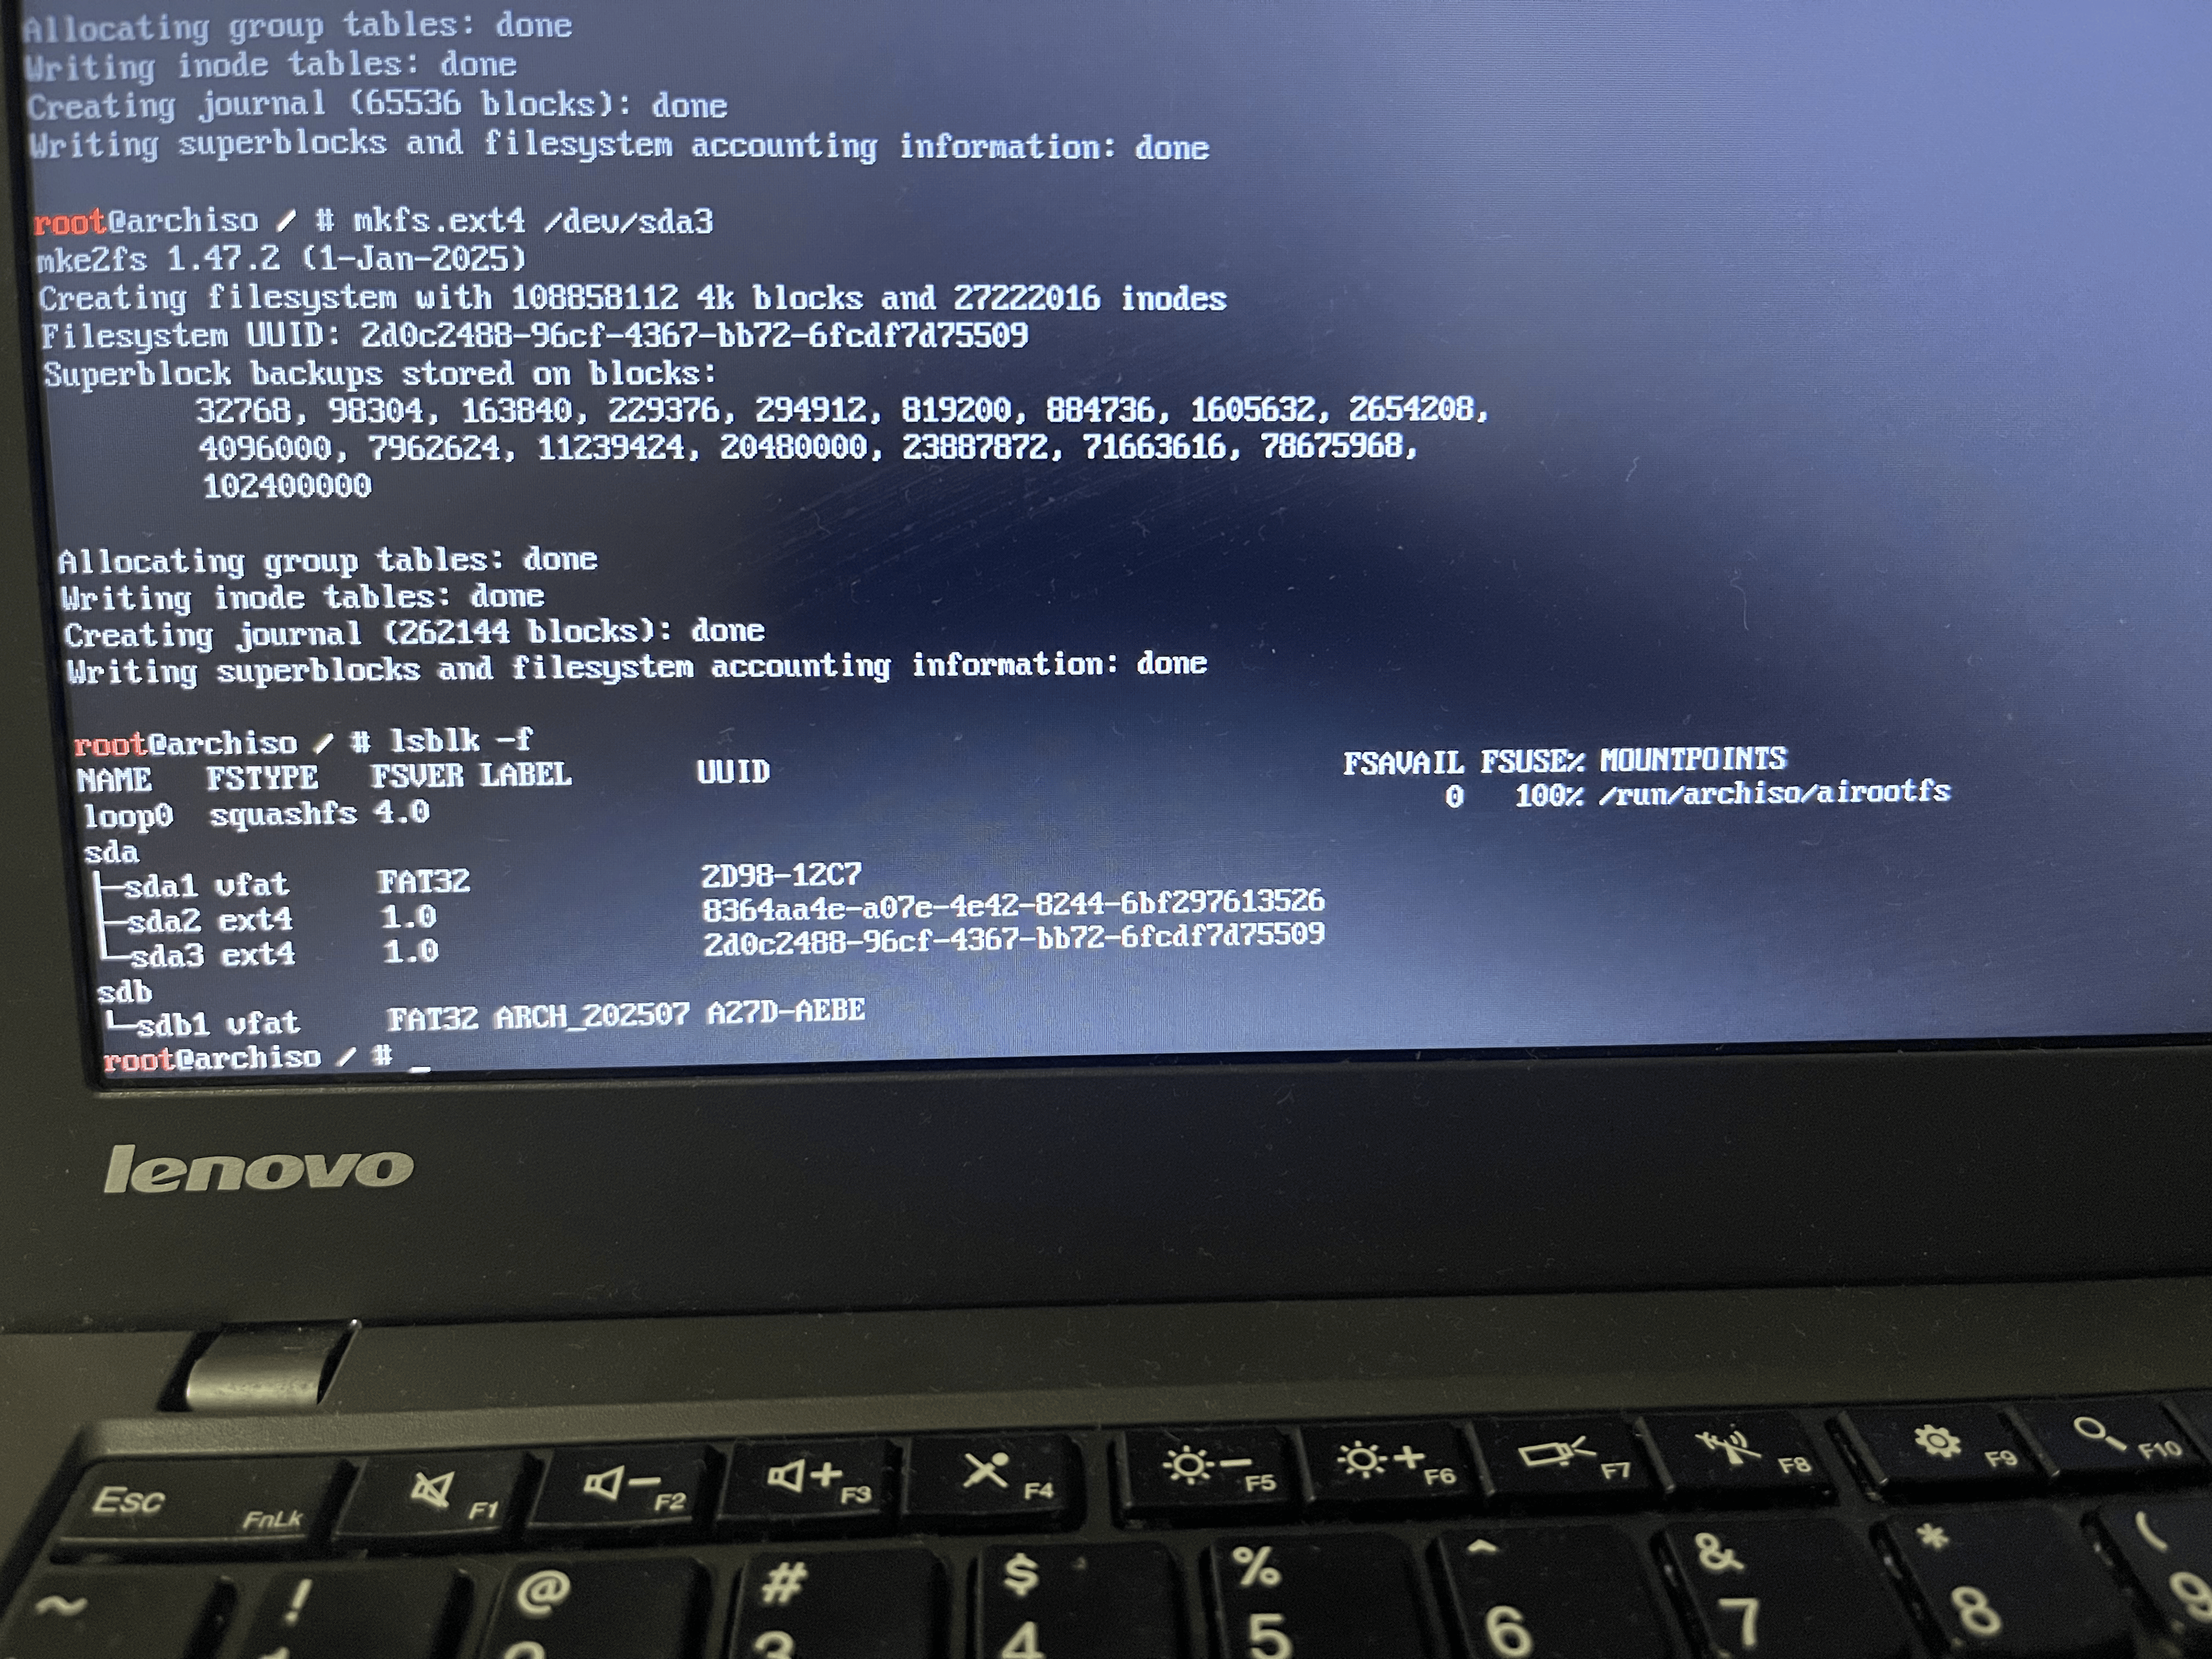
Create the Ext4 file system on /dev/sda3 (your Home Partition):
mkfs.ext4 /dev/sda3
# (Ext4 is also excellent for your personal data.)
Mount a file system
So far, the operations I’ve done before all happens in USB drive, now we can finally considering move OS to the PC hard drive
Mount the root volume to /mnt, for example, if the root volume is dev/root_partition:
mount /dev/root_partition /mnt
Here are my current partitions before mount:
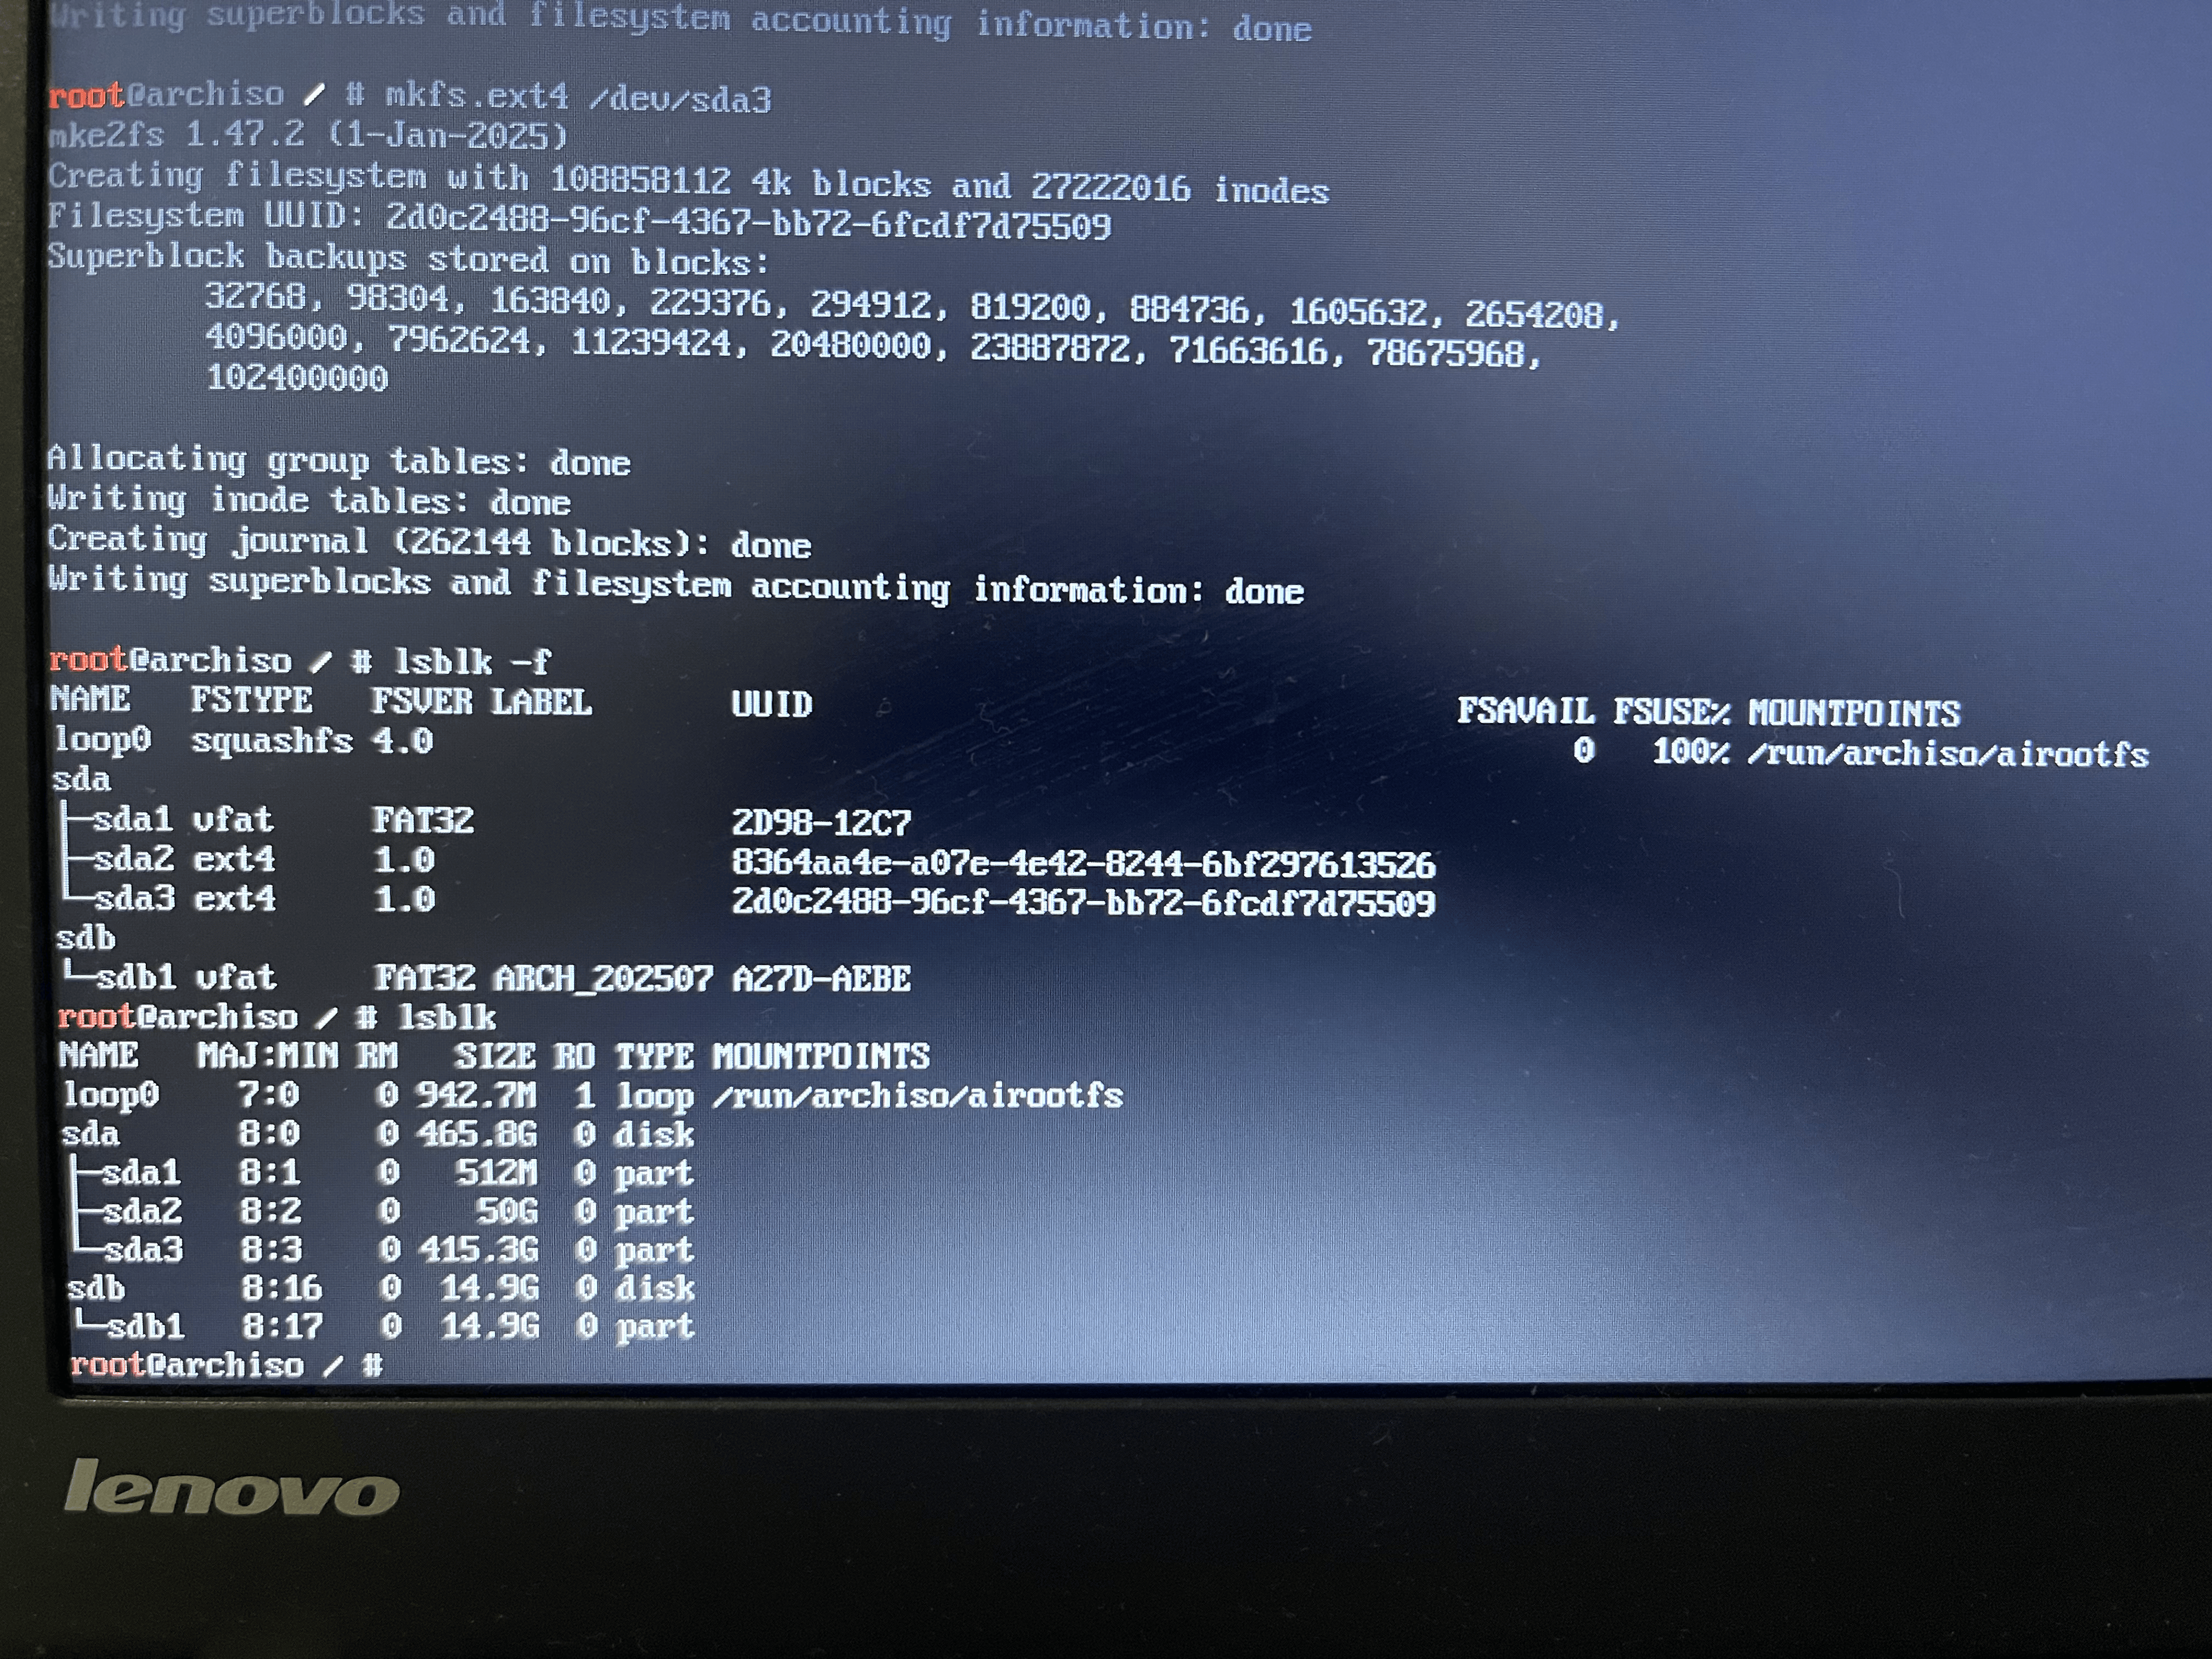
- Notice that the
MOUNPOINTcolumn is currently empty forsda1,sda2,sda3
Mount these newly formatted partitions.
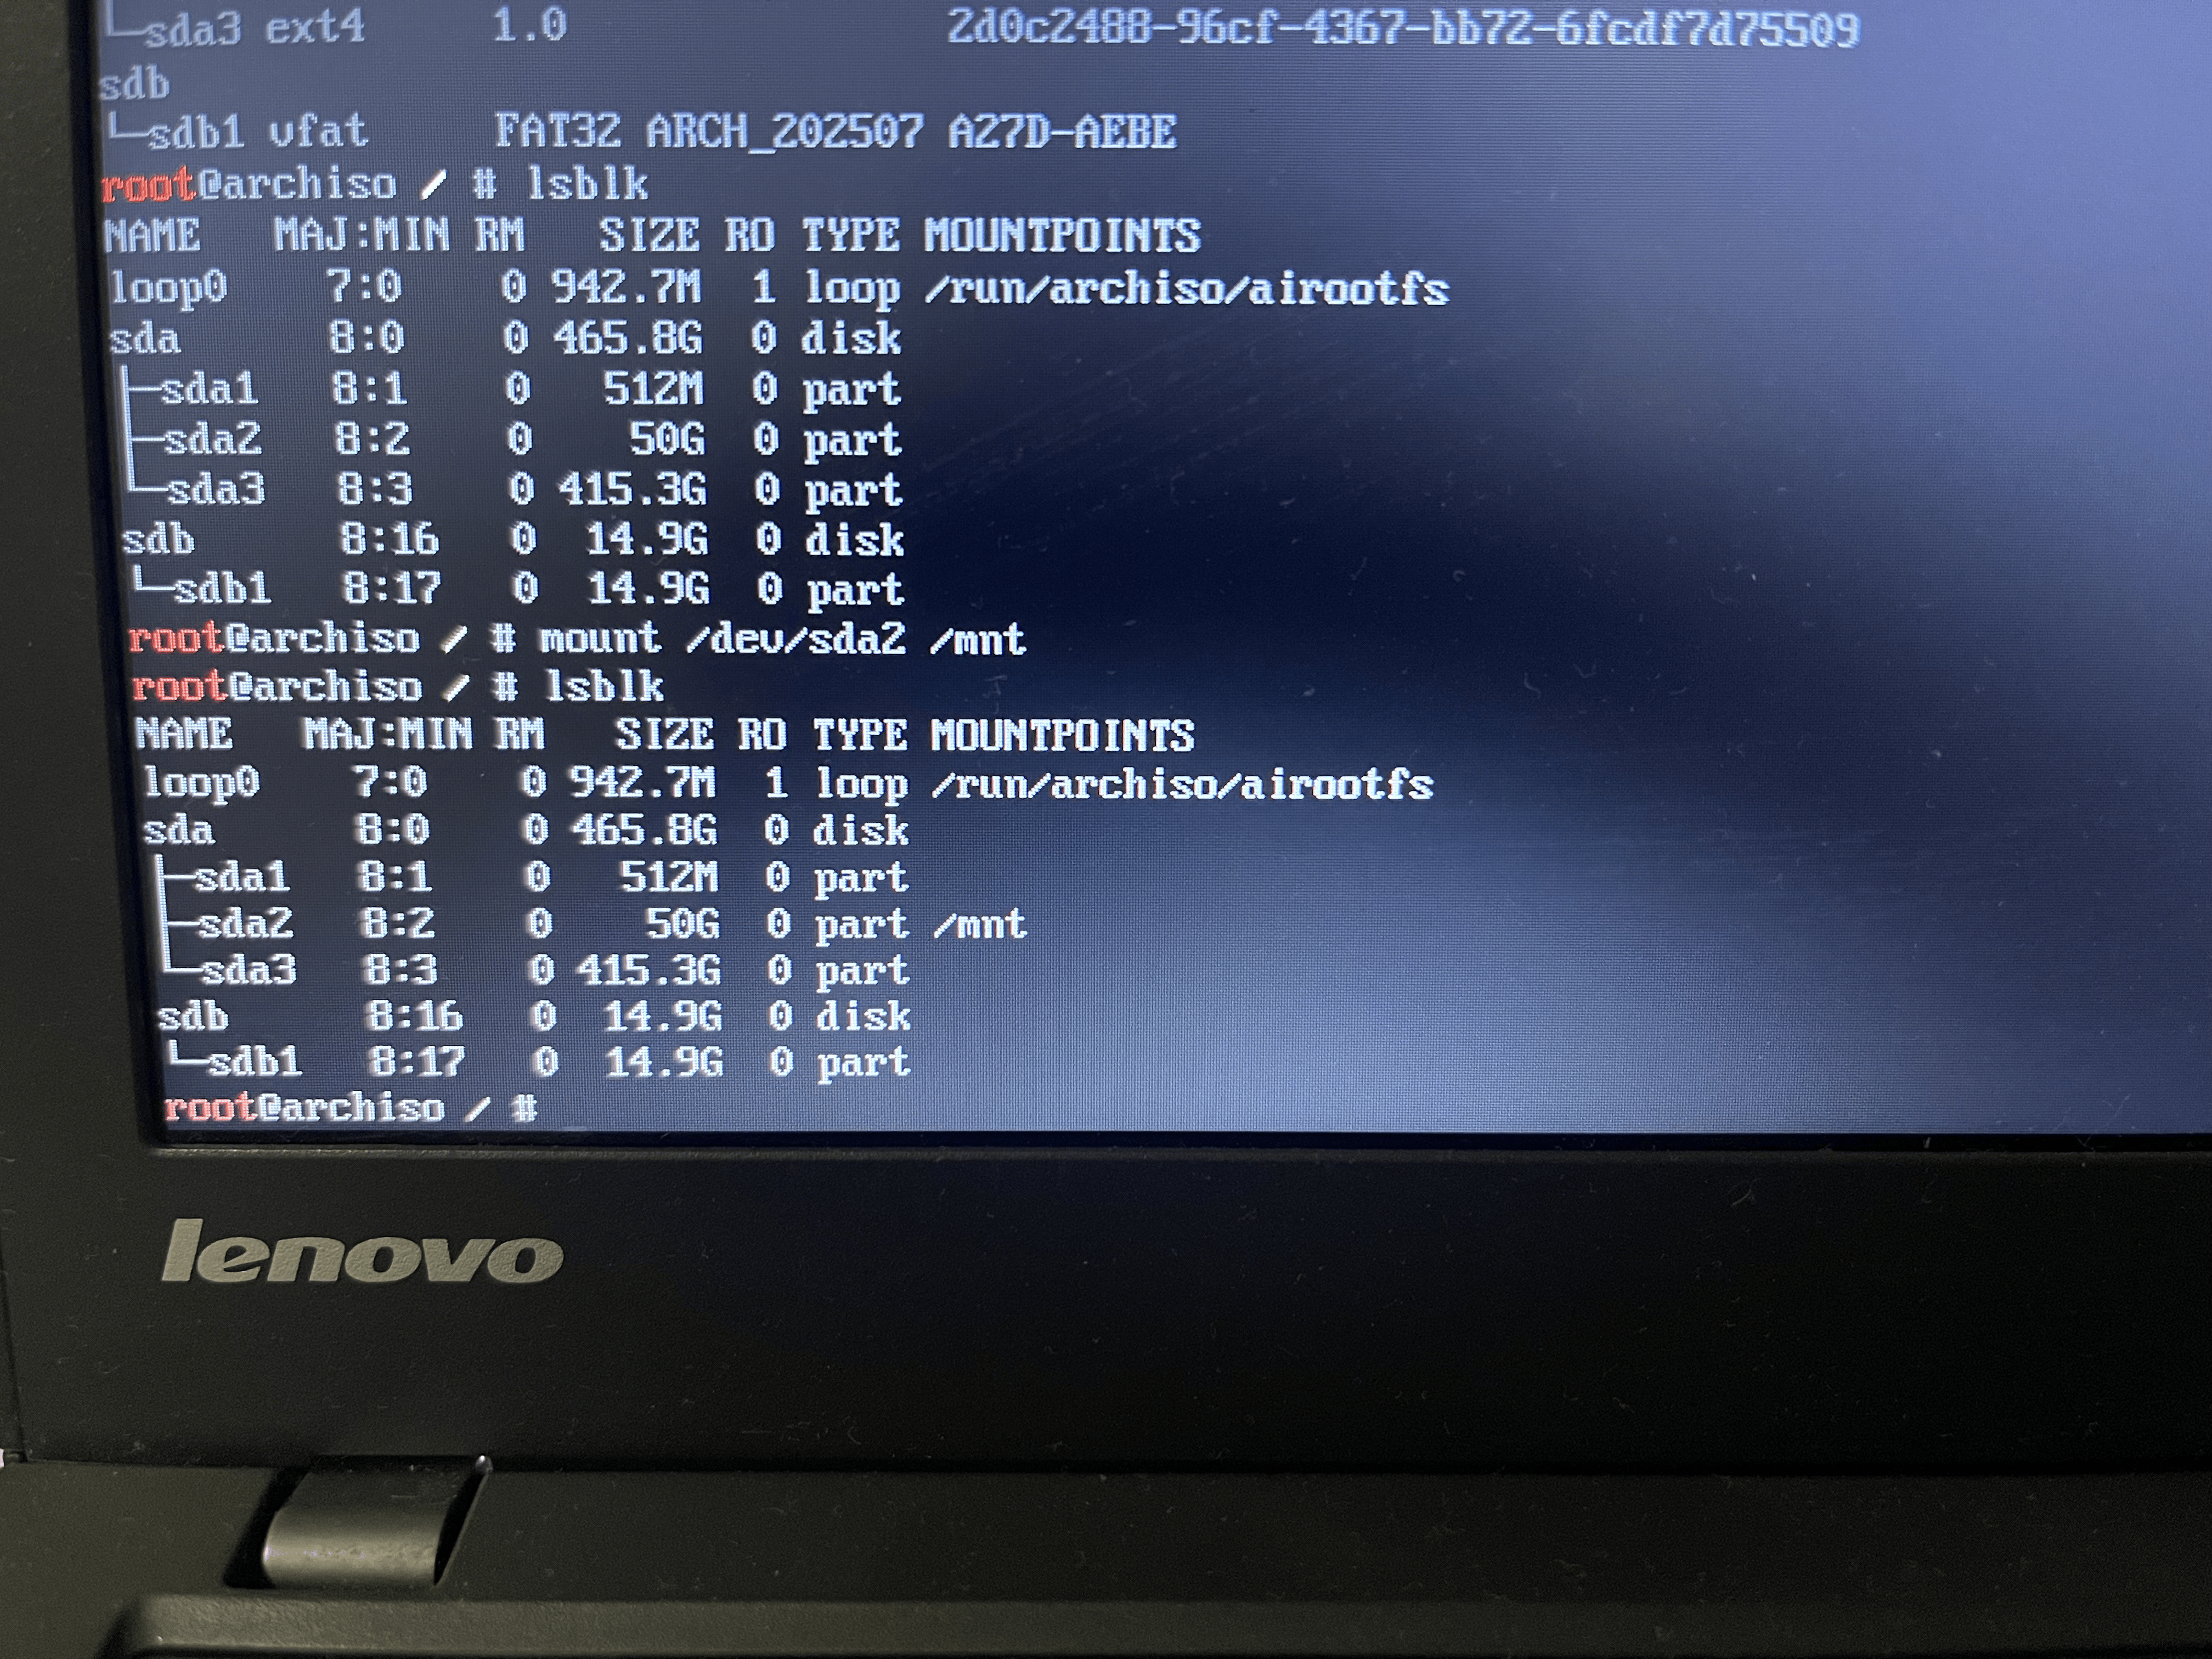
Mount the Root Partition
- root partition:
/dev/sda2
mount /dev/sda2 /mnt
Create any remaining mount points under /mnt (such as /mnt/boot for /boot) and mount the volumes in their corresponding hierarchical order.
what's difference between root(/) and boot/?
root (/) is the entire operating system.boot (/boot) is a special directory within the root filesystem (or a separate partition mounted there) that contains only the files needed for the very first stages of booting the system.
For UEFI, the EFI System Partition (ESP) (/dev/sda1) must be a separate FAT32 partition, and mounting it to /mnt/boot (or /mnt/boot/efi) is the standard way to set it up so your UEFI firmware can find the bootloader and load Arch Linux.
Create the mount point for your EFI System Partition and Mount it (/dev/sda1):
(This connects your EFI partition where the bootloader files will reside.)
mkdir -p /mnt/boot
mount /dev/sda1 /mnt/boot
Create the mount point for your Home Partition and Mount it (/dev/sda3):
(This connects your separate home partition to its correct place in the file system hierarchy.)
sudo mkdir -p /mnt/home
sudo mount /dev/sda3 /mnt/home
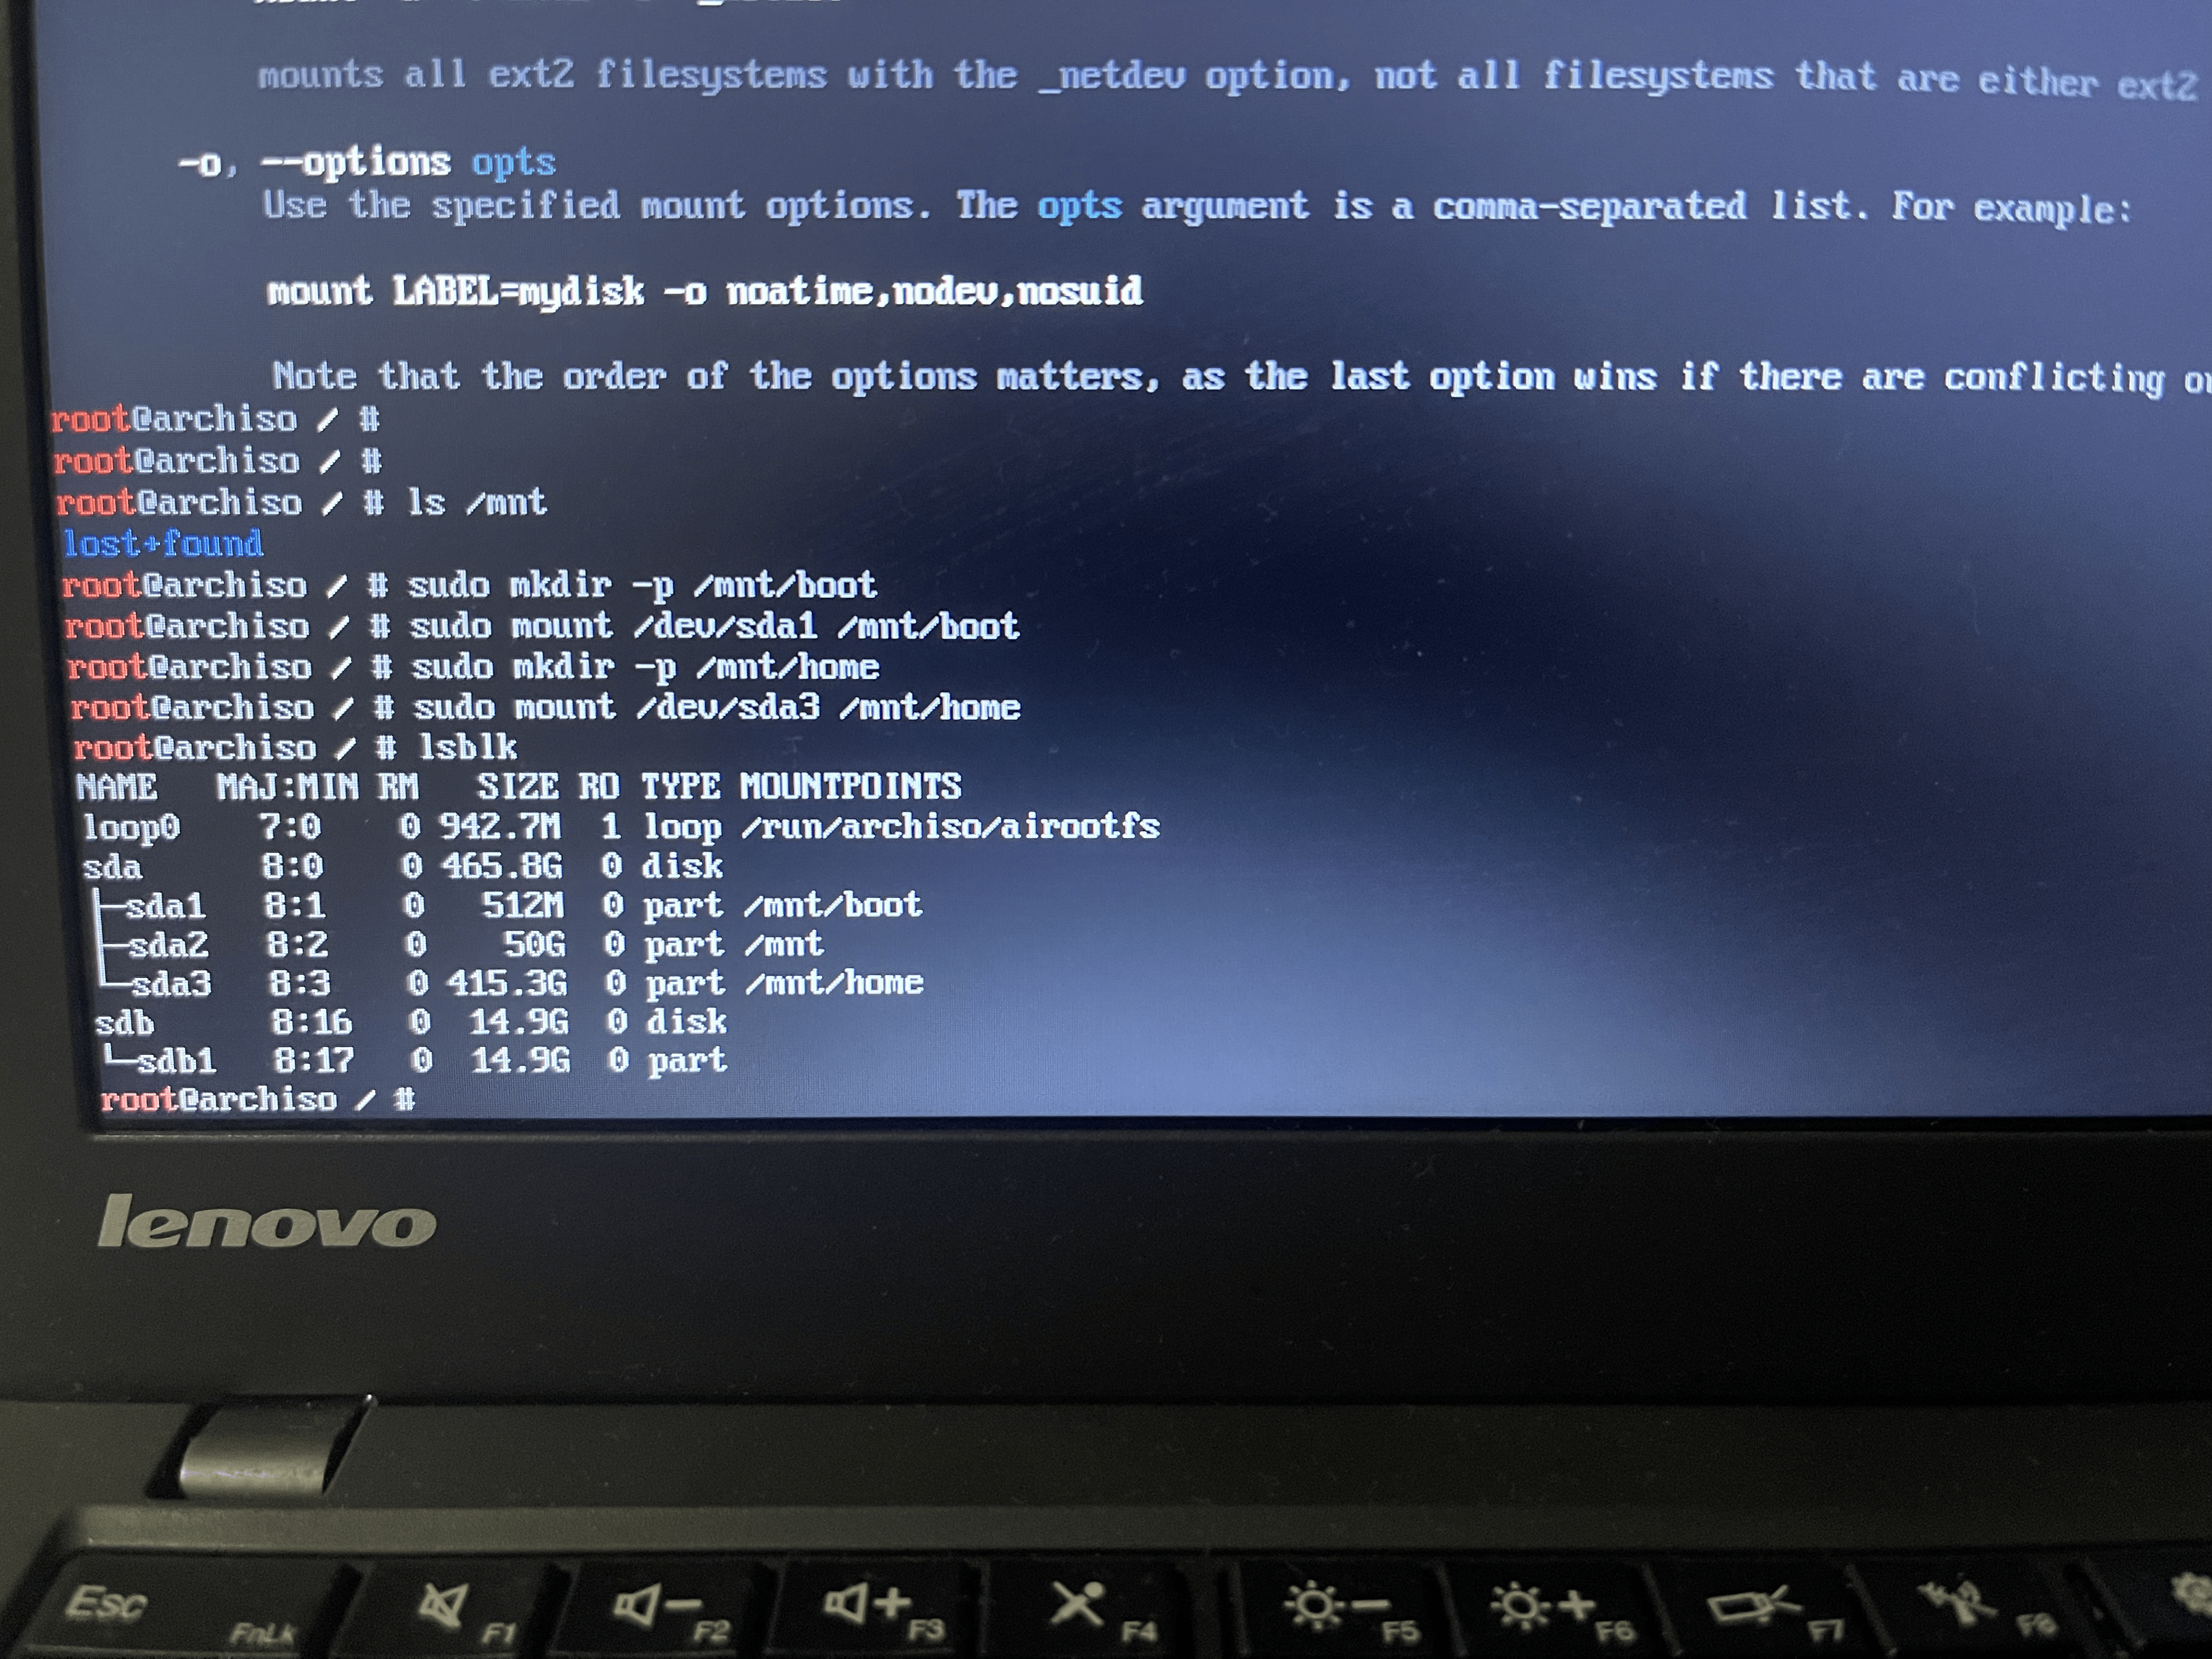
Why it is possible that /mnt has 50G and /mnt/home has 415.3G?
-
/mnt is the mount point for your Root Partition (/dev/sda2). I sized this partition at 50GB. So, the file system mounted at /mnt will have a capacity of 50GB.
-
/mnt/home is the mount point for your Home Partition (/dev/sda3). I sized this partition to take up the remainder of your disk (415.3GB). So, the file system mounted at /mnt/home will have a capacity of 415.3GB.
Even though /mnt/home is a directory inside /mnt in the file system hierarchy, its storage space comes from a completely separate physical partition (/dev/sda3), not from the 50GB of /dev/sda2.
This is the power of separate partitions and mount points in Linux! Each mounted partition has its own independent storage capacity, even if it’s a subdirectory of another mounted partition.
System Installation
Finally bro, the next phase is to install the base Arch Linux system onto these mounted partitions.
Package manager
For the package manager I choose to use pacman because it has better integration with Arch build system. It can manage packages whether from official repositories or user’s own builds.
Edit mirrorlist
Packages to be installed must be downloaded from mirror servers, which are defined in /etc/pacman.d/mirrorlist. On the live system, after connecting to the internet, reflector updates the mirror list by choosing 20 most recently synchronized HTTPS mirrors and sorting them by download rate.
The higher a mirror is placed in the list, the more priority it is given when downloading a package. You may want to inspect the file to see if it is satisfactory. If it is not, edit the file accordingly, and move the geographically closest mirrors to the top of the list, although other criteria should be taken into account.
This file will later be copied to the new system by pacstrap, so it is worth getting right.
Install base package, Linux kernel and fimware for common hardware
Configure mirrorlist:
use reflector to update your /etc/pacman.d/mirrorlist with fast mirrors from your location
[!NOTE] Make sure this pc has internet connection!!
What you need to do now is connect your Wi-Fi to your home network using iwctl:
[!NOTE] You will only find this command when exit root mode
iwctl
scan for available networks:
station wlan0 scan
(wait a few seconds for the scan to complete. You might not see any immediate output here.)
List available networks:
station wlan0 get-networks
This will show a list of Wi-Fi networks in your area, including their SSIDs(names)
Connect to your Wi-Fi network:
Replace YOUR_SSID with the actual name of your home Wi-Fi network from the list you just saw
station wlan0 connect YOUR_SSID
- if your network has a password, it will prompt you for the passphrase. Type it carefully and press Enter.
ctrl-c or type exit to exit iwctl
Select the HTTPS mirrors synchronized within the last 12 hours and located in either France or Germany, sort them by download speed, and overwrite the file /etc/pacman.d/mirrorlist with the results
reflector --country France,Germany --age 12 --protocol https --sort rate --save /etc/pacman.d/mirrorlist
sudo reflector --country "Your country" --protocol https --sort rate --save /etc/pacman.d/mirrorlist
pacstrap -K /mnt base linux linux-firmware
Install CPU microcode updates - amd-ucode or intel-ucode—for hardware bug and security fixes
pacstrap -K /mnt base intel-ucode
Package for accessing documentation in man and info pages:
pacstrap -K /mnt man-db man-pages texinfo
why not pacman?
pacman:
-
Is the package manager for a running Arch Linux system.
-
It installs packages relative to the root directory (/) of the system it’s currently running on.
-
When you’re in the live USB environment,
pacmanwould, by default, try to install packages onto the USB drive’s filesystem if you didn’t specify otherwise.
pacstrap:
-
Is a special script designed specifically for the installation process.
-
The
-K /mntpart of the command tellspacstrapto install the packages not to the root of the current live environment (your USB), but to the specified target directory (/mnt), which is where you’ve mounted your future root partition (/dev/sda2). -
It “bootstraps” a new Arch Linux system onto a different partition. It also handles some initial setup steps that
pacmanwouldn’t do when run normally, such as copying the mirrorlist (-K flag) and setting up basic directory structures for the new installation.
In essence:
-
You use pacstrap to build a new Arch Linux system onto a separate partition during installation.
-
You will use pacman (without pacstrap or /mnt arguments) to manage packages after you’ve installed Arch Linux and booted into your new system on the hard drive.
So, pacstrap is the correct tool for this specific “first installation” step.
Configure the system
Fastab
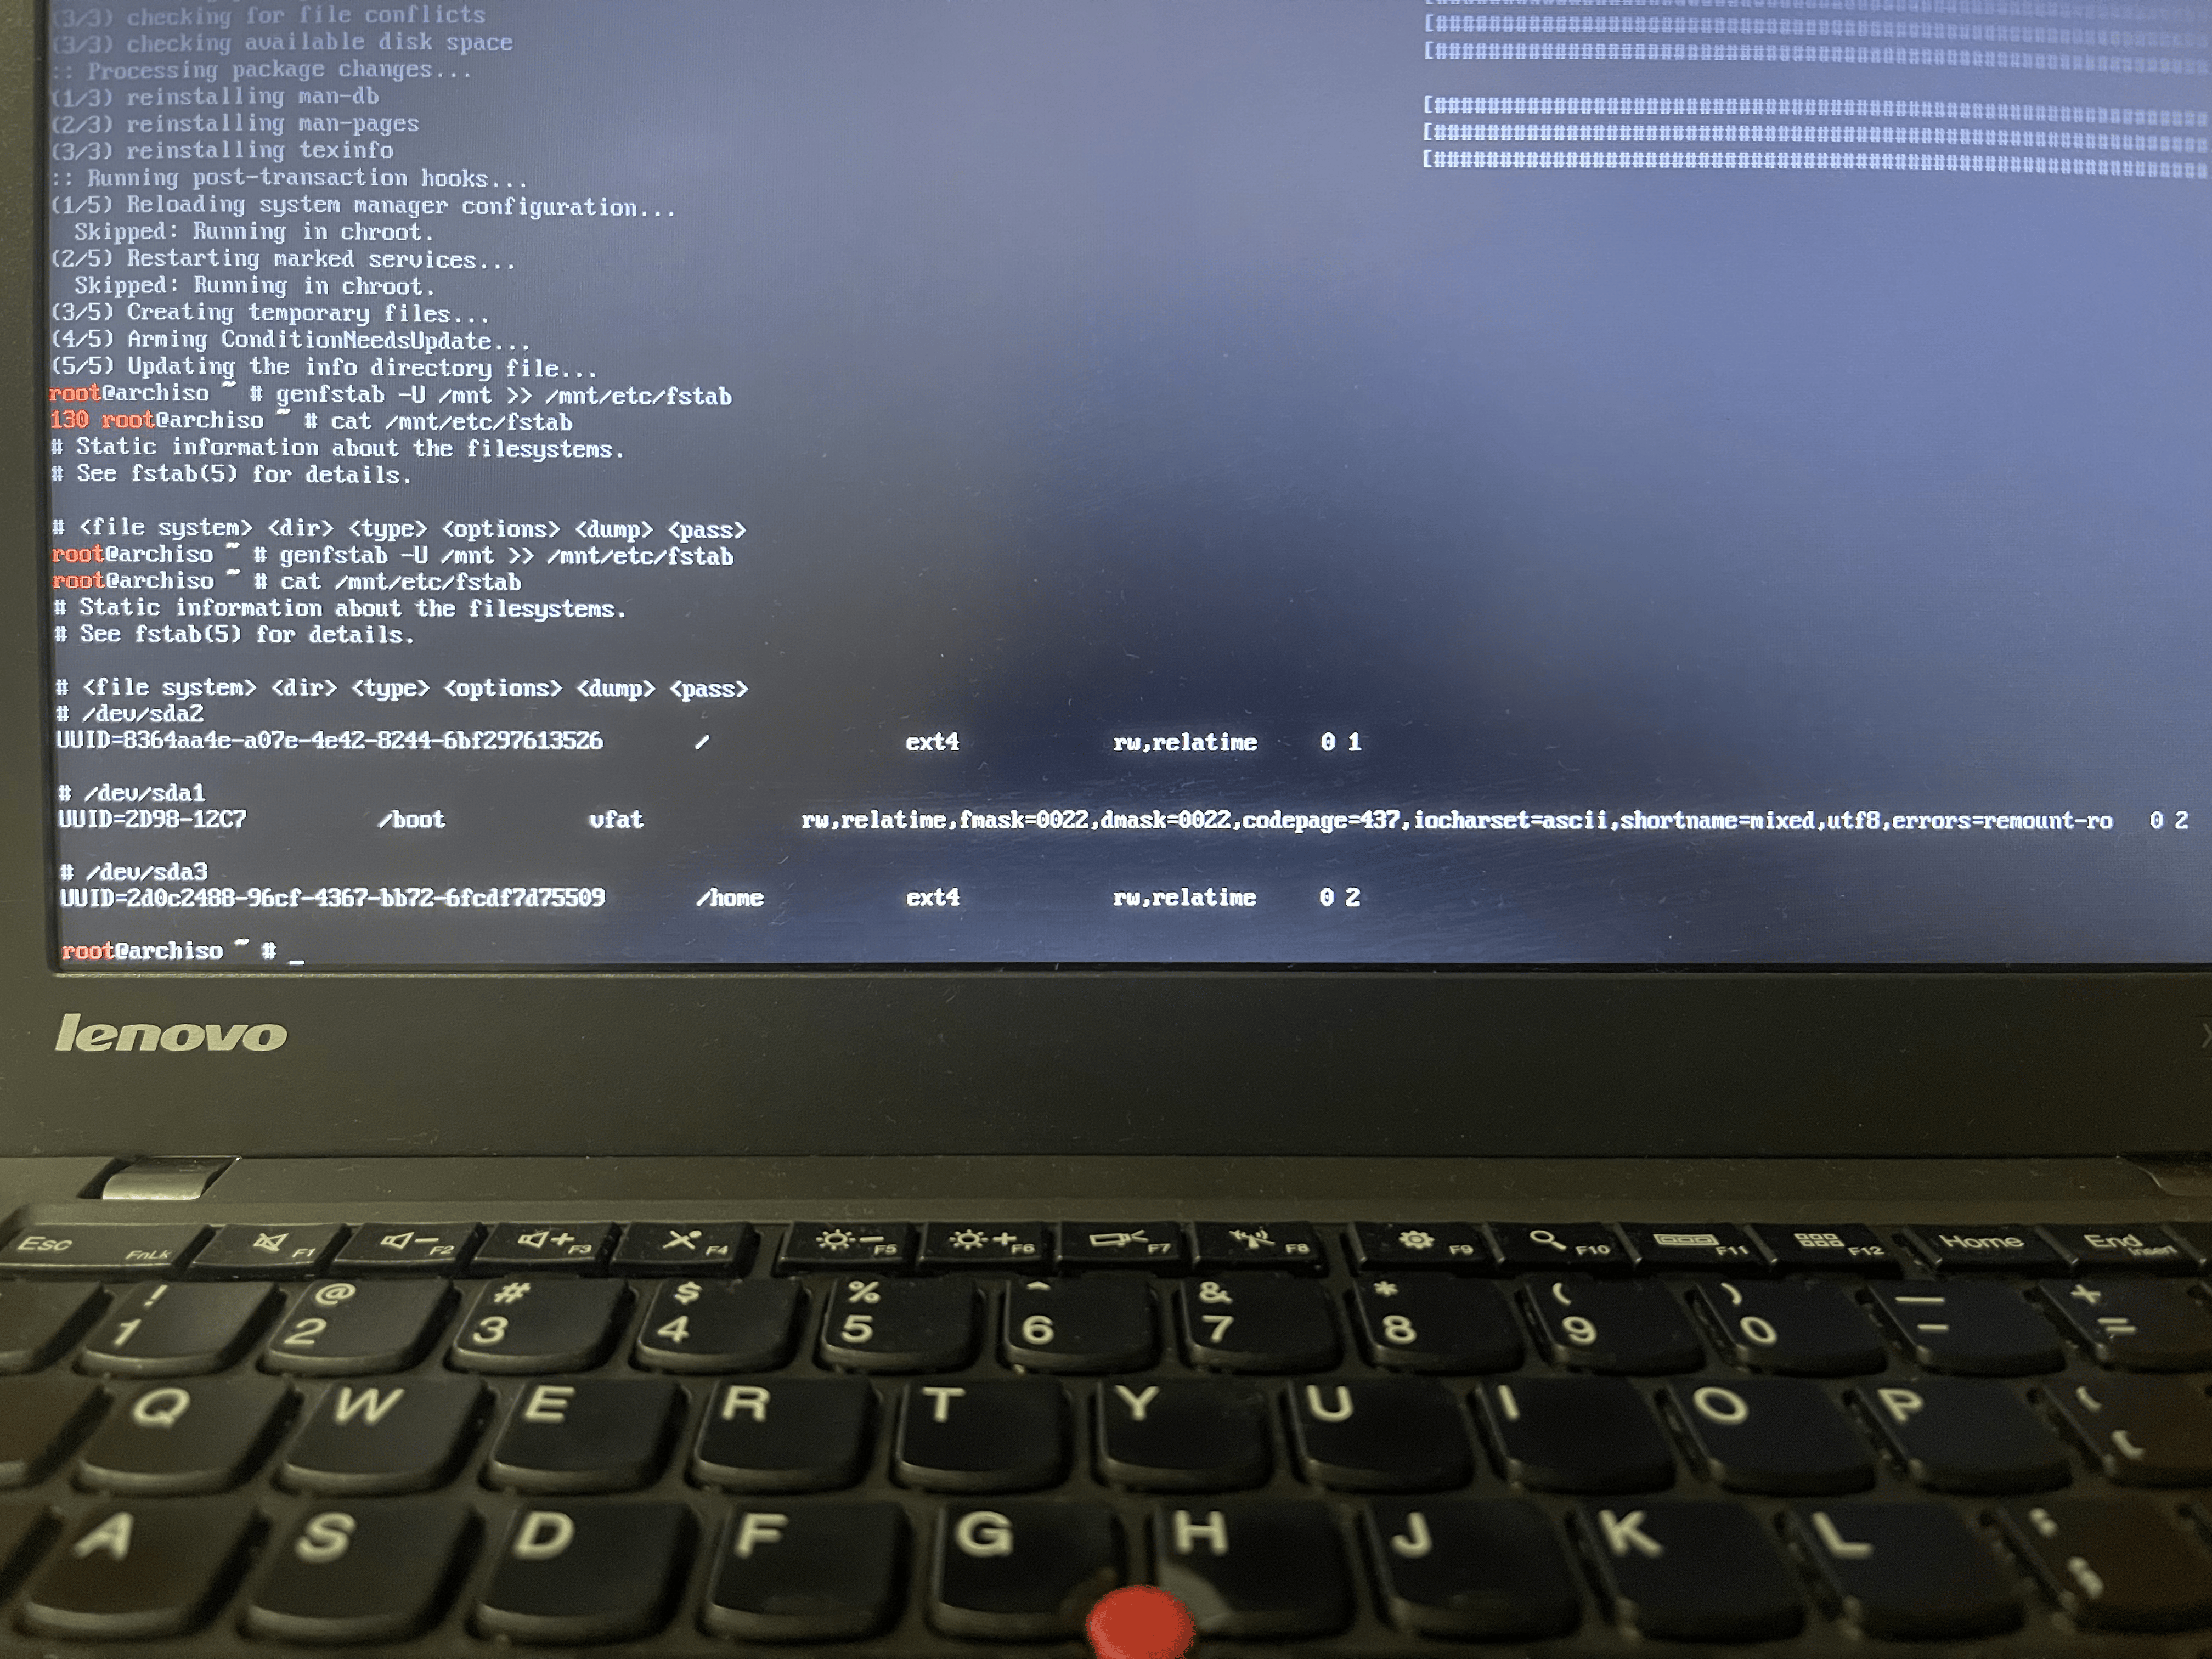
The file /mnt/etc/fstab is for getting needed file systems (like the one used for the boot directory /boot) mounted on startup
sudo genfstab -U /mnt >> /mnt/etc/fstab
Chroot
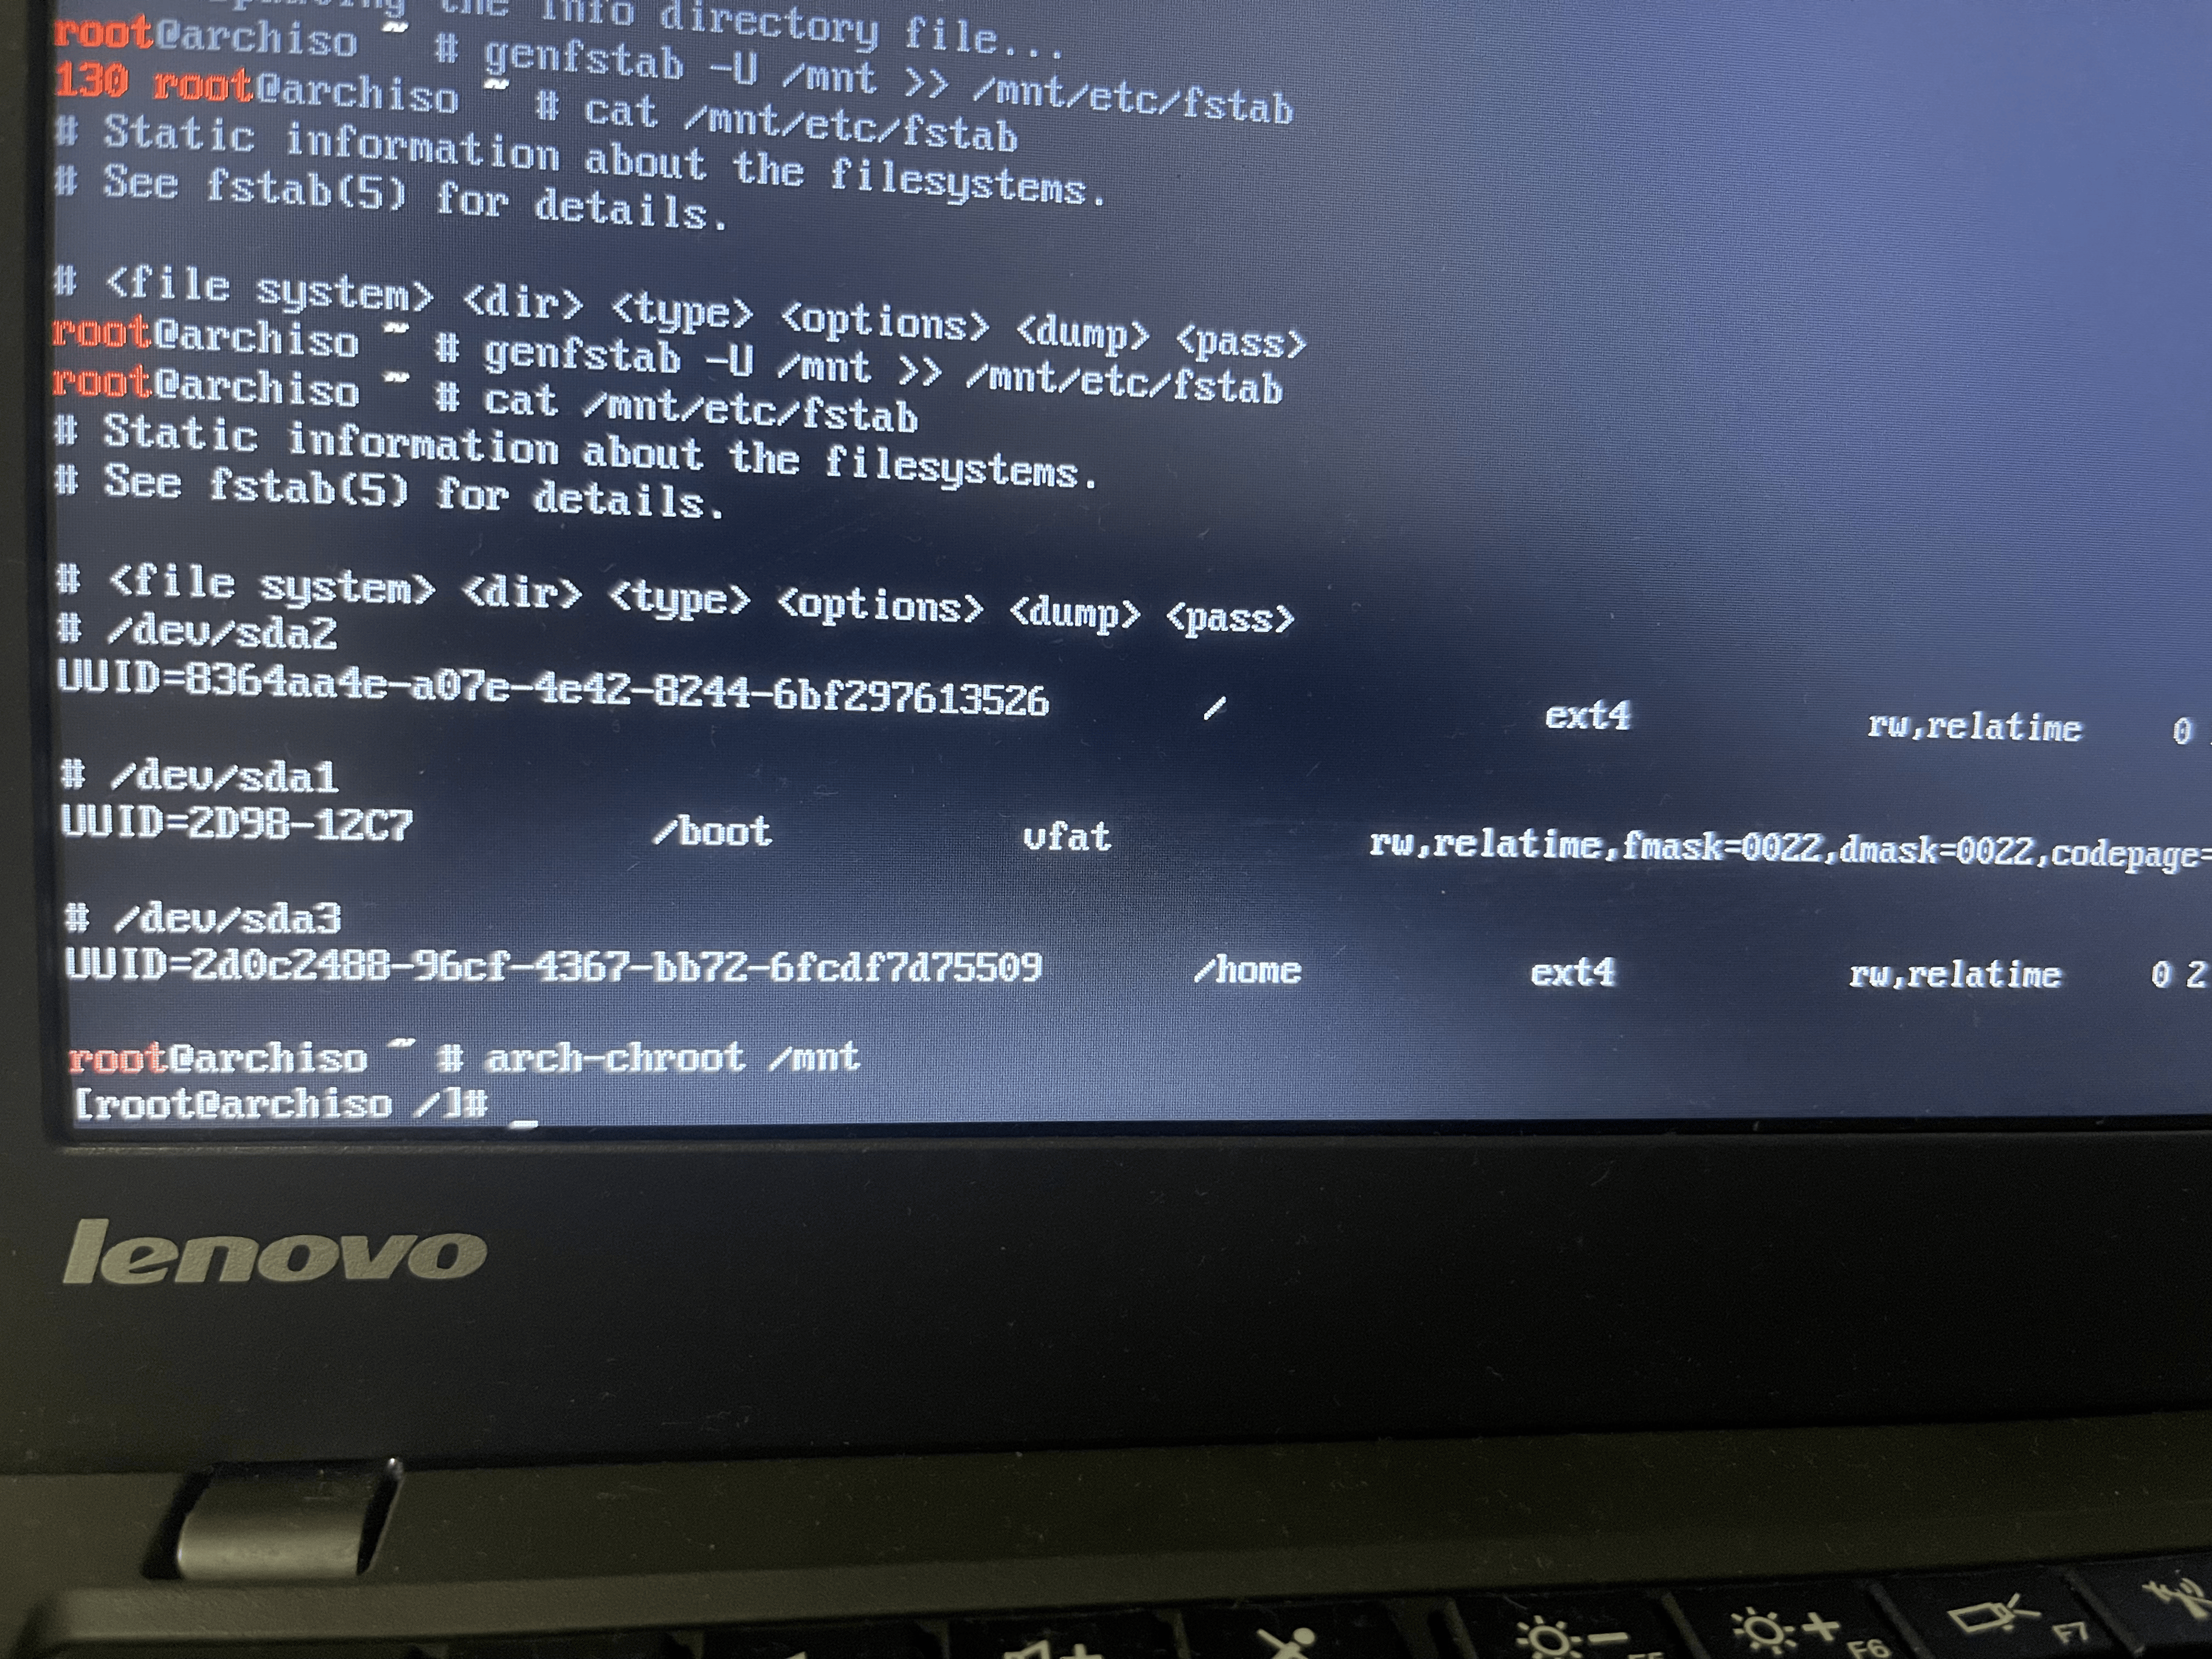
change root into the new system
arch-chroot /mnt
Time
set the time zone
ln -sf /usr/share/zoneinfo/PRC /etc/localtime
run hwclock(8) to generate /etc/adjtime
To prevent clock drift and ensure accurate time, set up time synchronization using a Network Time Protocol (NTP) client such as systemd-timesyncd
Localization
edit /etc/locale.gen and uncomment en_US.UTF-8 , UTF-8
side quest: install neovim
pacman -S neovim
home sweet home
create the locale.conf file , and set the LANG var accordingly:
LANG=en_US.UTF-8
Network configuration
To assign a consistent, identifiable name to your sytem (particularly useful in a networked environment), create the hostname file
/etc/hostname
yourhostname
Crucial step: Boot loader
If you don’t do this, when reboot the system, you will not see arch without the usb!!
make sure you’re in mnt
arch-chroot /mnt
install GRUB and efibootmgr
pacman -S grub efibootmgr
install GRUB to your EFI System partition:
grub-install --target=x86_64-efi --efi-directory=/boot --bootloader-id=ArchLinux --recheck
--efi-directory=/boot is crucial because that’s where /dev/sda1 is mounted inside your chroot.
--bootloader-id=ArchLinux will create a clear entry in your UEFI boot menu.
--recheck can sometimes help if there were any issues.
generate GRUB’s configuration file:
grub-mkconfig -o /boot/grub/grub.cfg
This command scans your system for kernels and creates the grub.cfg file that GRUB uses to boot
Root password
You can setup a root password, I want to set it after complete it
passwd
Reboot
Exit the chroot environment by typing exit or pressing ctrl+d
optionally mannually unmount all the partitions with unmount -R /mnt: this allows noticing any “busy” partitions, and finding the cause with fuser
unmount the /mnt (optional)
exit
umount -R /mnt
Finally, restart the machine by typing reboot
reboot
You will see the GNU GRUB CMD, if GRUB cannot find the grub.cfg, here are how to fix it:
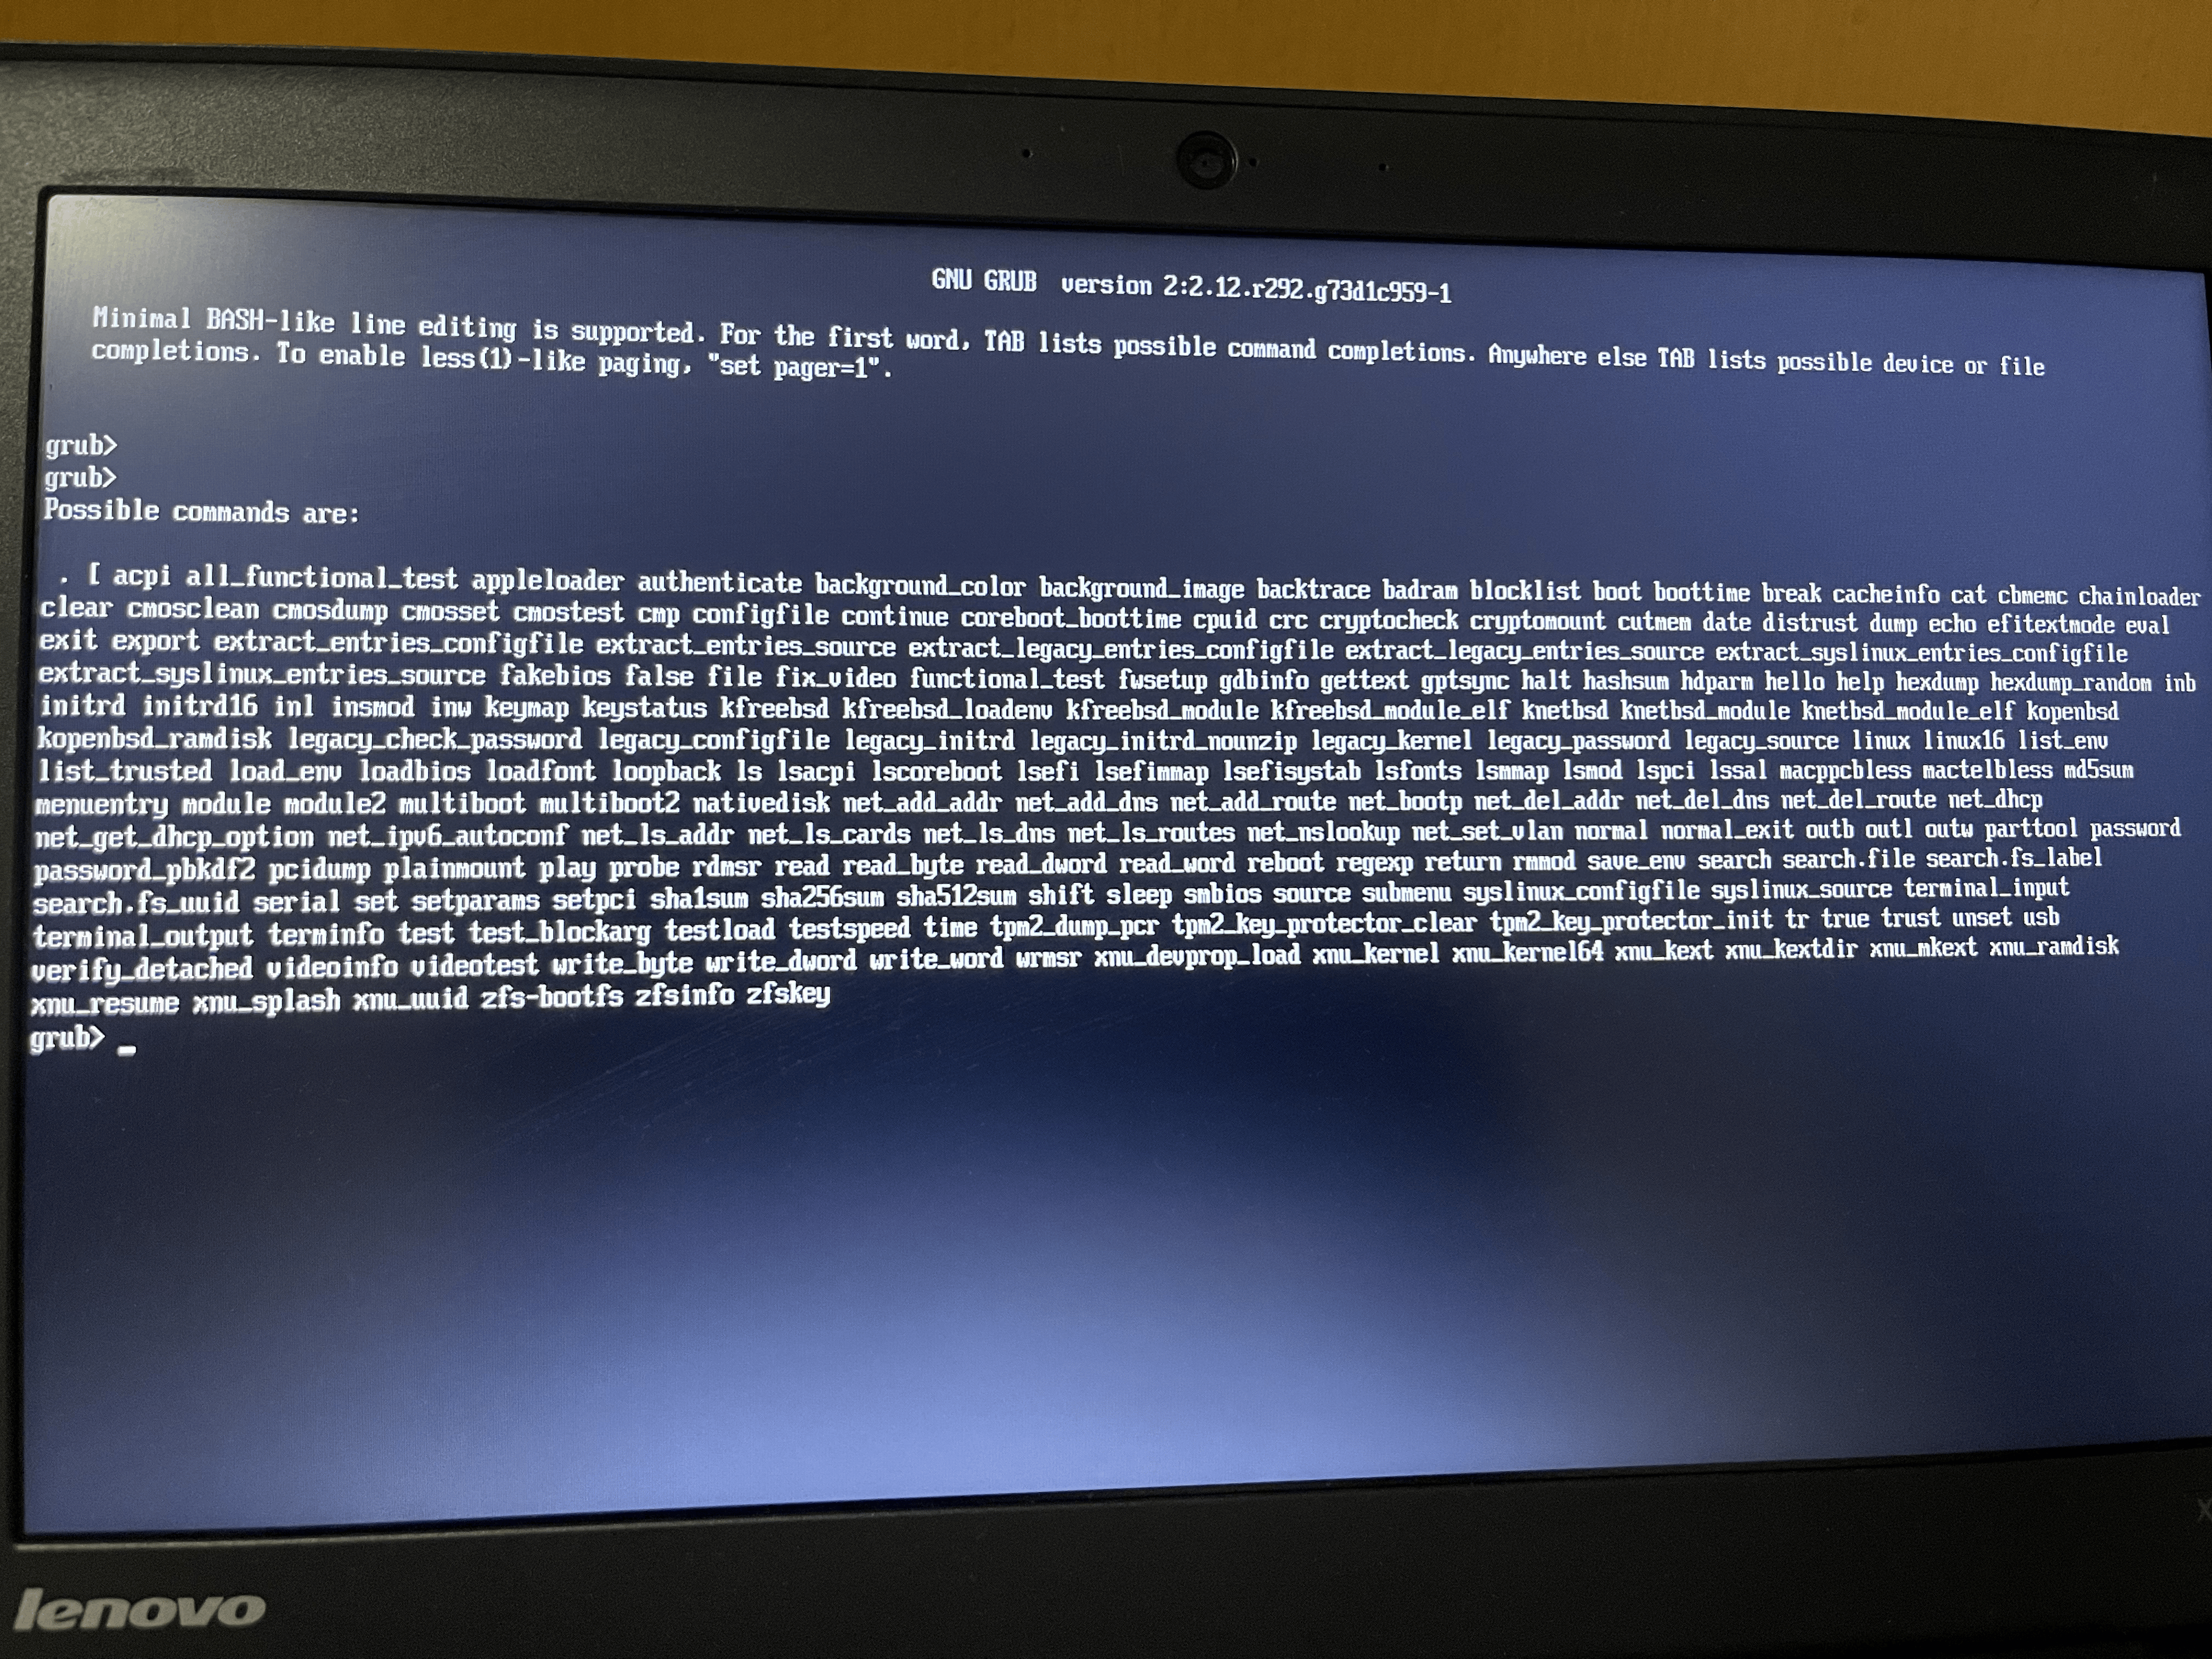
You cannot fix this from the grub> prompt. We need to go back into your installed system.
- Reboot your computer back into the Arch Linux live USB. (need to plugin USB again)
- perform mont process again
sudo mount /dev/sda2 /mnt
sudo mkdir -p /mnt/boot
sudo mount /dev/sda1 /mnt/boot
sudo mkdir -p /mnt/home # (Optional, but good practice to mount your home too)
sudo mount /dev/sda3 /mnt/home # (Optional)
- Chroot back into your new system:
arch-chroot /mnt
- Regenerate the GRUB configuration file.
grub-mkconfig -o /boot/grub/grub.cfg
- exit and reboot
exit
sudo umount -R /mnt # Optional, but good for a clean unmount
reboot
Immediately remove your USB drive as soon as the screen goes black during the reboot process.
now it ask for archlinux login
Login
- You need to set up when usb pluged in… :( lets plug usb and set it
Reboot your computer into the Arch Linux live USB.
-
If you’re at the login prompt, you can try to trigger a reboot by pressing Ctrl+Alt+Del. If that doesn’t work, perform a hard shutdown (hold the power button).
-
Power on, and press F12 (or your computer’s specific boot menu key) repeatedly to select your Arch Linux USB drive from the one-time boot menu.
Once in the live environment (root@archiso ~# prompt), mount your partitions and chroot back in
sudo mount /dev/sda2 /mnt
sudo mkdir -p /mnt/boot
sudo mount /dev/sda1 /mnt/boot
sudo mkdir -p /mnt/home
sudo mount /dev/sda3 /mnt/home
arch-chroot /mnt
Reset the root password:
passwd
Exit chroot and reboot
exit
sudo umount -R /mnt
reboot